Pages

Wednesday, February 27, 2013

Winter Mexican Corn Soup with Fried Cheese


This crazy California Winter weather has me all confused. One day it's cold and raining, then even hailing...frost covered mornings and wind blowing a gale. Then the next day, it's sunny and 80 degrees for three days. Completely bi-polar weather...Last week was perfect soup making weather because it was chilly and breezy. So I made this soup last week while my kids where home sick from school with the flu. Unfortunately, I also caught the kid's flu and it took me out. I was down for the count for three days and I was not able to get this posted as planned. Now, I'm feeling much better with no fever in sight and the weather here in Southern California is warm again too. I missed my cold weather window to post this Winter soup recipe. Anyway, we must charge forward and post.
I found this Winter Mexican Corn Soup recipe on Pinterest. Maybe it was the 'name' of the soup but I wanted to make this one soup before Spring. This is a wonderfully delicious corn soup and not a chowder as it would appear.


The added cream in this recipe is kept thin rather than thickened as you would expect in a chowder. It's a lovely mix of winter veggies: potatoes, sweet potatoes, carrots, onions with summery chilies and sweet corn. It absolutely delicious. The recipe itself is pretty mild but if you want to spice it up a bit I would add some Jalapeno or cayenne pepper along with the Pasilla (Poblano) peppers. In fact, I added a sprinkle of Cayenne Pepper to add a little kick.  :)
I also made some Queso Frito, or Fried Cheese to complement this soup. I don't know if you've ever had fried Cotija cheese before, but let me tell you...it is utterly amazing! Salty, buttery and cheesy but it's not soft. This is no Mozzarella cheese let me tell you. It's a firm, chewy cheese when pan fried. It crusts over easily but doesn't melt into a gooey mess as with other cheeses. It browns evenly and holds form. My husband's family introduced me to fried Cotija cheese and it's one of my favorites. It's simply delicious! Enjoy!


Winter Mexican Corn Soup (From Versesfrommykitchen.com)
Serves 4-6
 
  • 1 small sweet potato, peeled and cut into 1″ cubes
  • 1 small potato, peeled and cut into 1″ cubes
  • 1 garlic head, halved horizontally
  • 1 onion, chopped
  • 1 carrot, thick dice
  • 3 tbsp. olive oil
  • 2 cups corn, about 4 cobs
  • pinch of turmeric (I added Coriander since I couldn't find my tumeric)
  • 1/2 tsp. ancho chile powder (I substituted coarsely ground ancho chiles) 
  • 1/2 poblano, seeded and finely diced (I used a whole pepper)
  • coarse salt & pepper (I added Cayenne Pepper too)
  • 6 cups chicken stock
  • 1 cup water
  • 1 cup cream
  • 1 lime, juiced
  • 2 green onions, thinly sliced
  • small handful of cilantro, torn

Preheat broiler. Place sweet potato, potato, onion, garlic, carrot on a parchment-lined baking tray. Drizzle with 2 tbsp. of olive oil and give it a quick toss, making sure to spread out the mixture across the sheet. Broil 5 minutes, toss and broil for a further 5 minutes. Remove from oven and when garlic is cool, squeeze the garlic out. Discard the skin.
Heat the remaining oil in a large pot over medium heat. When oil is hot toss in the corn, sweet potato, potato, onion, garlic, turmeric, poblano and ancho powder and stir. Allow the flavours to mix for 2 minutes, stirring frequently, and then add in the stock and cup of water. Bring the mixture to a boil then reduce and simmer for 30 minutes. Season the soup and remove it from the heat. Add in the cream and lime juice and whisk to incorporate.
 
Ladle into bowls and top with the green onions and cilantro leaves.

Fried Cheese (Queso Frito)
  • Cotija Cheese, sliced about 1/2" thick into 8 pieces
  • Canola Oil, for frying ~1 Tbsp.
Add Cotija Cheese pieces to a non-stick skillet coated with canola oil. Fry on medium heat turning cheese frequently until it is evenly golden.(~5 minutes.) Remove from heat and cool on paper towels. 

Serve with Winter Mexican Corn Soup and crusty bread or just eat them while the soup cooks! That's what I did. Enjoy! :)

Friday, February 22, 2013

Crostini with Roasted Peppers, Goat Cheese, Lemon, Honey and Mint


Do you want to taste the most delicious crostini appetizer ever? According to me and my husband of course...I made these for my husband for our belated Valentine's date night the Saturday after Valentine's Day. The kids had a sleep over at their aunt's and my husband and I got to have some much needed down time. Normally, I would have jumped at the chance to go out to dinner and have something delicious, served to me with a glass of good wine. However, I just really wanted to stay in and cook and sit in a quiet house to recharge. It was wonderful, the silence was priceless and the food and company was great! 

I threw these together with what I had on hand. I had a frozen baguette in the freezer which I thought would be great to make some crostini. I roasted bell peppers earlier in the month and wanted to use them as well. My mom gave me a half dozen Meyer Lemons from her tree the day before and I wanted to include them somehow. I had a small container of crumbled goat cheese in the fridge and of course I had honey on hand. The only ingredient I didn't have was mint. I looked through my fridge and contemplated using basil or thyme since I had those on hand. But, I knew I wanted to have mint paired with the lemon and honey in this appetizer. I don't use mint much in my cooking so I had to run out and pick some up. I had all the ingredients I wanted and here's how I put it all together...Hope you enjoy them.


Crostini with Roasted Peppers, Goat Cheese, Lemon, Honey and Mint
  • 1 french baguette, sliced
  • crumbled goat cheese
  • 2 roasted peppers
  • zest of whole Meyer lemon
  • 1/4 cup extra virgin olive oil
  • 2 Tbsp honey
  • 1 tsp mint, finely chopped
  • sea salt

Preheat oven to 350 degrees.

Zest whole Meyer lemon and set aside.

Infuse the oil
Pour olive oil in a small bowl and add about half the Meyer Lemon zest. Let the zest infuse the olive oil. (You can do this a day ahead to really infuse the oil but it is not required, next time I make these I'll infuse the oil overnight to really punch up the lemon flavor)

Marinate the peppers
Slice roasted peppers into 1/4 inch strips and place in another small bowl. (I used a mix of orange, red and yellow peppers) Add remaining lemon zest and finely chopped mint to the peppers. Add about 2 Tbsp of honey and sprinkle with sea salt. Mix and set aside.

Toast baguettes
Arrange baguettes on a parchment paper lined cookie sheet and brush each side of baguette slices with the Meyer lemon infused olive oil. Put in oven and bake for about 10 minutes. Then turn slices over and cook an additional 10 minutes until toasted. Remove and let cool.

Assembly
Sprinkle about 1/2 tsp crumbled goat cheese on each crostini and then top with two strips of the marinated peppers. Spoon remaining marinade from the bowl onto each crostini and make sure each one has some of the mint. Then drizzle additional honey on the top of each crostini.  Enjoy!

I served these super yummy Crostini with some Spicy Fried Chickpeas and crackers with Red Pepper Jelly, all paired with a very festive Valentine-y sparkling wine called Je T'aime.   "Cheers to Love and Life!"

Wednesday, February 20, 2013

Oven Roasted Peppers


I bought two pounds of red, orange and yellow peppers for a dollar! Yes, one buck! I was so excited, I felt like I'd robbed the store. Do you know how expensive these colorful little guys are when you buy them individually? Well... there I was feeling like I got the deal of the century, and after two weeks of putting them in salads, making salsas, and adding them to sauces and stir frys, I still had a pound and a half left. Hmmm, not such a great deal if you don't use them. I wasn't sure I'd be able to force them on my family in another dish and was pretty certain that I'd end up throwing them away once they got all mushy in my vegetable crisper.  Yeah, news flash, at some point the crisper doesn't crisp any longer...sigh. Then it came to me...'why don't I roast and freeze them?'. They're so much better roasted anyway, right?
 
I thought roasting peppers was some complicated process, it had to be, because buying them at the grocery store is super expensive. Who knew it's one of the easiest things to do.  As I soon found out there's more than one way to skin a pepper. I read through various cookbooks and websites; some roast the peppers whole covered with olive oil others roast them on a grill or right on the stovetop burners and then cut up and seed the peppers afterward. All basically the same way, just in different order. I used the 'how to' from Allrecipes.com to roast my peppers.  I found it to be the most straight forward and I preferred doing all the preparation of the peppers before roasting them. So here we go...

Oven Roasted Peppers
1. Set oven to Broil on High.
2. Wash peppers.
3. Cut around the top of peppers with a knife. Kind of like a pumpkin, this allows you to pull out the stem along with the seeds together. Rinse. (see below...beautiful, they look like a flower.)

 
 4. Slice each pepper in half.
 5. Remove ribs and cut off the end portion of each pepper.
 6. Set aside end pieces to be used for salads, soups, sandwiches, etc.
 7. Use palm of hand or fingers to flatten peppers.
8. Arrange peppers, skin-side up on a parchment paper lined cookie sheet. Some 'how to's' call for coating the peppers with a little bit of olive oil, but there's no need to add oil or anything, they'll roast up beautifully just as is with no added fat.
 
 9. Broil on high for about 10-15 minutes, checking and rotating pan to ensure even roasting. Skins will start to turn black and you can add more time until you get the desired results. This took me about 15 minutes to get this amount of char. Remove from oven and cool completely. About 15 minutes.
 10. Once cooled, the charred skins will be easy to peel. Most of them come off as one large sheet.
 11. There now you have your beautifully roasted bell peppers. Ready to use or to freeze for later use.
 12. I opted to freeze mine to use later. Label your freezer bag and date it, ensure you have most air out of the bag and pop it into the freezer. Done.

And it's just that simple...Keep a look out for my next blog where I used these roasted peppers in my Crostini with Roasted Peppers, Goat cheese and Honey Appetizer. It's super delicious.

Monday, February 18, 2013

Roasted Potatoes with Bacon and Parmesan


So far, 2013 has left me with barely two weeks of health. I literally have caught every sniffle, cough or respiratory infection that happened to float my direction. I'm so tired of being sick and not having my normal energy level that I decided to treat myself to the ultimate comfort food, potatoes! Not just any potatoes, but potatoes with bacon, garlic and Parmesan cheese. Yum! I could have made something up myself, but instead I went to the professionals at Epicurious and picked their Roasted Potatoes with Bacon, Cheese and Parsley recipe. Here's the link: http://www.epicurious.com/recipes/food/views/Roasted-Potatoes-with-Bacon-Cheese-and-Parsley-240561 .

Not only were these potatoes like a warm blanket easing my head-cold weary soul, they were also the perfect food to put my new cast iron skillet to the test.
If you missed my blog about seasoning cast iron, it only took two weeks and seven rounds of seasoning to get my pan ready...and now the moment of truth has arrived for my new cast iron skillet, let's get cooking. (I imagine horns sounding..da-ta-ta-da!) Enjoy!!


Roasted Potatoes with Bacon, Cheese and Parsley (Slightly adapted from epicurious.com)
  • 3 pounds baby Yukon Gold and Red potatoes, quartered 
  • 4 slices bacon, cooked and crumbled
  • 2 tablespoons butter, unsalted
  • 1/2 cup Parmesan cheese, grated 
  • 2 garlic cloves, finely chopped
  • 1/4 cup chopped flat-leaf parsley

  • Preheat oven to 425°F with rack in lowest position.

    Wash and quarter baby potatoes and cover potatoes with cold water in a 4-quart pot and add 1 tablespoon salt.


    Bring to a boil, simmer until potatoes are just tender when pierced with a small sharp knife, about 12 minutes. Drain. Cool potatoes to warm.

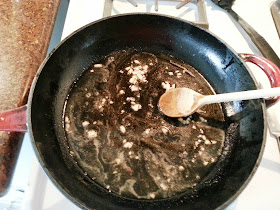
    Cook bacon in a 12-inch heavy skillet over medium heat, stirring, until cooked through but still flexible. Drain on paper towels, reserving fat in skillet. (See my new skillet handling that bacon like a champ...no sticking! Yay!)
     

    Add garlic to skillet with reserved bacon fat and saute for about two minutes.
     
     
    Add potatoes and sprinkle with 1/2 teaspoon salt and 1/4 teaspoon pepper and arrange, cut sides down, in cast iron skillet.
     
     
    Bake until undersides are golden brown, 30 to 40 minutes.
    Reduce oven temperature to 375°F. Turn potatoes over, then sprinkle with cheese, bacon, and garlic.  Bake until cheese is melted, about 15 minutes. Sprinkle with parsley.


    Saturday, February 16, 2013

    Seasoning Cast Iron


    A few weeks ago I found this beautiful enameled cast iron skillet on sale for thirty dollars, marked down from $90. I was so excited because I'd never had a cast iron skillet before and never cooked in one either. I was giddy thinking of all the possibilities: skillet corn bread, bacon, roasted potatoes, steaks...wow, what else can I cook in it? What are the rules? How do I clean it..Oh wait, before I can clean it, how do I season this pan to get it ready for use?

    I went on a mission to educate myself on cast iron. First order of business, How to season this pan? The Internet was filled with all kinds of information on seasoning cast iron and after reading a few sites, they basically end up contradicting the next, each saying their way was best. Basically, you can use any type of oil to season your pan. Finally, I came across Sheryl Canter's website. She used a science-based approach to season cast iron where she considered the chemistry of oils and recommends using Flax Seed Oil for seasoning cast iron. She goes into her reasoning and the chemistry on her page. Now, this is a website I can sink my scientific teeth into. Many lifetimes ago I graduated from UCLA with a Biochemistry degree, so this type of information really spoke to my inner-nerd and sealed my decision to use Sheryl Canter's technique to season my cast iron skillet.

    Her web page has tons of useful information and make sure to read the comments section, I read through all the comments and there was some really great information there too. Here is the link to her website. 
    http://sherylcanter.com/wordpress/2010/01/a-science-based-technique-for-seasoning-cast-iron/

    Seasoning Cast Iron
    Here's a much simplified Chemistry lesson...In a nutshell, seasoning cast iron involves coating the pan with oil and heating the pan to very high temperatures (450-500+ degrees) in order to polymerize the fat. When fats/oils are super heated, a part of the fat molecule is cleaved off which creates a highly reactive molecule with an unpaired electron (free radical). The liberation of the free radical allows the fat molecules to change orientation and cross link (polymerize) with each other. The polymerization changes the properties of the oil from a clear, light yellow liquid into an extremely hard, slick, black substance. As we all have experienced when cleaning our ovens or BBQ grills, overheated or polymerized fat is no easy clean up job. That stuff is cemented on there. Not good for ovens but great for cast iron and that's the barrier we want, hard, slick and tough to remove. According to Sheryl Canter, Flax Oil will give you the hardest, slickest surface.

    I picked up this bottle from The Vitamin Shoppe for about $11.
    It's found in the refrigerated section because this oil goes rancid quickly. (Please do not confuse Flax Oil with Linseed Oil, Flax Oil is edible and available in Health food stores and Linseed Oil is not edible and found in Hardware stores. Both are derived from Flax Seeds.)

    Now we are ready to season cast iron with Flax Oil.

    Step 1: Make sure your pan is completely dry by placing the pan in a 200 degree oven for 10-15 minutes. Allow to cool enough to touch and proceed to Step 2.


    Step 2: Add 1-2 Tbsp of Flax Seed Oil to pan. Rub in with hands to ensure complete coverage of cast iron surfaces.


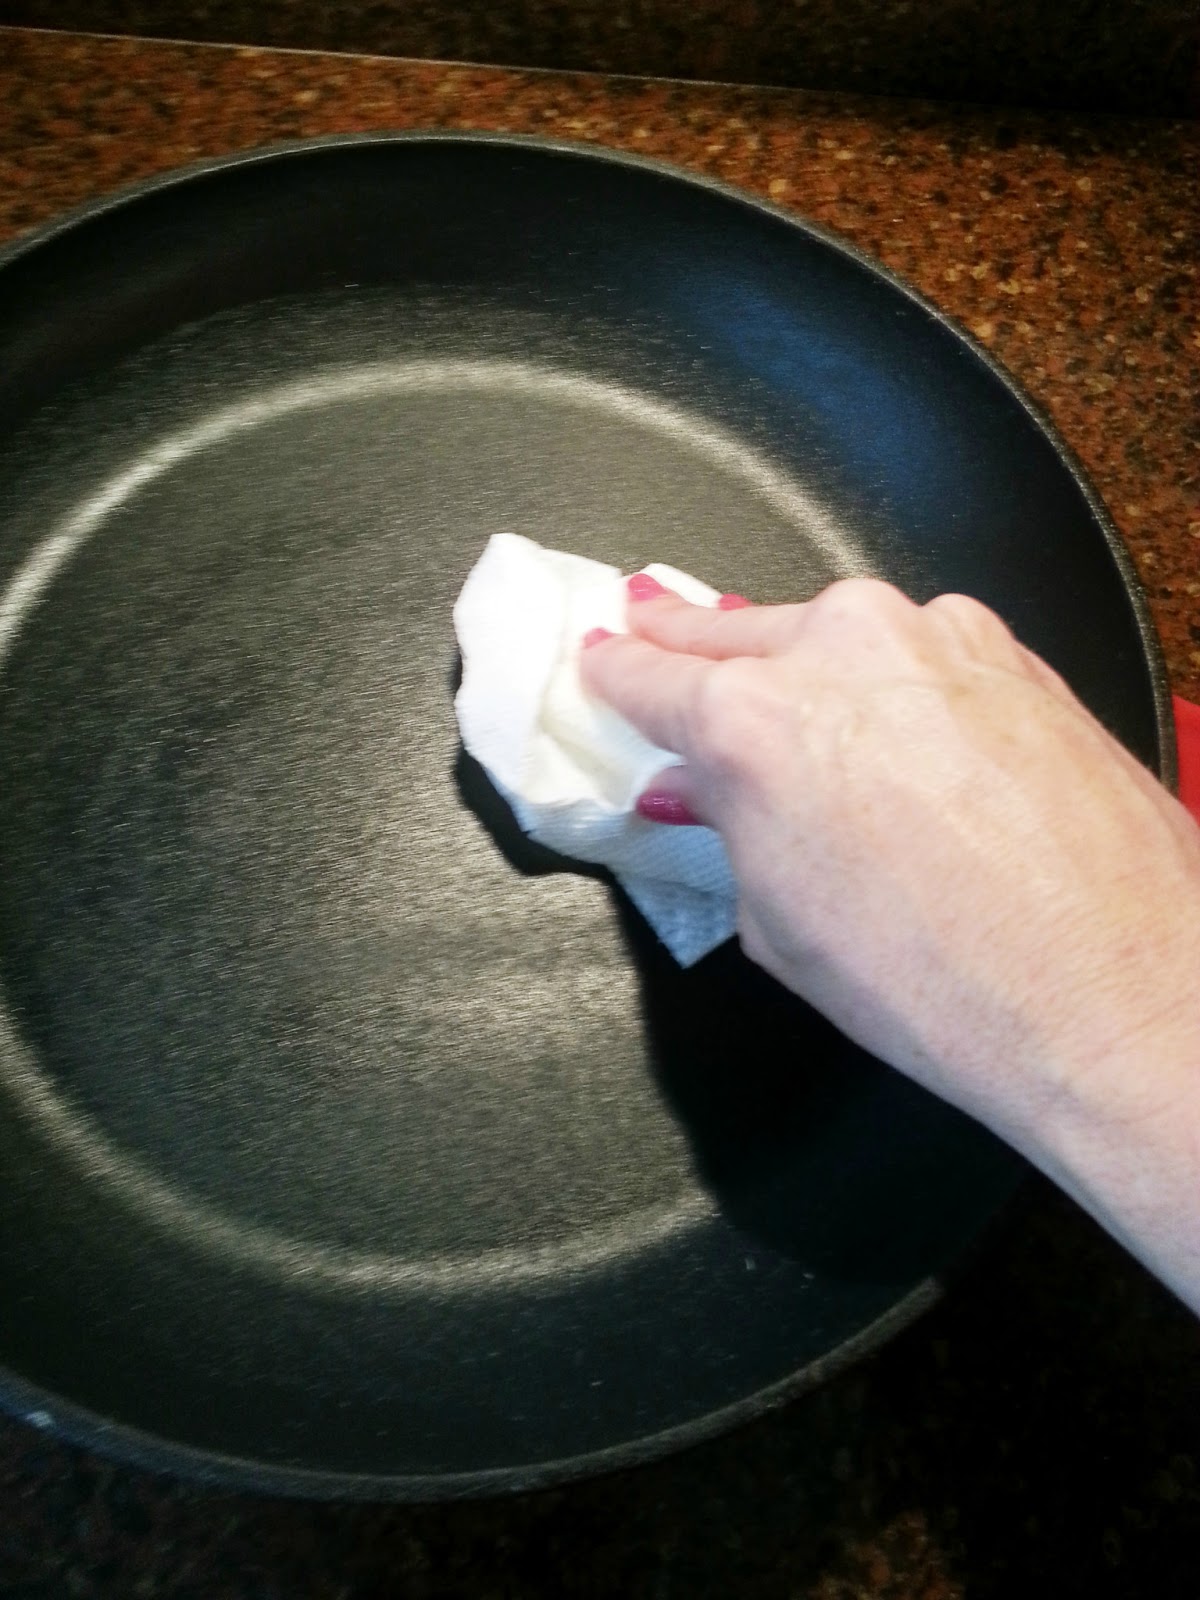
    Step  3: Wipe off all excess oil with a paper towel until it's dry looking with no slick oily surface. The pan is still coated with a thin layer of flax oil but you don't want any excess oil to cause drips.
     

    Step 4: Place pan upside down in a cold oven and turn temperature as high as your oven will go. I set mine to 520 degrees. My oven goes to 550 degrees but my smoke detectors go off at that range so I adjusted down. Allow oven to reach temperature and then heat pan for 1 hour at 520 degrees. After one hour, turn oven off and let the pan sit in oven for two hours.  Now the pan will be cool enough to touch. Remove pan and repeat steps 2-4. a minimum of 6 times. (Gasp??? What?) Yes, It took me a week and in fact I repeated this 7 times and look, my pan is absolutely stunning!


    Cleaning Cast Iron
    Next question about cast iron...How to clean it? I'd heard from numerous folks to never use soap, only hot water to clean a seasoned cast iron pan. That just didn't sound right to me because to cook with this baby, you have to use oil even with seasoning, this pan is not a Teflon pan so food will stick if you don't add oil. I imagined cooking bacon in it and not cleaning it with soap... won't everything else you cook in it have that faint bacon flavor. Okay so here's the deal. The seasoning is hard and will not come off with soap. Just think of your oven splatters, those don't come off easily with soap.
    After I seasoned my pan, I cooked the most incredible roasted potatoes with bacon and Parmesan cheese in my new pan. I wanted to really test the surface and also test how to clean my new pan.
    See my roasted potatoes, beautiful huh? They were divine!


    Cleaning was a breeze. I wiped out the excess food with a paper towel. My pan's non-stick ability passed with flying colors since all that cheese and bacon came right off with no elbow grease. I added some liquid detergent to a cellulose sponge and cleaned it as I would any other pan and rinsed well with warm water. I dried it with a towel and then popped it into a 200 degree oven for 15 minutes to completely dry pan. I added about a teaspoon of olive oil and spread it all over the pan with a clean paper towel. Now the pan is clean and oiled ready for the next use. (Note: Do not use Flax Oil to coat your pan after cleaning. Flax oil is used for the seasoning process but shouldn't be used for cooking, two different things entirely) Also DO NOT soak your pan in water overnight, this will weaken the seasoning. Clean your pan right away and ensure it is completely dry by putting it in a warm oven before putting it away.


    What can't I cook in a Seasoned Cast Iron Pan?

    Seasoning protects the iron from rusting and provides some non-stick properties. The seasoning is hard and strong but it's not impervious to degradation. Certain foods will weaken the seasoning and cause it to flake off. Here are the rules:
    It is not recommended to cook anything acidic in cast iron pans. Foods with vinegar in it, which includes marinades, so be vigilant and use another pan if you have a highly marinated meat. Tomato based ingredients, lemon and wine are also not recommended.
    Also you don't want to braise anything in a seasoned cast iron pan. If you want to braise in cast iron, make sure it's a fully enameled cast iron dutch oven,not seasoned cast iron.

    And that is it! Enjoy cooking in Cast Iron! Look out for my Roasted Potatoes with Bacon and Parmesan Cheese recipe. I'll post it next!

    Tuesday, February 12, 2013

    Valentine Projects


    I know what you're thinking..."She obviously has way too much time on her hands!" Right?  Well, I have two boys under the age of 7 and they keep me hopping, but when I'm inspired I'll sacrifice sleep for the creative good. I find a bit of time here and there while cooking or after dinner but mostly, I stay up late and get up early to work on projects. Oh and I can't forget to mention, my incredibly supportive husband keeps our boys busy on weekends when he sees that I'm in my creative head space and allows some much needed, and mostly unknown, 'uninterrupted time'. Best husband ever! xo

    So I made these Valentine Tree bookmarks for my kids' teachers and teacher's aides for Valentine's Day this year. This Valentine tree design adds to my 'Tree for all Seasons' bookmarks which I blogged last month. If you're interested and want to see a 'how to' you can go to my Paint chip Bookmark Project under the Projects label.


    My 'Tree' bookmarks were originally inspired from a simple paint chip bookmark I saw on Pinterest from oldtownhome.com. But I wanted to also make the simpler version for my boy's classes for Valentines Day. So, I made a variation of the oldtownhome.com bookmarks for my second grader's class where I framed the paint chips in white card stock paper and rounded all the corners. I didn't think the boys would appreciate the pink with hearts bookmarks, so I also made blue with stars for the boys.


    As if I don't need any sleep at all...last weekend, I was surfing Pinterest and I saw these Heart-shaped Crayon Valentines. They were just too cute to ignore and they demanded to be made for my kindergartner's class. Didn't they turn out adorable?

    I got the basic 'how to' instructions via Pinterest from the blog http://grinandbakeit.com/valentines-crayon-hearts-craft. Enjoy!


    Happy Valentine's Day!

    Saturday, February 9, 2013

    Chocolate Cake Mix Cookies


    It just wouldn't be Valentine's Day without chocolate. I love chocolate...who doesn't, right? When I get a craving for chocolate, I want it right away. These cake mix cookies are a super fast and easy way to satisfy your chocolate craving and a way to show your love (via chocolate, of course) on Valentine's Day. Make them for friends, neighbors, co-workers or your honey and they will sure to be a hit. They're soft, light and super delicious.

    I first discovered these cookies in 2011, in a Taste of Home Christmas Cookie magazine. They were called Lemon Snowflakes and made with lemon cake mix. I made them for our annual Cookie Exchange that year and my husband and kids loved them. They were so disappointed that I gave them away at the exchange, that I ended up making more just for them.

    Basically, you can make these with any flavor cake mix as long as there is pudding in the mix. Think of the options: strawberry, spice cake, yellow, confetti, lemon, chocolate or any other flavor you can dream up. In fact, when I see cake mix on sale, I buy a few boxes to have on hand, just to make these cookies. I also keep a tub of Cool Whip in the freezer for the occasion.

    I hope you try these yummy cookies and have a lovely Valentine's Day!

    Chocolate Cake Mix Cookies
    (slightly adapted from Taste of Home, Lemon Snowflakes recipe)
    Makes 5 dozen

    • 1 box chocolate cake mix with pudding
    • 1- 8oz. container of whipped topping (Cool Whip)
    • 1 egg
    • powdered sugar
    Preheat oven to 350 degrees.
    In a large bowl, combine cake mix, egg and whipped topping until blended. Batter will be very sticky. Using a small cookie scoop, drop small scoopfuls into powdered sugar; roll to coat with sugar and place on a parchment paper lined cookie sheet. Bake at 350 degrees for 10-12 minutes, or until tops are cracked. Cool on wire racks and eat.


    Thursday, February 7, 2013

    Cinnamon Rolls with Cream Cheese Glaze


    I saw a picture of some cute heart-shaped cinnamon rolls on the blog juststopscreaming.com via Pinterest and I thought how cute it would be to make some for Valentine's Day.  My kids love to help cook especially when it's something sweet, so I had my kids help me with these. We were feeling very festive so I pulled out some of my heart-shaped bowls to use during preparation. My boys had a great time helping but were not happy about the rising time needed between steps. It was a torturous exercise of patience for my two boys. Needless to say, 3 hours or so later... they were elated to finally get to eat their cinnamon rolls when I pulled them from the oven.


    I'll admit, the heart-shaped dough after baking, looked more like happy faces than hearts but they're still a cute idea. In fact, I think I'll make these again for Halloween and make them Jack-o-lanterns by adding orange food-coloring to the icing and adding a little pumpkin pie spice to the filling! (Hmmm...what a cute and festive idea for Fall...definitely adding this to my Fall recipes list.)
    Anyway, I searched for a good cinnamon roll recipe and found this one from Epicurious.com: http://www.epicurious.com/recipes/food/views/Cinnamon-Rolls-with-Cream-Cheese-Glaze-241631. Hope you have a great Valentine's Day! Enjoy!


    Cinnamon Rolls with Cream Cheese Glaze
    (recipe from Epicurious.com)
    Makes 12

    Dough:
    • 1 cup whole milk
    • 3 tablespoons unsalted butter
    • 3 1/2 cups (or more) unbleached all purpose flour, divided
    • 1/2 cup sugar
    • 1 large egg
    • 2 1/4 teaspoons rapid-rise yeast (from 2 envelopes yeast)
    • 1 teaspoon salt
    • Nonstick vegetable oil spray
    Filling:
    • 3/4 cup (packed) golden brown sugar
    • 2 tablespoons ground cinnamon
    • 1/4 cup (1/2 stick) unsalted butter, room temperature
    Glaze:
    • 4 ounces cream cheese, room temperature
    • 1 cup powdered sugar
    • 1/4 cup (1/2 stick) unsalted butter, room temperature
    • 1/2 teaspoon vanilla extract
    For dough:

    1. Combine milk and butter in glass measuring cup. Microwave on high until butter melts and mixture is just warmed to 120°F to 130°F, 30 to 45 seconds.

    Note: It's important to heat the milk mixture to the designated temperatures because if it's too cold the yeast won't activate and if it's too high it may kill the yeast. In both instances the dough will not rise enough or at all. Also after heating the milk mixture in a microwave, first stir your mixture to ensure an even temperature throughout and then use an instant-read thermometer to check your temp.


    2. Pour into bowl of stand mixer fitted with paddle attachment. Add 1 cup flour, sugar, egg, yeast, and salt. Beat on low speed 3 minutes, stopping occasionally to scrape down sides of bowl. Add 2 1/2 cups flour. Beat on low until flour is absorbed and dough is sticky, scraping down sides of bowl. If dough is very sticky, add more flour by tablespoonfuls until dough begins to form ball and pulls away from sides of bowl.

    3. Turn dough out onto lightly floured work surface. Knead until smooth and elastic, adding more flour if sticky, about 8 minutes. Form into ball.
     
    4. Lightly oil large bowl with nonstick spray. Transfer dough to bowl, turning to coat. Cover bowl with plastic wrap, then kitchen towel. Let dough rise in warm draft-free area until doubled in volume, about 2 hours.

    I love taking pictures of yeast dough because I like to see the transformation of the dough before and after rising. It's just cool to see...


    For filling:
    1. Mix brown sugar and cinnamon in medium bowl.


    2. Punch down dough. Transfer to floured work surface. Roll out to 15x11-inch rectangle. Spread butter over dough, leaving 1/2-inch border. Sprinkle cinnamon sugar evenly over butter.


    My kiddos helped with sprinkling of the cinnamon sugar...Which explains why there was so much of it on these rolls. My youngest didn't want to stop  sprinkling and used the entire bowl, patting it down with his hands like he was building a sandcastle. He was so cute. (Here's some pics of my two boys helping, First one of my 7 yr old and the second picture is my 5 yr old.)


    To make the heart-shaped rolls:
    1. Start at one long side and roll dough about half way and then roll the other side half way meeting the other rolled side.

    2. Pinch ends and trim off the end piece.
    3. Cut dough crosswise with a sharp knife into 12 equal slices (each about 1" inch wide).
     
    4. Spray a 9x12 glass baking dish with nonstick spray. Place rolls on baking dish, arranging cut side up (there will be almost no space between rolls).
     
    5. Cover baking dish with plastic wrap, then a kitchen towel. Let dough rise in warm draft-free area until almost doubled in volume, 40 to 45 minutes.

    6. Position rack in center of oven and preheat to 375°F. Bake rolls until tops are golden, about 20 minutes. Remove from oven and invert immediately onto rack. Cool 10 minutes. Turn rolls right side up.


    For glaze:
    Combine cream cheese, powdered sugar, butter, and vanilla in medium bowl. Using electric mixer, beat until smooth. Spread glaze on rolls. Serve warm or at room temperature.
    Note: I substituted the cream cheese with 2 Tbsp of Greek yogurt since I didn't have any cream cheese and it was just delicious.