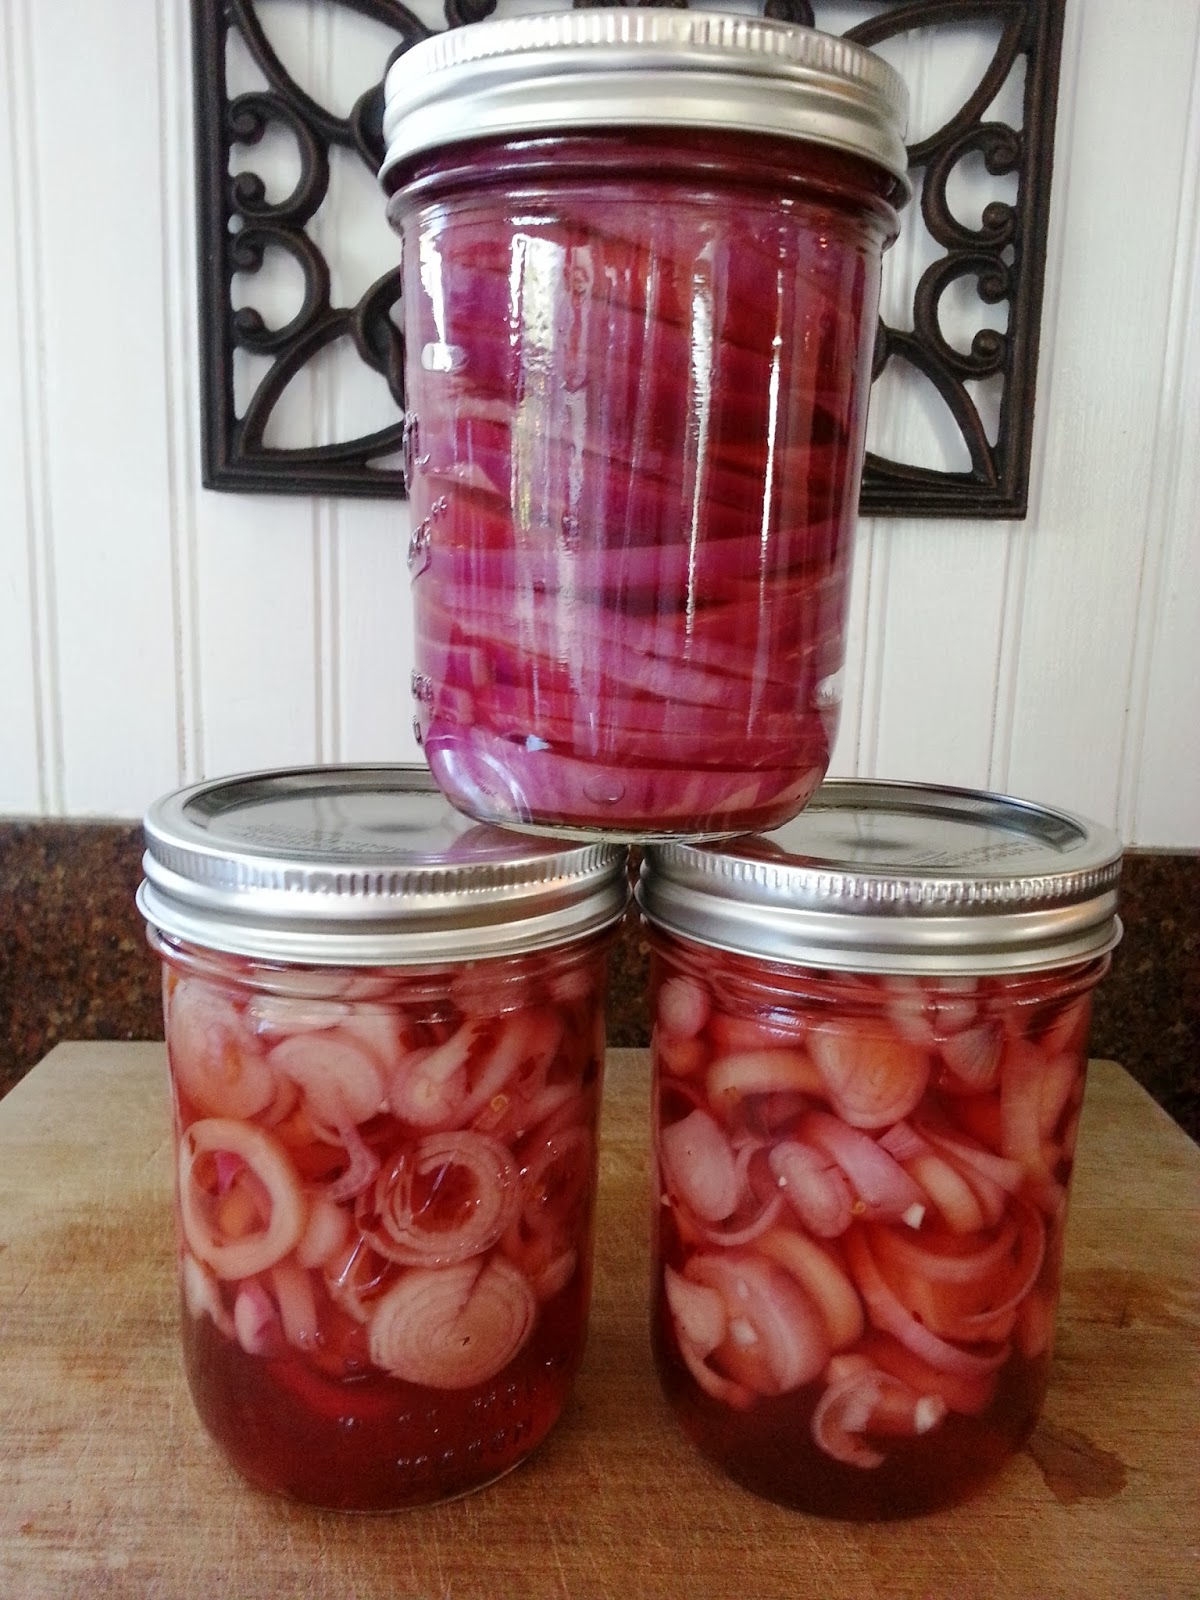
Pickled onions? Eew! Or at least that's what my kids say. They're still too young to appreciate pickled vegetables outside of cucumbers. That's okay though because that means there's more for me and my husband.
I was inspired to make some pickled onions after I had the most amazing slider in the history of hamburgers a few weeks ago. I ordered some Pan Seared Chicken Sliders from a local food truck called Belly BombZ where one of the key ingredients on this slider was pickled onions along with a few other yummy ingredients! I'm craving them now as I type. They were so incredibly delicious that I had to try to make a copycat version of them at home. In my homemade attempt to recreate these delicious sliders, I first had to make some pickled onions. I remembered seeing this easy recipe for Pickled Shallots on Pinterest from one of my favorite blogs, The Cutting Edge of Ordinary. I made some with red onions rather than shallots since that's what I had on hand, and recently made the shallots too.
Instead of a big fancy dinner for New Years Eve, this year I'm making a copycat version of Belly BombZ's Chicken Sliders. I'll blog my copycat version of the Chicken Sliders recipe on New Years Day but here's the first step, pickling onions. Enjoy!
Pickled Onions (recipe from The Cutting Edge of Ordinary)
(makes 1-16 oz jar)
1 1/2 cup red onions, sliced (~2 medium red onions)
3/4 cup water
3/4 cup red wine vinegar
1/3 cup sugar
2 T kosher salt (I used canning salt)
1/4 t red pepper flakes

Sterilize canning jars, lids and rings and set aside. Slice onions and place into canning jars. Stack the rings in layers like this.
Add water, vinegar, sugar, salt and red pepper flakes to a medium saucepan and bring to a boil. Boil for about 5 minutes and then pour hot pickling liquid into the onion filled jars and fill to the top. Place lids and rings over filled jars and hand tighten. Let cool to room temperature and store in the refrigerator. Let them pickle in the fridge for 2-3 days and Enjoy!
Note: These are not canned, only quick pickled so these must be stored in the fridge.
These are great on hamburgers, sandwiches and salads or a great addition to an appetizer cheese plate. Enjoy!
Other pickling recipes to try:
Quick Pickled Jalapenos and Radishes
Dill Pickles
Looking for another onion recipe to try, these are delicious.Parmesan Creamed Onions
Happy New Year!
I apologize for the belated Christmas post. I was laid up with the stomach flu for the last few days and was unable to post this in time. I think this Christmas season came way too quick due to Thanksgiving coming so late in November this year. I'm not complaining, just an observation as I'm usually more prepared for Christmas. This year and maybe it was because I was carrying the stomach flu bug a few days before Christmas, I was struggling with exhaustion and just not feeling like myself. My kids woke up early Christmas morning, 6 am early, and we were up watching them open presents from Santa. All was good for a while, I even ate a delicious Tortilla, Chorizo and Egg Bake I prepared the night before for breakfast...and then it hit me! And that's the moment I regretted eating breakfast. The rest as they say is history, I was down hard for two days. I'm hoping to actually eat a meal today now that my fever is broken and my body aches have subsided this morning. :)
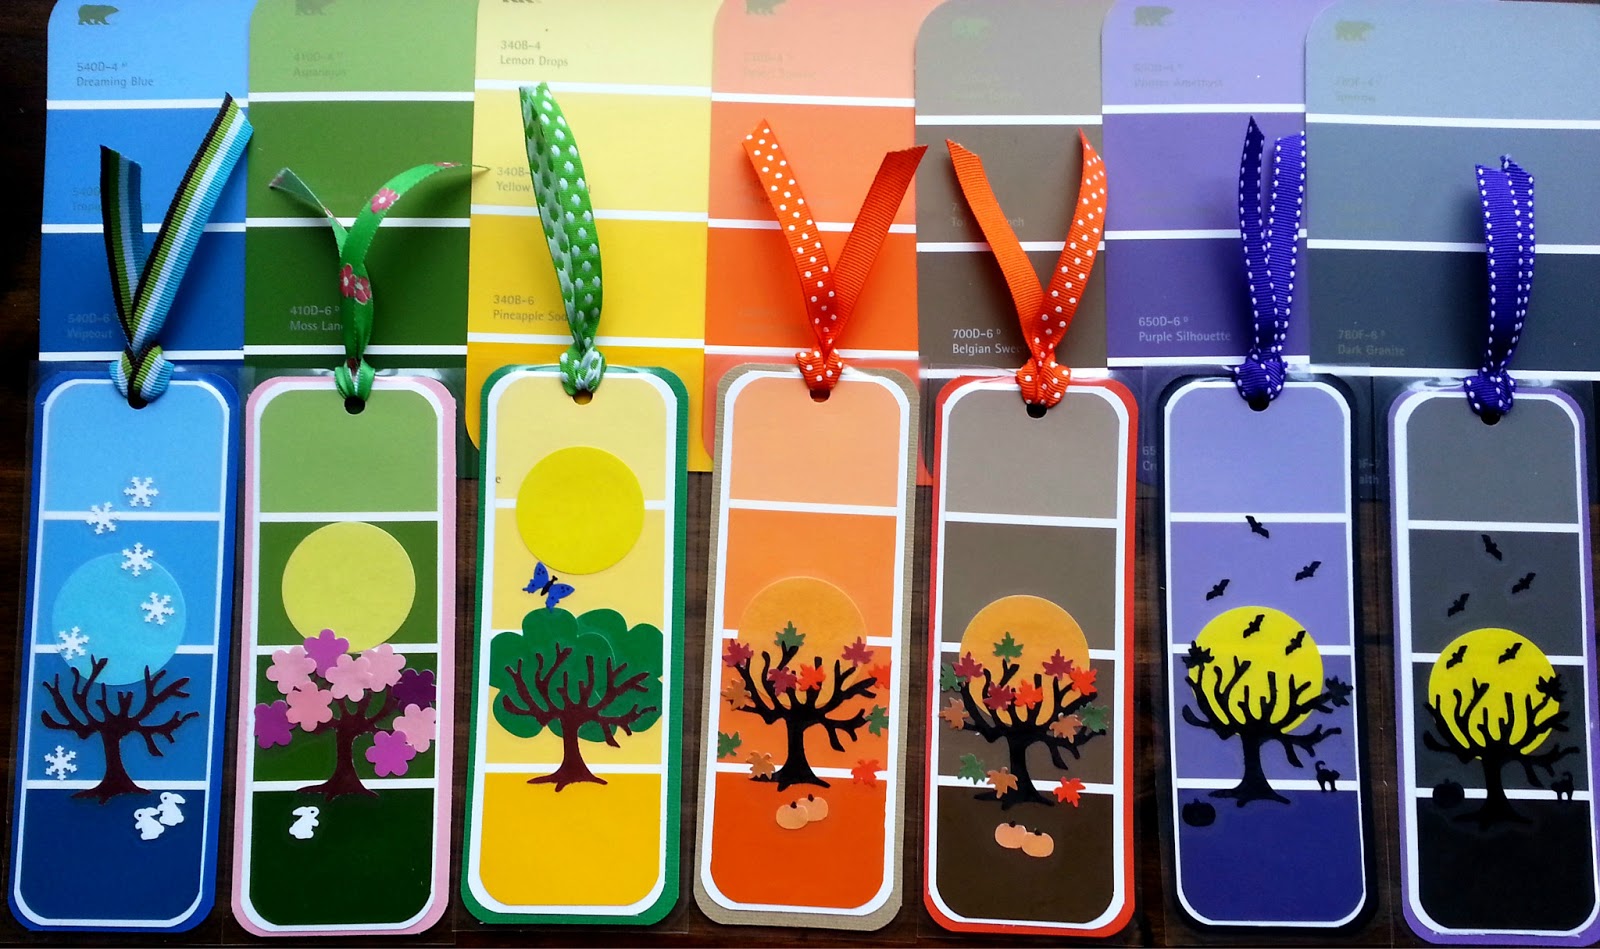 With all that behind me and Christmas too, belatedly, I come to you with a cute, easy craft to do with your kids, even if you now have to wait until next Christmas to use them. I used some paper punches on mine but you could use buttons, markers, stickers and ribbons. There are a ton of versions of these on Pinterest, but these are ones I did that are similar to my Paintchip Bookmarks from earlier this year. I made these with the thought that you could use them first as gift tags on presents and then use them as bookmarks or as Christmas ornaments. Happy New Year!
Supplies needed:
green, white, brown and yellow paint chips
white card stock
various paper punches
glue sticks
paper cutter
hole punch
ribbon
Instructions:
1. Mark the center of paint chip. Cut evenly, aligning the bottom corner of paint chip with the center mark.
2. Cut small trunk using a brown paint chip and glue to the back of the Christmas tree. Glue tree and trunk to a white piece of card stock. Trim card stock.
 3. Embellish with paper punches. I used snowflake, star, heart and apple punches with these but you can use what ever you have.
4. Punch top of tree with hole punch and add ribbon.
3. Embellish with paper punches. I used snowflake, star, heart and apple punches with these but you can use what ever you have.
4. Punch top of tree with hole punch and add ribbon.
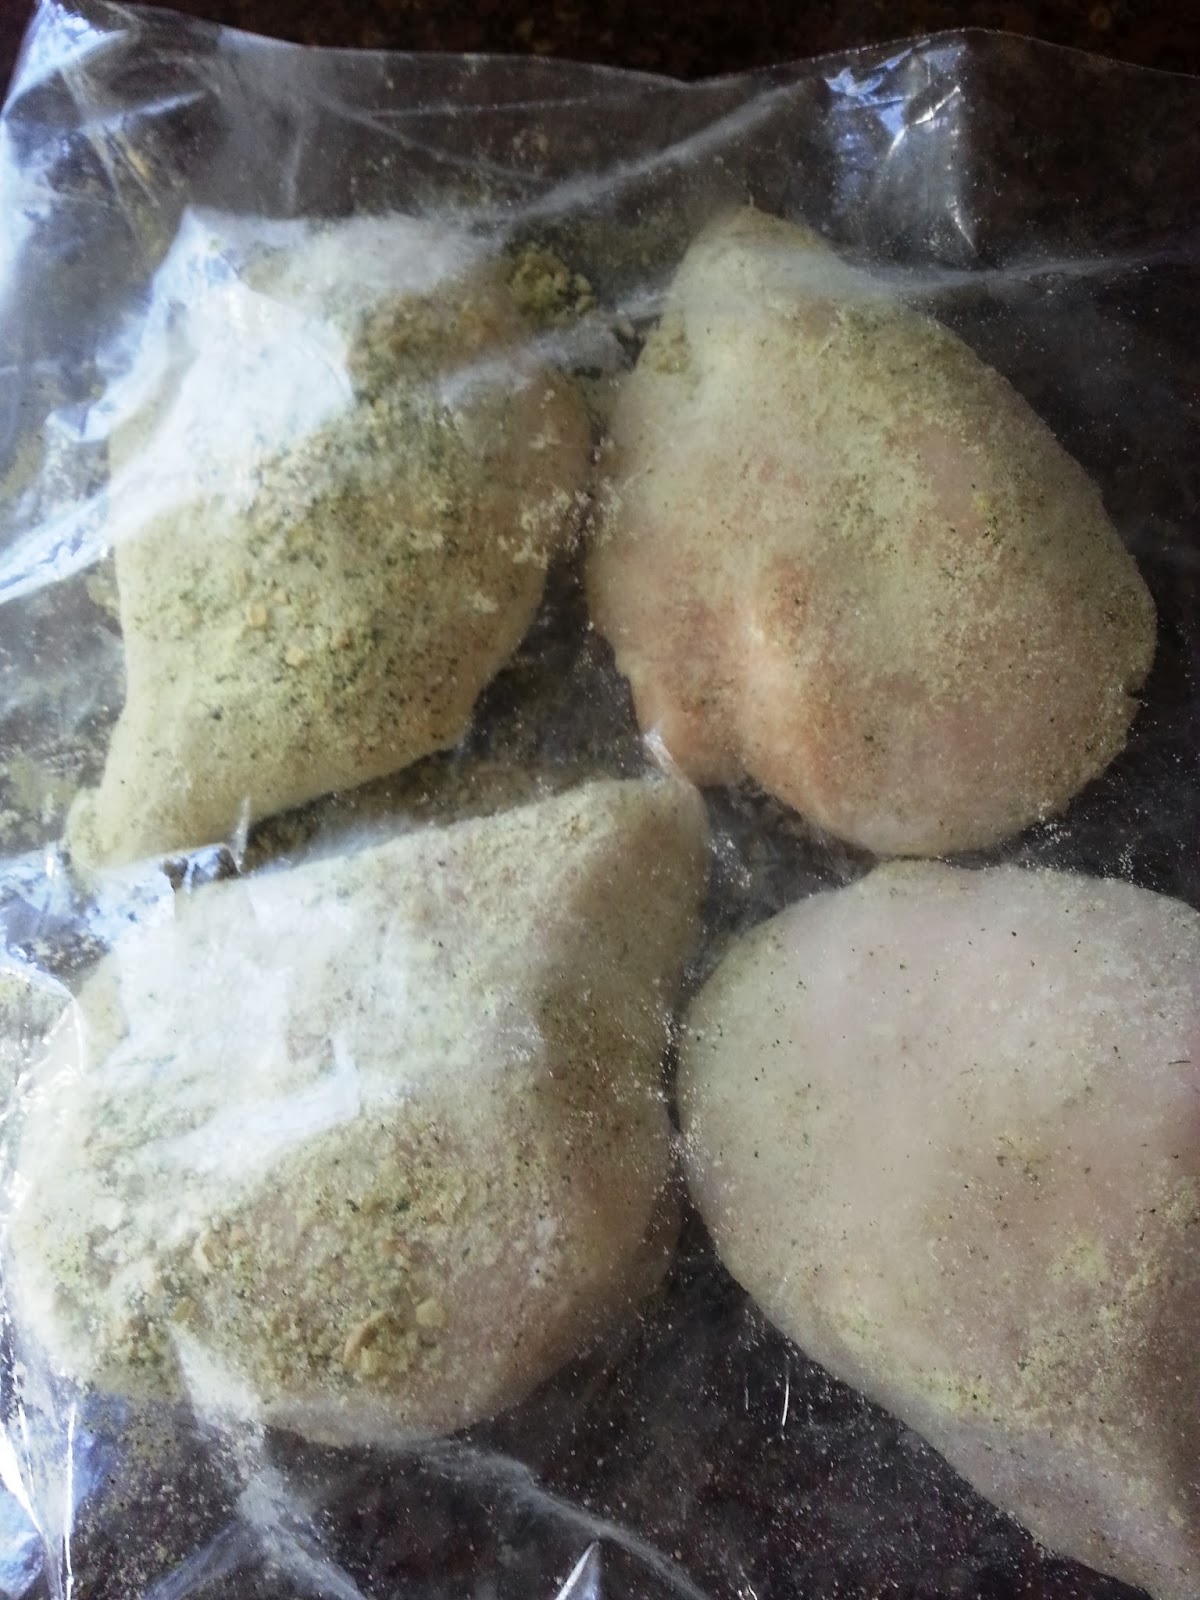
Like most of my dishes, this dish came about by accident. On three separate occasions, I had gone to the store to buy some Ranch Dressing mix, the dry mix in an envelope that you add mayo and milk to make fresh Ranch Dressing. On each of these occasions, I got home and realized that I'd mistakenly picked up Ranch 'Dip' mix and not the 'Dressing' mix. Most would say, so what? Right? Well, for those of you who have made this mistake and tried to then make Ranch Dressing with the Dip mix, knows that the two cannot be used interchangeably. The Dip mix is way too salty to make into a dressing. It's completely inedible as a dressing. Trust me! :) So what do I do with all these boxes of Ranch Dip mix? Well, I added them to my Crockpot Pot Roast, delicious! And sprinkled them on Roasted Potatoes. delicious! So there I was looking at my many boxes of Ranch Dip and some frozen chicken breasts and decided to experiment and this is the recipe that resulted. Give it a try, it's an easy one pan dish that's so simple and amazingly delicious!
Easy Ranch Chicken
Serves 4
4 chicken breasts
1 T olive oil or butter
1 envelope of Hidden Valley Ranch 'Dip' mix*
1/2 cup yellow onion, diced
1-2 cups mushrooms, sliced
1 pound Brussels sprouts, halved or quartered
1/2 cup of ice cubes
pepper, to taste
*I've
made this dish with other brands of Ranch Dip mix, but Hidden Valley
gives the best flavor. If you use other brands, you may have to use
more than one envelope to get more flavor.
 Sprinkle about 3/4 of the envelope of Ranch Dip over chicken breasts. (I usually add the dip mix to a Ziplock bag along with some frozen chicken breasts and allow the chicken to thaw with the ranch dip mix as a kind of marinade or rub.)
When chicken is thawed, preheat oven to 425 degrees.
Heat oil in a large skillet and brown chicken breasts for about 3 minutes each side. Remove chicken breasts and set aside. The chicken will not be fully cooked, you are just browning the outsides for color and you'll then finish cooking in the oven.
In the same skillet, add the onions and mushrooms and saute for about 5 minutes. Add the browned chicken back into the skillet and add the Brussels sprouts. Note, depending on the size of your Brussels sprouts, you may have to quarter them and make sure they are uniform in size for even cooking. Sprinkle the remaining Ranch Dip over the vegetables and then add ice to skillet. The ice serves two purposes, it helps steam the Brussels sprouts so they'll be perfectly cooked and it makes a nice ranch flavored broth for the vegetables.
Sprinkle about 3/4 of the envelope of Ranch Dip over chicken breasts. (I usually add the dip mix to a Ziplock bag along with some frozen chicken breasts and allow the chicken to thaw with the ranch dip mix as a kind of marinade or rub.)
When chicken is thawed, preheat oven to 425 degrees.
Heat oil in a large skillet and brown chicken breasts for about 3 minutes each side. Remove chicken breasts and set aside. The chicken will not be fully cooked, you are just browning the outsides for color and you'll then finish cooking in the oven.
In the same skillet, add the onions and mushrooms and saute for about 5 minutes. Add the browned chicken back into the skillet and add the Brussels sprouts. Note, depending on the size of your Brussels sprouts, you may have to quarter them and make sure they are uniform in size for even cooking. Sprinkle the remaining Ranch Dip over the vegetables and then add ice to skillet. The ice serves two purposes, it helps steam the Brussels sprouts so they'll be perfectly cooked and it makes a nice ranch flavored broth for the vegetables.
Cover with aluminum foil and bake in 425 degree oven for 25 minutes. Remove foil carefully, to release the steam and serve.
(Note: I did not add any additional salt to this dish because the dip mix provides the salt, however you can pepper to taste.)
I was panicked by the end of last week, because I hadn't spent any time cooking and as a result, I had nothing to blog about. It's Christmastime and I got nothing in the pipeline, nothing waiting to be written or pictures waiting to be reviewed and cropped. I was so ready for fall, so what happened to Christmas? ...the most wonderful time of the year...*sigh*
So...last weekend was catch up time. I made one of my easy dinners on Sunday and in addition to the easy main dish, I wanted to make something sweet and festive, like cookies. I perused my Pinterest pins, but nothing really jumped out at me. Then, I remembered the Cinnamon Cheesecake Cookies, I made last year for my neighbor's annual cookie exchange. My neighbor, Lily and her daughters host a cookie exchange each year and there are three categories to win, best presentation, most creative and best tasting. Last year, I was so excited that I won 'best tasting" for these little Cinnamon Cheesecake Cookies.
The basic recipe came from from Heat Oven to 350 but I made a few changes to get to these delicious cookies. I omitted the fruit topping and added a cinnamon glaze, I also added cinnamon to the cookie dough and also added cinnamon graham crackers to the outside coating. They are so delicious, you won't believe all that yumminess comes from such a simple looking cookie. If you like cheesecake and sugar cookies and Snicker doodles, you'll love these soft, decadent cookies with a little bit of icing. Merry Christmas!
Cinnamon Cheesecake Cookies
makes ~5 dozen
3 1/2 cups all-purpose flour
2 t baking powder
1 t salt
1/4 t cinnamon
2 (8-ounce) packages cream cheese, softened
2 1/2 sticks butter, softened
1 1/2 cups sugar
2 large eggs
2 t vanilla extract
1 cup cinnamon graham cracker crumbs
1 T Hershey's Cinnamon Chips
1 1/2 T milk
1 cup powdered sugar
Preheat oven to 350 degrees.
Combine the flour, baking powder, salt, and cinnamon in a bowl.
In
another bowl with an electric mixer, beat cream cheese, butter and sugar
until smooth and creamy, about 2 minutes.
Add eggs and vanilla and mix
until incorporated.
Reduce speed to low and add the flour mixture and mix
until just combined. Refrigerate dough until firm, at least 30 minutes.
Place one package of cinnamon graham crackers in a Ziplock bag and use a rolling pin to roll along the bag, crushing the crackers until they are uniform in size. Pour crumbs into a shallow dish.
Prepare two baking sheets with
parchment paper.
Using a small cookie scoop, drop 1-inch rounds of the dough into the graham cracker crumbs and then roll the
balls until covered with graham cracker crumbs. Place balls 2 inches apart on prepared
baking sheets. Using the back of the spoon, slightly flatten the balls to ensure even cooking. Bake until golden
brown around the edges, 12 to 14 minutes. Cool for five minutes on the
sheet and then transfer to a wire rack to cool completely.

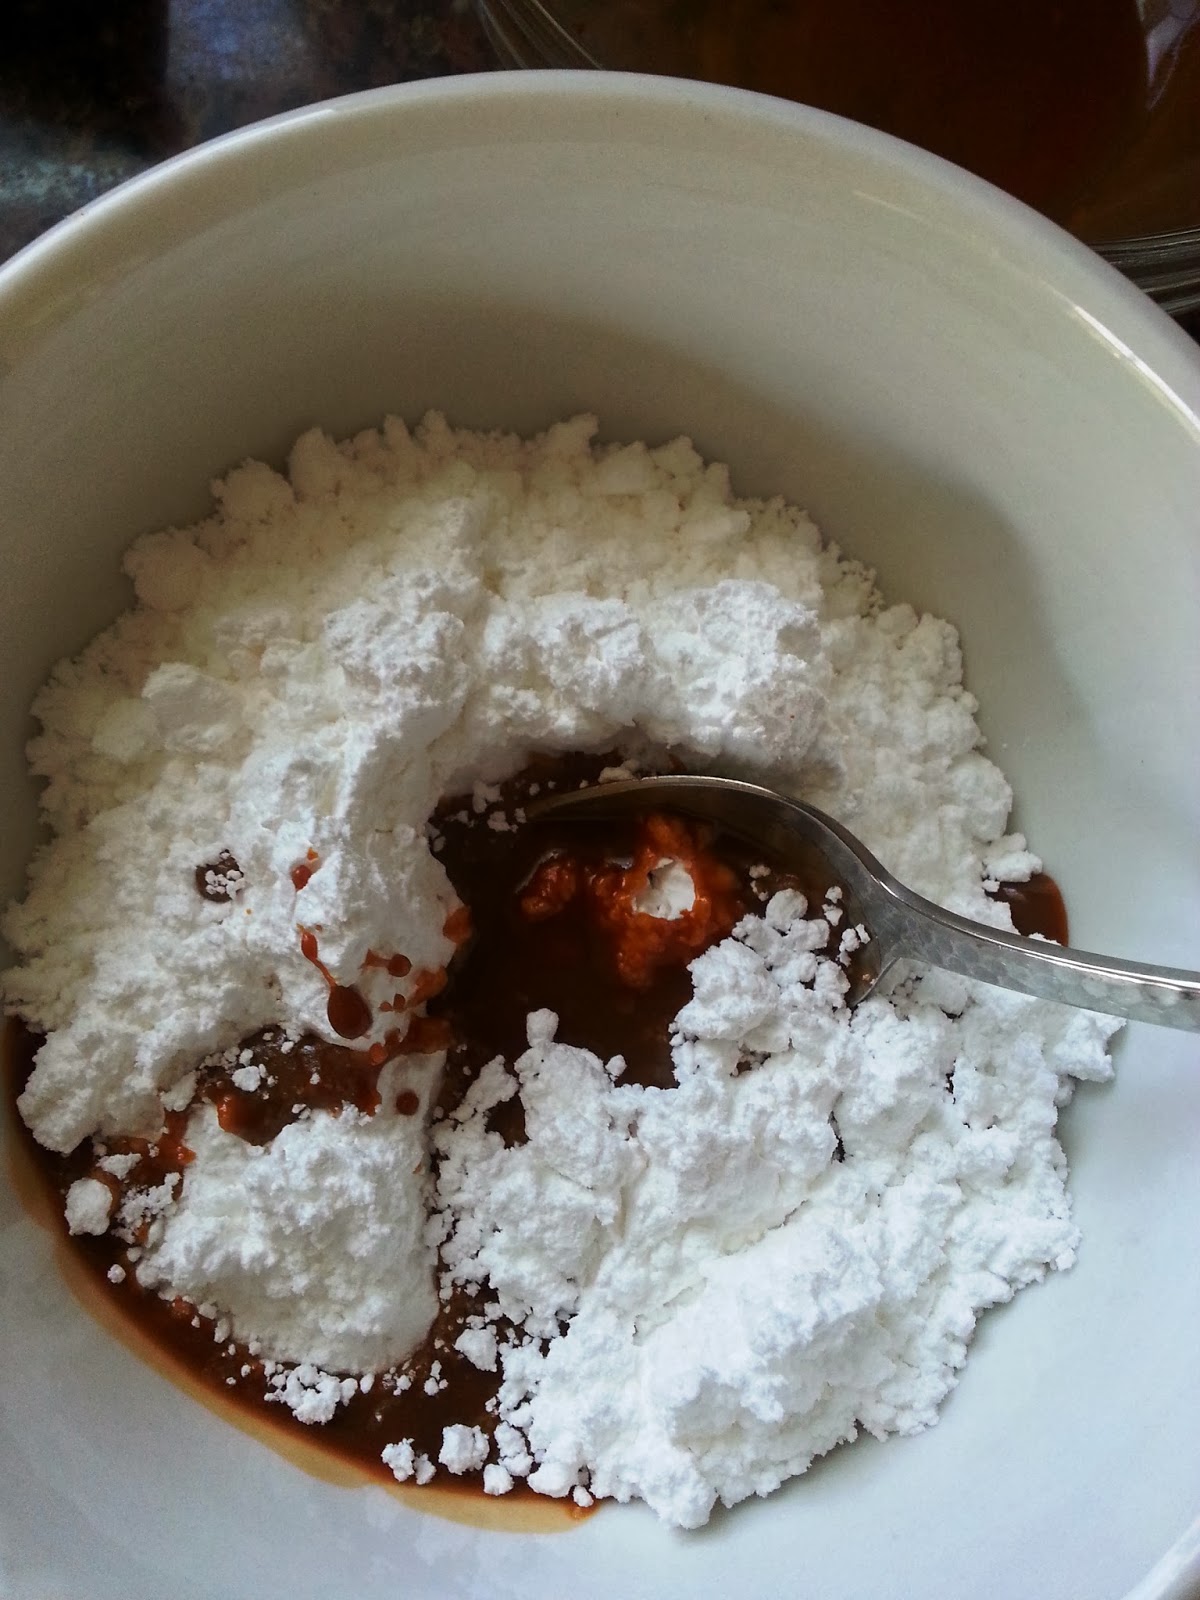
While cookies are cooling, prepare the icing. Placing the tablespoon of cinnamon chips and the 1 1/2 tablespoon of milk in a small microwavable bowl. Heat the milk and chips for 30 seconds. Remove from microwave and let sit for 1 minute and stir to melt the chips. Return to the microwave and repeat until chips are completely melted and smooth.
Once melted, add the cinnamon chip and milk mixture to the cup of powdered sugar and mix until smooth. The mixture will not be runny. It will be the consistency of thick caramel. Add a 1/4 teaspoon of more milk if needed, but take care not to add too much milk. You don't want a runny icing that will melt and soak in to the cookie.
Once the icing is prepared, use a spoon to drizzle icing in long strokes onto the cookies. Let icing set and then store cookies in an air tight container.
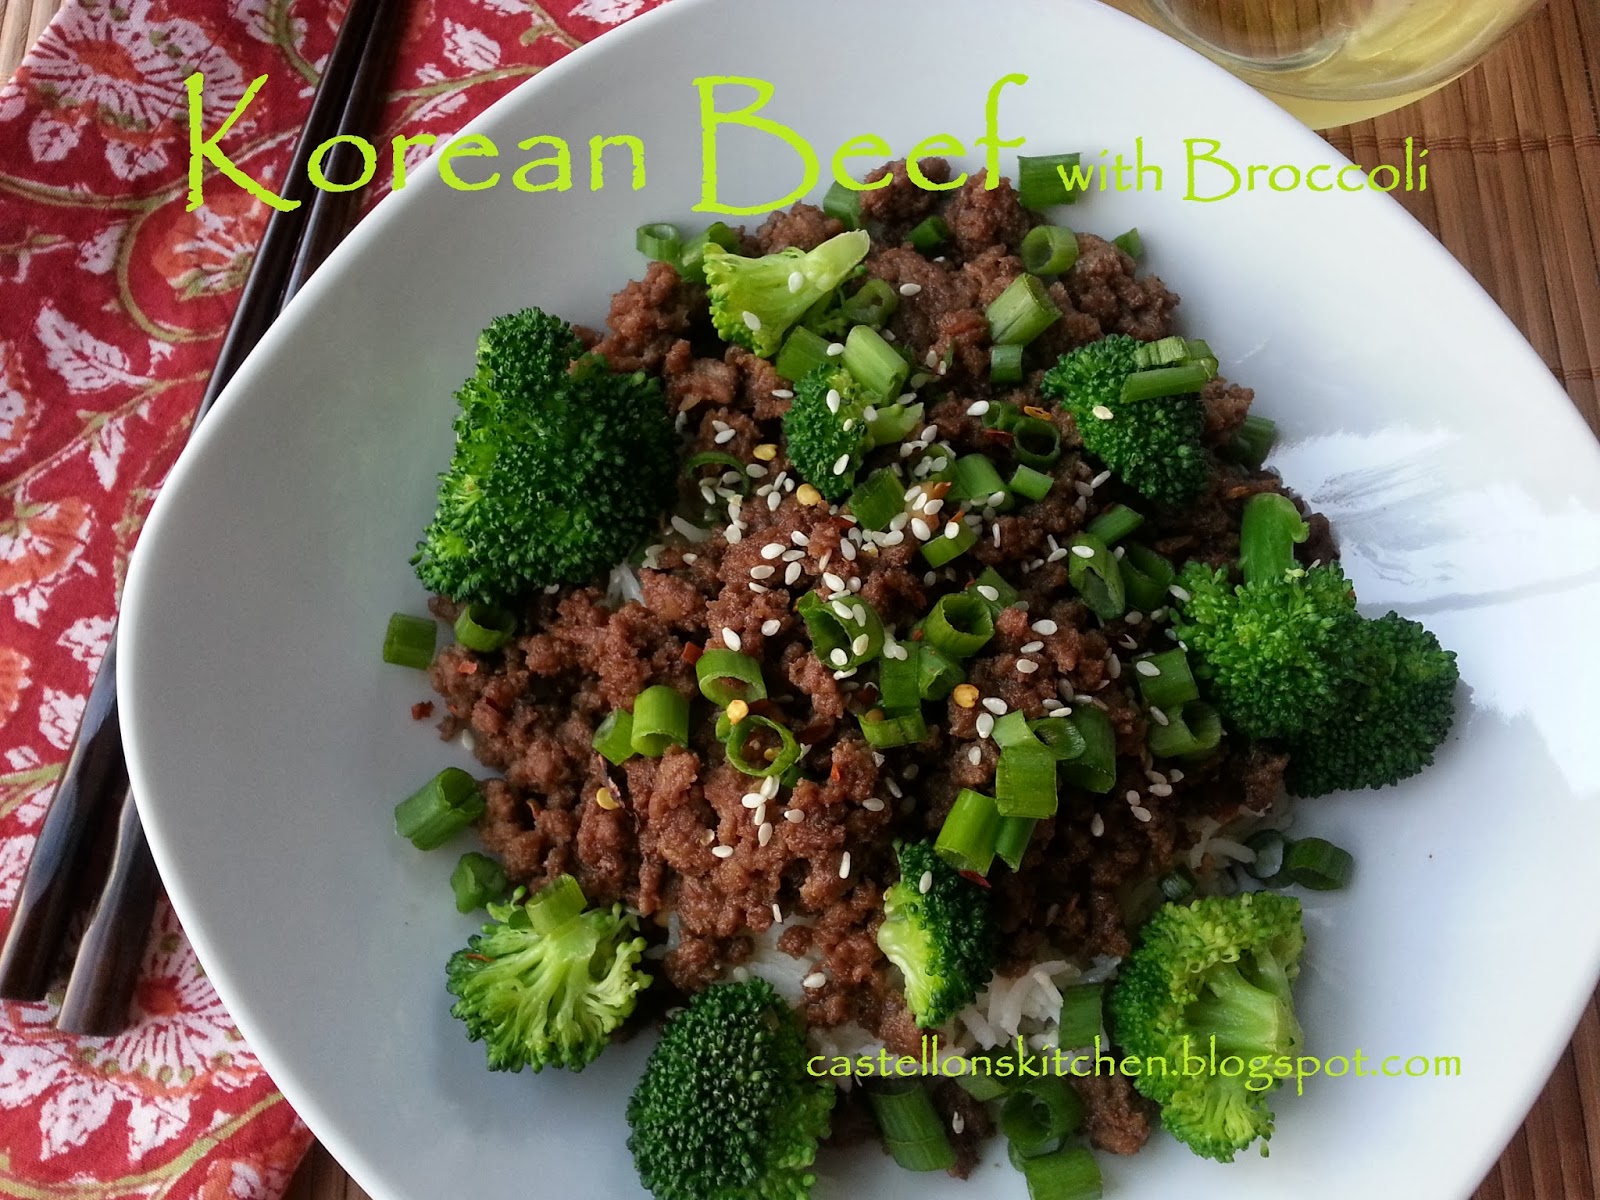
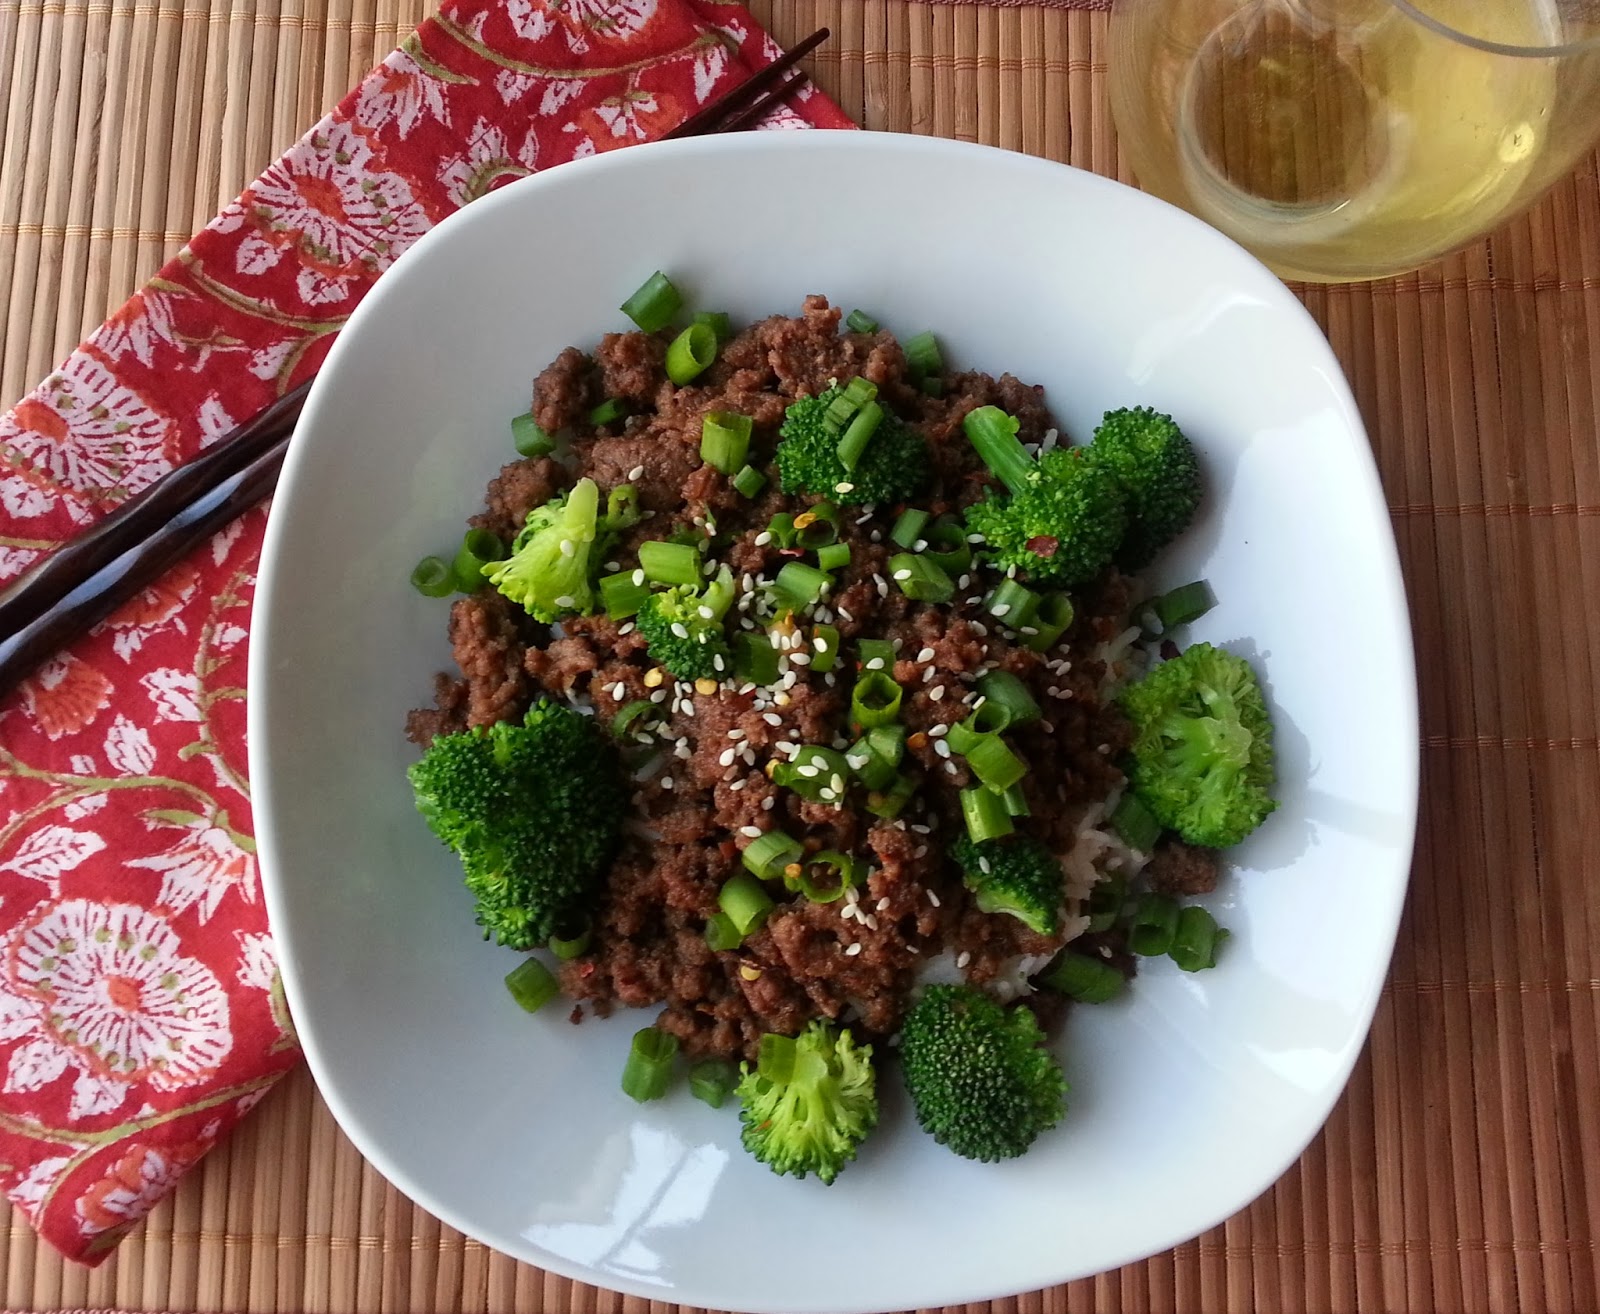
Ground beef is a staple in my house, from meatloaf, to spaghetti, to tacos, and meatballs. It's convenient, fairly inexpensive and basically my kids eat whatever I make when I cook with ground beef and this Korean Beef is no exception. I was a bit unsure whether my kids would like this dish because of all the garlic and Asian flavors, but my worries were unfounded as they gobbled up this deliciously sweetened ground beef and even asked for seconds. The best part, second only to the incredible flavor, is that this dish literally can come together in less than 30 minutes. I made this on Monday night and it took me 25 minutes. The rice takes the most time. It's a super easy, weeknight meal, which is perfect during the holidays when time seems to be at a premium. The last thing you want to do is spend a lot of time in the kitchen or if you are on a tight budget like me, spend more money on takeout. Enjoy!
Korean Beef with Broccoli (slightly adapted recipe from Lizzy Writes)
Serves 5-6
2 lbs ground beef
1/2 cup brown sugar, packed
1/2 cup soy sauce, low sodium
2 T sesame oil
6 cloves garlic, minced
1 t ginger, minced
1-2 t red pepper flakes (omit for kid friendly version)
pepper to taste
1 bunch green onions chopped
sesame seeds for garnish
Steamed broccoli
Steamed rice
Brown ground beef with garlic and drain fat. Add sesame oil, brown sugar, soy sauce, ginger, red pepper flakes (if desired) and pepper and let simmer to blend flavors ~10 minutes. I usually omit adding the red pepper flakes at this step so the kiddos will eat it. But I add the red pepper flakes afterward to my individual serving to my desired spiciness. It's really good when its spicy and sweet!!
Serve on top of rice, add broccoli and green onions. Garnish with sesame seeds and red pepper flakes if desired.
Not everyone likes biscotti. It's usually hard and dry and not that sweet and I have to admit that I'm not a huge fan of biscotti myself. But this recipe for Gingerbread Biscotti has just the right amount of sweetness and it's not as hard as most biscotti. The best part, is that it tastes like gingerbread! I found this recipe on Pinterest and as I scrolled down through similar pins I saw a picture of some gingerbread biscotti sprinkled with these mini gingerbread men. I gasped...literally gasped they were so cute! They were perfect for these biscotti and after seeing them, they completely ruined my original plan to decorate these guys! The gingerbread men were it! I had to have these little brown gingerbread men. I searched high and low for these little buggers and finally came across them at an awesome little Baking supply Store called Calico Cake Shop in Buena Park, CA.

Talk about a goldmine for anything baking! I could have spent an entire day there, looking at all the baking supplies, sprinkles, icings, food colorings and everything you could imagine was at that store. I'm going to have to go in there more often just to get ideas on what to bake. So, if you like to bake and you are in Southern California, you need to see this store.You will LOVE it!
I think these little gingerbread sprinkles completely make these biscotti into something special and perfect for the holidays. Merry Christmas! Enjoy!
Gingerbread Biscotti
(recipe from Krissy's Creations)
1/3 cup vegetable oil
1 cup sugar
3 eggs
1/4 cup molasses
2 1/2 cup all purpose flour
1 cup whole wheat flour
1 T baking powder
1 T ground ginger
3/4 T ground cinnamon
1 t ground cloves
1/4 t ground nutmeg
1/2 t salt
6 oz. white chocolate chips
1 T shortening
Preheat oven to 375 degrees. Line baking sheet with parchment paper. Set aside.
In a medium bowl, whisk together the flours, baking powder, ginger, cinnamon, cloves and salt. Set aside.
In another bowl or stand mixer, mix together the oil, sugar, eggs and molasses. With the mixer on low, gradually add the flour mixture until fully incorporated. (Note: I added a bit more flour since my dough was extremely sticky. Add enough flour so that you can handle it fairly easily, although it will still be a bit sticky.
Remove the dough from the bowl or mixer and divide it into 2 disks. Flatten each disk until it's about 1/2 inch thick. Place the disks onto the prepared baking sheet and bake for 30 minutes.
Remove the baked dough from the oven and let cool on the pan for about 10 minutes. Once the dough is cool enough to touch, cut into 1/2 inch slices and place the slices onto the baking sheet.
Bake the biscotti until it is thoroughly toasted and lightly browned, about 7 minutes on each side. Remove from oven and let cool completely.
Place the white chocolate chips in a microwave safe bowl and heat for 30 seconds and then stir. Heat 30 seconds and stir and repeat until chocolate is completely melted. Add the shortening and stir until it has melted and combined with the chocolate.
Dip the biscotti in the chocolate and sprinkle with mini gingerbread men, Christmas sprinkles or cinnamon sugar. Place on parchment paper until chocolate is set. Enjoy!