Pages

Thursday, June 29, 2017

Grubs Au Gratin (Gnocchi in Cheese Sauce)


The other day, my husband and I looked through some pictures of my upcoming blogs and a theme emerged. We noticed that all my Halloween ideas were worms, snakes and other wiggly things. It started with Squirmy Wormy Shots, and then Decomposing Deviled Eggs which looked like worms and now, Grubs au Gratin...and I have two more upcoming that are along the same theme. Totally unintentional and I'm sure there's a Freudian interpretation in here somewhere. But hey, I didn't invite the psychoanalyst to my Halloween party. Anyway, I think worms and snakes make for some way cool Halloween inspired dishes. And like all my Halloween recipes they have to taste good! They can't look disgusting and then taste disgusting...what's the art in that?  I thought of this idea back when I was making some homemade Gnocchi for my Potato Gnocchi and Spinach Curry. While I photographed it, I thought those puffy little pillows of gnocchi looked like grubs...and that was the moment this dish was born! Grubs au Gratin. It's actually just a fancy Macaroni and Cheese but I like the sound of Grubs Au Gratin way better than, Grubs and Cheese. The cheese sauce is divine, by the way. I literally want to put it on toast and eat it for breakfast, or make grilled cheese sandwiched with it, or even drink it straight. It is that good!  A classic Bechamel Cheese Sauce with sharp cheddar, Parmesan cheese and a smidge of goat cheese. Happy Summer of Halloween everyone!


Grubs Au Gratin


Serves 4

Gnocchi
2 medium potatoes, measured 1 cup cooked
2 cups all purpose flour
1 egg
1 tsp parsley, dried
1/4 tsp black pepper
1/2 tsp salt

green food coloring

Place unpeeled potatoes into a medium saucepan and cover with water. Cook until potatoes are cooked through. About 20-30 minutes. 
Drain and let potatoes cool slightly. Peel potatoes and mash with a potato ricer. Measure out 1 cup of packed cooked potatoes and add to a medium bowl. Let cool. Add parsley, pepper and salt to the all purpose flour and mix well. Add flour mixture and egg to the potatoes and mix until incorporated. Add food coloring and mix until you get stripes of green throughout but not solid color. 


Cut dough into quarters and roll each quarter into thin ropes of dough. Cut ropes into 1/2 inch pieces and roll and twist with your fingers to mimic grubs. Set aside. Bring salted water to a boil, add a drop or two of green food coloring to the water and drop gnocchi into boiling water. Cook until gnocchi float to the top of the water and then drain and set aside with a little coat of olive oil. 


Cheese Sauce
2 T unsalted butter
2 T all purpose flour
2 cups milk
1 small onion, peeled
1 bay leaf
nutmeg(pinch)
white pepper
1 cup sharp cheddar cheese
1/2 cup Parmesan cheese
2 T goat cheese
salt and pepper (to taste)

Heat butter in a large sauce pan over low heat. Add flour to make a roux. Turn off heat. In another sauce pan, scald the milk and then gradually stir the warm milk into the roux. Whisking constantly. Bring to a boil, stirring constantly. Reduce heat to a simmer. Add bay leaf, onion, nutmeg and pepper to the sauce. Simmer for 15 to 30 minutes. Turn off heat and then add the cheeses. Stir until melted. Add additional salt and pepper if needed. Add hot cheese sauce to gnocchi and top with Parmesan cheese. Enjoy!

Other Halloween dishes to try:

Love at First Bite Linguini
Ghoulish Goat Cheese Torte
Nightcrawlers con Funghi

Wednesday, June 28, 2017

Skull and Crossbones Cookies


Each year brings new challenges and sometimes the same challenges. For me, those challenges are with melting chocolate. I do this to myself each year with my Halloween blogs...I attempt to make something with melting chocolate. Ugh! My last few attempts using this confection were very challenging to say the least. I began to score my efforts with melting chocolate after I had a little success and last time I checked in, the score was Melting Chocolate 2, Castellon's Kitchen 1. But I think I've just tied the game against melting chocolate on this one. These skull and crossbone cookies turned out super duper cute and believe it or not, they look pretty much like I envisioned in my head, which is success in my book. Usually, my ideas in my head become a compromised version of what I imagined.  

So even though I've tied the game with melting chocolate, I must admit that I went in for reinforcements and bought a melting chocolate warmer from Michael's. See? It's not cheating. It's getting a first round draft pick to assist. I was losing this fight with chocolate and I had to find a way to enjoy using these sweet little buggers. I needed help, don't judge me.😁
It's fantastic if you ask me! It melted the chocolate just perfectly and then kept it warm so it stayed easy to work with. Plus it cleaned up easily because the warming pot is silicone. After use, cool the chocolate and then break it apart and either toss it or store in a plastic bag for reuse. I think I'm going to win this battle against the Melts afterall! 

Final score:     Castellon's Kitchen- 2 (Double Yay!)             Melting Chocolate- 2


Skull and Crossbones Cookies

Makes 2 dozen

2 bags white melting chocolate
24 Snack Factory® Pretzel Crisps®
48 Pretzel sticks
96 mini marshallows
2 T vegetable shortening (as needed)

Melt chocolate according to package directions. adding 1-2 T of vegetable shortening to thin out melting chocolate, if needed.

Use a fork to lower a pretzel crisp into chocolate to coat and tap fork against the side of the bowl to remove excess chocolate. Place chocolate covered pretzel on a parchment paper covered cookie sheet. Repeat with all pretzels. 


Stick mini marshmallows on each end of the stick pretzels and then coat with chocolate. Place the second crossbone over the first one while the chocolate is still wet so that it will set as an "X" just under the skull. 

Smear some chocolate on parchment paper and when it's almost set, use a sharp knife to cut 'teeth" for the skulls. 

Let set and then break up the teeth and place teeth onto skull pretzel using the tip of the knife or tweezers. Avoid using your fingers as the chocolate will melt. If you don't want to go to the extra work of placing the teeth, use the tines of a fork to make an impression in the chocolate when almost set. Place cookies in the refrigerator for 10-20 minutes to completely cool the chocolate and then Enjoy! 

Happy Halloween!


Other Halloween desserts to try:


Zombie Pretzel Cookies
Black Magic Spell Cakes
Black Velvet Creme Cakes

Tuesday, June 20, 2017

Decomposed Deviled Eggs


Halloween in the summer? Yes, it's that time again for me. I've already began working on my Halloween recipes along with a few summery dishes. You'll see a spattering of both from me this summer. But here's my first appetizer of the season...Decomposed Deviled Eggs.  I realize these deviled eggs look a bit menacing, but like all my Halloween dishes, they look the part but taste amazing. These are a Halloween version of my Sriracha Deviled Eggs.  Equally as important, these deviled eggs are super easy to make. I love deviled eggs but I really hate having to peel all those hard boiled eggs. Here's a technique my mom told me about where you prepare deviled eggs by cooking all the whites in the oven and the yolks on the stove top. I was skeptical about how the yolks would turn out, but holy moley, these were super easy to make and tasted great with great texture.  You can't tell that the yolks were not hard boiled.
Enjoy! 


Decomposed Deviled Eggs 

Makes 24

12 eggs, yolks and whites separated
olive oil or cooking spray
red and purple food coloring
1/4 cup mayonnaise
1/4 cup sriracha sauce
black sesame seeds


Preheat oven to 350 degrees. 

Separate the whites and yolks into two bowls. 

Separate about 2-3 T of egg whites into another small bowl. Add enough red and purple food coloring to the small amount of egg whites until you get it to look like blood. A deep dark red.
 
Spray an 8"x8" pan generously with cooking spray or olive oil. Cut to fit a piece of parchment paper and line the bottom of the pan with parchment. Take extra care to remove all creases and bubbles from the parchment. See my picture below...I learned the hard way and didn't get all these creases out and some of the egg whites seeped below the parchment and stuck to the bottom of the pan and made my egg whites uneven. So make sure you get all the creases out. Once you get the air bubbles out, spray the top of the parchment with more cooking spray. 

Pour egg whites into prepare pan. Using a fork, drizzle some of the red dyed egg whites into the pan. You do not have to add all of the red egg whites. Less is more in this instance because as the dye sits, it will spread to the rest of the eggs whites to give a mottled appearance. The first time I made these, I was heavy handed with the red whites and got a deeply colored egg white with very little white showing, like this. Still looks creepy as far as Halloween dishes go, but I wanted the whites to be more recognizable in the photos. Here they look like chunks of meat, don't you think?


Once you add the red whites to the egg whites, cover with foil and bake for 20 minutes. Don't let the egg whites sit too long before cooking or the red food coloring will start to spread. If you use less than 12 eggs, you will have to adjust your time. Start checking after 10 minutes.  Remove from oven and let cool. Refrigerate for an hour or more until completely chilled. You can make these ahead of time and then cut and assemble right before party time.  

In a large non-stick skillet, add yolks over medium heat and using a rubber spatula, stir yolks until they are cooked through, about 4-5 minutes. Cool and then refrigerate until chilled. Once chilled, add cooked yolks into a food processor. Add mayonnaise and sriracha and blend until smooth. Add food coloring until the desired color is achieved. I was going for a wormy reddish-brown color. Put prepared yolks into a piping bag and refrigerate until ready to assemble.

Get the cooked and cooled egg whites from refrigerator and use a sharp knife to cut around the pan and turn out egg whites onto a cutting board. Cut into 24 even slices. Place slices on a serving platter and pipe sriracha yolk mixture and top with black sesame seeds. Enjoy! Happy "Summer" Halloween!


Other Halloween recipes to try:
Spider Caviar
Spiderweb Eggs
Bloody Eyeball Bruschetta

Sunday, June 18, 2017

Squirmy Wormy Shots

Summer vacation is here and that could only mean one thing in my house...Halloween! If you've followed my blog, you will know that summer is when I create and blog all my Halloween food ideas, decorating ideas and props. After Fourth of July, 'RETAIL FALL' begins. Oh happy Day! I'm able to shop for Halloween items! It's the most wonderful time of the year, if you ask me! So lets get the summer started with a Halloween drink recipe.
These jello worms are all over Pinterest as a fun Halloween food for kids. Super Squirmy, Wormy, Icky, and FUN! Perfect for Halloween. I decided to make a grown up version by making these festive Jello Shots. I made them with Peach Vodka but you can make them with your favorite spirit and your favorite flavor of jello. I added coconut milk with green food coloring to create a deep red with a milky appearance. I had some separation of the cream when the jello set but I think it adds a really cool effect with the bright red or mottled ends. The flavor and color possibilities are endless. Enjoy!


Squirmy Wormy Shots

2 box sugar-free Cherry Jello
2 packets gelatin, unflavored
2 cups hot water
1 1/2 cups peach vodka(I used Ciroc)
1/2 cup coconut milk 
1/4 tsp green gel food coloring
1 box of bendable straws, rubber bands

Bring water to a boil and add jello. Stir jello until dissolved. Let cool a bit. While the jello cools, add green food coloring to coconut milk and stir until combined. Add green coconut milk to dissolved jello. Add vodka and set aside. 
Prepare straws by stretching out the bendable sections of each straw. Bunch straws with rubber bands. Put banded straws into a tall, narrow container with the bendy part down. Carefully pour the warm jello mixture into the straws. The mixture will fill up the container surrounding the straws. Fill to the top, cover with plastic wrap and then refrigerate overnight. 
Gently squeeze the container to loosen the jello from the sides. 
Peel away the extra jello. Then...Stop...Look around, make sure no one is watching, Check the time...if after 5pm, proceed to eat some of the extra jello.


There's always room for jello, right? After a few nibbles, all will be right in your world and you will be ready to host your party. Just kidding, there's still work to do to get those worms out of the straws... Working one by one, squeeze the straws to extrude the jello worms. I put them in plastic skull shot glasses I got from "The 99" but you can throw them in a bowl if you prefer. Just make sure they are away from the kiddos. These are for adults only!
Happy Halloween!

Other recipes to try:
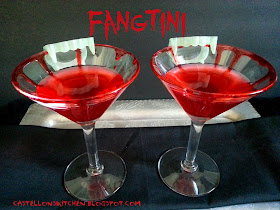
Fangtini (Blood Orange Martini)

Michelada Pops

Saturday, June 17, 2017

Strawberry Mango Summer Salad

School's out and summer begins! Every year I feel the same way. First, I feel relief. Relief from the daily grind of getting my boys up for school. NO more making rushed breakfast and lunches, running forgotten badges, lunches, violins or trumpets to school, field trips, basketball practices and games, playdates...HOMEWORK! Second, I feel hopeful. Hopeful that this summer will be a relaxing and fun time with my boys. If history is any gauge, after about a week, I'll be wishing for school to start as I listen to the daily complaints of..."I'm bored!" and the constant bickering between the two of them. I want this summer to be different. I want to take it as it comes. The good and the bad and not let their moods get to me. I don't want to feel pressure to alleviate their boredom. I want to just live in the moment and savor these days with them as I know, far too soon, they will be grown and begin directing their own lives and I'll look back at these days with longing for what used to be. For today, and every day this summer, I will be grateful that I am able to be home with them, to be involved with their lives. Grateful that I know their friends and for the amazing parents I've become friends with along the way.
To kick off my grateful summer, I made this Strawberry Mango Salad that's cool, crisp, crunchy, sweet, juicy and oh so refreshing for those hot summer days. Strawberry. Mango and Orange lend all the sweetness, with crunchy jicama and cool cucumber to add texture and interest. Top it all off with plenty of lime and orange zest and juice and lots of cilantro salt and cayenne to give it a little heat on the finish! It's summer in every bite. Not to mention, this salad is stunningly beautiful with the bright cheery colors of summer. Happy Summer everyone!

Credit: This is a copycat recipe of Teri Appleton Villanueva's delicious Strawberry Mango Jicama Salad. I had this a few weeks back when I assisted her with a cooking class. :)


Strawberry Mango Summer Salad

Serves 8-10

3-4 mangoes, peeled and diced
2 lbs. strawberries, chopped
1 small jicama, peeled and diced
3-4 large oranges, segmented and chopped
1 English cucumber, seeded and diced

Dressing
1/2 cup lime juice and zest of one lime
juice and zest of 1 orange
1/4 cup cilantro leaves, finely chopped
1/8 cup honey (to taste)
salt (to taste)
1/8 tsp. cayenne pepper (or to taste) 

Prepare all fruit and combine in a large bowl. In another small bowl, add cilantro, juices and zests, honey, salt and cayenne to taste. Add dressing to fruit and mix. Taste, add additional lime juice, salt, cayenne and honey to taste. Serve immediately. Enjoy!


Other recipes to try:

Summer Fruit Salad with Ginger and Lime
Kale Salad with Strawberry Mango Salsa
Caprese Salad with Pesto Viniagrette