Pages

Sunday, November 19, 2017

Baked Chicken with Onion Pancetta Gravy

I love to stay home. I'm not ashamed to admit it. I love being at home to piddle around my house working on a project or cooking in the kitchen. When I was younger and single it was fun to go out and meet up with friends and stay out all night. I was rarely home back then. Now it's nice to get home after a long day and just be at home and have something delicious and comforting to eat. I made this dish one weekend while trying to decide what to do with some leftover pancetta I didn't use for our Halloween party. I had three containers of pancetta to use up. I used one with some Cream of Mushroom Soup and it was absolutely delish. I plan to use one of them for Thanksgiving so I had one left to contend with. At the same time though, I got a new cast iron braiser that I was dying to break in and cook something up. Something slow and wonderful to roast, bake or braise. So I created these Baked Chicken Thighs with the most amazing Onion Pancetta Gravy. I will say, that this is one of the most delicious chicken dishes I have ever tasted. I'm not kidding. This is an amazing recipe if I do say so myself. I am super duper impressed with myself on this one. Plan to stay in tonight and give this recipe a try. I promise you won't be disappointed. Enjoy!

Baked Chicken with Onion Pancetta Gravy

Serves 6

6 boneless, skinless chicken thighs
flour salt and pepper for dredging
1 Tbsp canola oil
2 cups chicken broth
4 oz pancetta, diced
1 Tbsp butter
2 medium yellow onions, sliced
1 clove garlic, finely minced
1 tsp dried thyme
1 cup Gruyere cheese
fresh thyme leaves (garnish)

Preheat oven to 400 degrees.
Dredge Chicken thighs in flour salt and pepper and set aside. Heat oil in a large cast iron dutch oven or braiser and working in batches, brown top side of chicken thighs only and set aside on a plate. 
Deglaze pan with chicken stock removing bits and flour from bottom of dutch oven/braiser. Pour chicken broth(deglazing liquid) into another pot to reserve for a second deglazing. 
In the now empty dutch oven/braiser, brown pancetta and render fat. Spoon out cooked pancetta onto paper towels.  Add sliced onions and butter to the rendered pancetta fat and cook onions until they are nicely caramelized.
Pour reserve chicken broth into onions and deglaze the pan a second time. Add garlic, cooked pancetta, and dried thyme to the pan.  
Roll chicken thighs up like they have bones and place thighs in the pan browned side up and bake at 400 degrees for 20 minutes or until internal temperature reaches 165 degrees. Remove from oven, top with cheese and place under a broiler until cheese is melted. Garnish with fresh thyme leaves and Eat!


Other Chicken recipes to try:

Chicken with Braised Carrots
Honey Butter Chicken
Easy Ranch Chicken

Saturday, November 18, 2017

Autumn Slaw with Candied Pumpkin Seeds

Thanksgiving is all about the sides for me. From garlicky mashed potatoes and gravy, cheesy corn casseroles, savory dressings and bread puddings, to green bean casseroles. All those comforting, rib-sticking side dishes are what I look forward to the most for Thanksgiving. However, I find I still long for fresh veggies on Thanksgiving. This recipe for Autumn Slaw is a delicious way to add a little green to all that comforting, sleep inducing, tryptophan-laced Thanksgiving meal. 

Wait, wait, wait, I know what your thinking...You hate Kale. I know. Kale is a tough sell for my husband too. And my mom, and probably my brother and sister-in-law...and forget about my kids...None of them are friends with Kale. Don't be afraid, here are a few secrets to make kale taste good. 
First, if using it raw in a salad, it needs to be rubbed between your hands and massaged. Gather up a big handful of Kale and rub it back and forth and roll it into a ball and break up all that fibrous toughness. Work in batches rubbing all the leaves, wash and spin and now you're ready to rock your salad.
Next, I think it's best when paired with something sweet, like fruit. Kale can be a bit bitter, so pairing it with fruit or a sweet salad dressing helps balance some it's harsher qualities. One more secret, is to cook it. Braising, roasting or sauteing this green makes it uber delicious. Savory onions, garlic and sweet balsamic butter really makes this wild cabbage sing in my Braised Kale and Onions with Balsamic Butter recipe below.
Anyway back to my kale-hating family, namely my hubby...I had little faith that my husband would touch this salad but to my amazement, he loved this salad and even had two servings. He even ate it for leftovers the next day too. Can you believe it? I love this Autumn Slaw and my husband liked it so I'm going to attempt to bring to Thanksgiving this year and see if the rest of my family will like it too. Happy Thanksgiving everyone!

Autumn Slaw with Candied Pumpkin Seeds

Serves 8-10
Maple Mustard Dressing
1 small shallot, finely minced (~1 Tbsp)
3 Tbsp Dijon mustard 
1/4 cup real maple syrup
1/4 cup apple cider vinegar
1/2 tsp salt
1/4 tsp pepper
1/3 cup canola oil

In a medium bowl, whisk together the shallots mustard, maple syrup, apple cider vinegar, salt and pepper. Slowly add the canola oil while whisking continuously to emulsify the dressing. Set aside.

Candied Pumpkin Seeds
1 cup pumpkin seeds
1 Tbsp real maple syrup
1/4 cup brown sugar
1 Tbsp butter

In a skillet, add pumpkin seeds, maple syrup, brown sugar, and butter and heat over medium heat until sugar is melted and nuts are coated. About 5 minutes. Turn out on a parchment paper to cool. Set aside.

Salad ingredients
3 large bunches of curly kale, chopped and rubbed 
3 carrots, peeled and cut into matchsticks (I used purple carrots)
1 cup dried cranberries
1 1/2 cups finely shredded red cabbage 
1 cup candied pumpkin seeds 

The secret to using Kale is to use only the curly parts of the leaves and remove all the fibrous stems. I tear it right from the stems, rather than cutting it. Kale is best when massaged, or rubbed between your hands, like what you do when your hands get cold and you rub them together to heat them up.  Working in batches, grab a handful and rub it back and forth and roll it into a ball in your hands. Then, place the rubbed kale in a salad spinner. It seems like a weird thing to do but it really helps soften the fibrous leaves. Once you rub all the kale, rinse and spin in a salad spinner. 
I used purple carrots for this salad because I like the two toned color of them. When cut into matchsticks they look like flames. Neat-o!
Add Kale, carrots and cranberries to a bowl and coat with about half the dressing. Do not add the red cabbage at this time, you'll add the cabbage right before serving to prevent the color from bleeding and turning everything purple.  Refrigerate for at least 2 hours and up to 8 hours. This will help soften the kale further and plump up the dried cranberries just a little. The kale will shrink as the dressing wilts it a bit. Right before serving, add the red cabbage and toss, only adding additional dressing if needed. Top with lots of crunchy candied pumpkin seeds and enjoy! 

Other recipes to try:

Braised Kale and Onions with Balsamic Butter
Spiced Couscous and Carrot Salad
Brussels Sprouts Salad with Bacon Mustard Dressing

Wednesday, November 15, 2017

Pumpkin Crumb Muffins


I do most, if not all, of my baking during the holidays. I actually love to bake, but rarely do it. So as the holiday baking season begins, I can't let Thanksgiving go by with out a pumpkin spiced baked good. These Pumpkin Crumb Muffins are to die for. The muffin itself is just sweet enough. Sometimes pumpkin muffins are too sweet for this girl. This muffin is perfect because the cake itself is sweet, but not too sweet, and super moist with the most deliciously buttery, sweet, pie-spiced, streusel topping. Great as a dessert or with your morning coffee. Confession...I ate these every day for a week with my morning coffee. So good but completely not low calorie. Now I remember why I don't bake too much, I end up eating it all myself. Enjoy!


Pumpkin Crumb Muffins

Recipe from The Cafe Sucre Farine
Makes 12

1 1/2 cup all-purpose flour
1 cup sugar
1 tsp baking soda
1/2 tsp. salt
1 1/2 tsp. pumpkin pie spice
1 cup pumpkin puree
1/4 cup milk (I used cream)
1/3 cup melted butter
2 large eggs, beaten
1 tsp vanilla

Crumb topping
1 cup flour
1/2 cup packed brown sugar
2 T sugar
1 tsp. pumpkin pie spice
1/8 tsp salt
7 Tbsp melted butter

Preheat oven to 400 degrees.
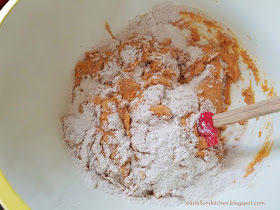
Spray muffin pan or line with cupcake liners. Combine flour, sugars, baking soda, salt and pie spice in a medium bowl and set aside. Combine pumpkin puree, cream, melted bitter, eggs and vanilla in a small bowl and mix well.  Make a well in the flour and add the pumpkin mixture and stir just until the flour disappears.


For the crumb topping, combine, flour, sugars, pie spice and salt and mix well. Add melted butter and stir with a fork until large crumbs form.

Using a large cookie scoop, scoop mixture into muffin liners or prepared muffin pan. Sprinkle generously over muffin batter.


Place muffins in your preheated 400 degree oven and then immediately turn down the temperature to 350 degrees. Bake for 20 minutes, then cover with foil and bake another 5-7 minutes or until a toothpick inserted into the center of one of the muffins comes out clean. Cool in the pan for 10 minutes, then remove to a wire rack to cool completely. Sprinkle with powdered sugar if desired.


Other recipes to try:

Cranberry Orange Buttermilk Cake
Pumpkin Pie Cupcakes
Pumpkin Spice Latte Ice Cream

Tuesday, November 14, 2017

Cream of Mushroom Soup with Pancetta

I know there are some people who don't like mushrooms. I'm not one of those people. I love mushrooms. Maybe its the meatiness, the earthiness, the overall yumminess. I love sauteed mushrooms with butter, garlic and a splash of sherry to top steaks and burgers. I like them marinated or sliced into salads, but I especially love them when they are creamed into soup. I started this soup base by using the rendered fat from pancetta to saute the mushrooms, onions and celery and it added an amazing depth of flavor. As a bonus, the saltiness of the pancetta salted the soup for us so I didn't add too much more salt once the soup was done. BUt feel free to salt to your personal taste. Use your favorite mix of mushrooms to customize your mushroom flavors and then don't forget to top it with crispy pancetta, fried mushrooms and thyme leaves. It is sheer decadence. For all the mushroom lovers, this recipe is for you. Enjoy!

Cream of Mushroom Soup with Pancetta

Serves 4

4 oz. pancetta, diced
1 T butter
1 medium yellow onion, diced
1/2 cup celery, diced
2 cloves garlic, minced
2 lbs mushrooms (I used crimini and button), sliced (reserve 1/2 cup for garnish)
2 Tbsp dry sherry
2 cups chicken broth
1 tsp fresh thyme leaves
1/4 tsp black pepper
1 cup heavy cream
thyme leaves(garnish) 
salt (to taste)

In a dutch oven, cook pancetta until crispy. Transfer cooked pancetta to a paper towel and set aside. In the rendered pancetta fat, fry about 1/2 cup of the sliced mushrooms until golden brown and set aside for garnish.  
Over medium high heat, add 1 T butter to pancetta fat in the dutch oven, then add onions, celery, remaining uncooked mushrooms, and garlic and cook for about 10 minutes or until mushrooms are tender and onions are translucent. 
Add 2 T sherry and cook until liquid is absorbed. Add chicken stock, thyme and pepper and continue to cook for 10-15 minutes. 

Transfer soup to a blender filling the blender only half full, working in batches as needed. Leave the top insert open but cover it with a towel and blend until smooth.


Transfer blended soup back to the dutch oven and add cream and over medium heat heat soup until hot, about 5-10 minutes more. Serve in bowls, garnish with pancetta, fried mushrooms and fresh thyme. Enjoy!
Other recipes to try.


Quinoa with Mushrooms, Onions and Pine Nuts

Udon Noodles with Mushrooms and Pancetta

Mexican Corn Soup with Fried Cheese

Sunday, November 12, 2017

Halloween Decorating 2017


My computer is finally back from the computer ICU. It basically got all new guts, thanks to the virus my kiddos accidentally downloaded while playing Minecraft®. It shut down everything...sigh. No worries kids, I only love Halloween and couldn't post a single thing for the last month. 😥 Luckily these pics were still on my phone.
Things are looking up as I'm finally able to post all my Halloween creations. For the last two months my house has been in complete disarray. Boxes of Halloween decorations and craft supplies, plastic arms and legs, bloody jars, pumpkins inside and out...just crap everywhere during the creative frenzy, I call Halloween. I realize its nearly Thanksgiving, but take a look around and Pin it for next year if you see something you like. Enjoy!

Dining Room

This year I went with a black and white organic palette. Taking from nature, with a twig wreath with black and white oak leaves and white pumpkins. It was difficult to fight the urge to add skulls and spiders to my dining room decorations, however I resisted and created an elegant and very not scary style.  

For the chandelier, I hung a few different types of black leaf garland to create this dramatic fall of foliage mixed in with more of the white oak leaves. I loved this so much I wanted to leave it up all year.
A very simple centerpiece for the table using a grapevine wreath spray painted black, white pumpkins, white oak leaves, black floral accents and candles. Easy and beautiful. Black candles would be great here too.
I love these skull stepping stones I got from the 99. So I added them to my plate rack on the other wall of my dining room. I guess I added a skull or too afterall...;)

Living Room

I went with more neutrals in my living room, echoing the white pumpkins from the dining room. Color inspiration came from the wreath I made using creams and off whites. Unlike the dining room, I added skulls and crossbones.  :)

I continued the neutrals onto my entryway table. Unfortunately, I discovered the limits of my photography skills with the big window behind this table. Just couldn't get the picture I wanted. I took over 100 photos at different times, evening, morning, lights on and off, using filters, adding drapery to filter light, and ended up trying to adjust them in Photoshop for which I have limited skills as well...I'm really not that happy with these pics, but I wanted to post them anyway because I love this vignette.So ignore the yucky lighting. :)

Scarecrow Photo Booth

We threw a Halloween Party this year and I wanted to create a fun outdoor space that is basically a big Photo Booth with prop scarecrows, straw bales, corn stalks and my fake boneyard bonfire.This was so much fun to make and the final effect was really cool.Check it out! 


  Here's the How-to-link!  Boneyard Bonfire

Cemetery

Halloween isn't complete without a cemetery. I didn't get too many pictures of the outside of my house and its hard to see the rest of the tombstones behind the tree. Next year I'll add more to this by adding ground breakers and more tombstones. I wanted to show the cool swirl lights. :)

Bloody Jars

These bloody jars were so fun to make. I've seen lots and lots of specimen jars on Pinterest, most have labels and aged effects. I went with a less is more approach. I wanted to see in the jars so I saved all my plastic mayo, peanut butter, pickle, jalapeno and cheese ball jars.  Filled them with body parts, gauze and fake blood. I put these all over my kitchen for the party. It was a really cool prop.

Decorating with Jacks

I love Jack-o-lanterns. It wouldn't be Halloween without them. Here's a small corner of my kitchen where I display all my cute ceramic pumpkins and jacks. 

Ghostly Woman

Here's an in-process picture (no arms yet) of the ghost I placed in the corner of my living room for the party. She was real simple to make using PVC pipe, foam head and creepy cloth. She came together in less than an hour. Easy breezy.  

Grim Reeper

When my oldest son was 4 years old, we had this grim reeper decoration that made sound and shook when you walked past it. He was fascinated by it. He'd go up to it and trigger the sound and smile. That year, he was Batman for Halloween but he looked at me and said, "Mama, next year I want to be a 'Green Whopper' for Halloween." I laughed so hard, he was too cute. Here's my Green Whopper, (aka Grim Reeper) prop I made. The larger one behind it is one I got from The 99 Cents Only Store. I made mine with PVC, plastic rib cage, vertebra, skull, lots of creepy cloth, and witches hands from the 99.
Easy centerpiece using creepy cloth, bones, skulls, skeleton animals from the 99 and candles...

Easy light-up Jacks


This is just a fun and easy idea. I purchased small plastic treat pumpkins and battery operated tea lights and created this super cute jack-o-lantern. Perfect to add light to props to draw your eye to decorations or to light up walkways. Below, I hung a jack-o-lantern from the mouth of my skeleton cats that I placed in a planter on my patio.

Other Halloween Ideas:
Halloween 2013 
Halloween 2014
Halloween 2015
Halloween 2016