Pages

Monday, December 19, 2016

Blackberry Oatmeal Bars

Yay! Two dessert posts in a row! Okay, so I must admit that this baking thing is pretty satisfying. Throwing butter and sugar together in all it's wonderful combinations is something to behold...and EAT!  
If you haven't noticed, I'm not a big dessert gal. I usually eat desserts on two occasions. During the holidays and during that time of the month...wink! So this is rare to have two dessert posts.   
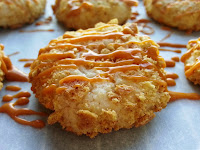
With the holidays quickly approaching, I was compelled to bake! I've made these a few times and each time I've made them with a different homemade jam so feel free to use whatever you have on hand. These nuggets of buttery jammy goodness are crowd pleasers! Everyone will rave about them and think you spent all day in the kitchen, but the best part about these Blackberry Oatmeal Bars is that they are super simple to make. Throw the dry ingredients together with melted butter, use half to make the crust. Layer on your favorite jam. Top with crumbs and bake for 35-40 minutes.  Just the kind of easy throw together cookie to make your holidays merry. 
 Merry Christmas!

Blackberry Oatmeal Bars

(Slightly adapted recipe by Averie Cooks)
Makes 32 cookie triangles

1/2 cup butter, unsalted, melted
1 cup flour
1 cup old fashioned whole rolled oats
1/2 cup granulated sugar
1/4 cup brown sugar
Pinch of salt
3/4 cup of blackberry jam

Preheat oven to 350 degrees
Line 8x8 pan with aluminum foil and spray with cooking spray. Set aside.

Combine melted butter, flour, oats, sugars and salt. Set one cup of mixture aside for the crumb topping. Pour remaining crust mixture into prepared pan and use the back of a spoon to smooth out mixture to form a smooth, even crust. 

Add blackberry jam in an even layer. 

Sprinkle top with remaining crumb topping. 

Bake for about 35-40 minutes, until set and the crust is light brown. Cool completely before cutting into squares or triangles. 


More easy dessert recipes to try:                                               
  
Easy Fudge
Heath Bar Cookies

Friday, December 9, 2016

Lemon Butter Cookies

It's been forever since I've made cookies, but this time of year it's hard to get into the spirit of Christmas without baking some sort of yummy treat. And the day I made these, I went into an all-out baking extravaganza and made some Blackberry Oatmeal Bars and a Pumpkin Crumb Cake too! It was awesome as I listened to Christmas music and baked my heart out. I didn't foresee the future of all this sweetness. I wasn't making them for gifts...it's too early. I was happily making them for me. 
So... guess what's happening now? The things I don't normally eat, ie: desserthas become it's own food group. I have been eating cake and cookies for breakfast everyday! I even have dessert after my salad at lunch. And at night while watching TV...Jeez...the cookies call out to me and I don't ignore them. I pause my binge watching of Scandal on Netflix and go get cookies! These in particular...Buttery and not too sweet!

Lemon Butter Cookies 

Makes ~30 cookies
Slightly adapted recipe by Simply Whisked


1 cup butter, room temperature
2/3 cup granulated sugar
1 egg
1 tsp lemon zest
1 Tbsp lemon juice
2 1/2- 3 cups all purpose flour
sugar crystals or powdered sugar topping

Preheat oven to 350 degrees.
Cream butter and sugar in a stand mixer until fluffy. Beat in the egg. Add lemon juice and zest. Gradually add flour until incorporated. (note: I added a total of 3 cups flour so that the dough could be rolled into balls. It was a bit sticky with only 2 1/2 cups flour.) Using a 1 inch cookie scoop, roll dough into 1 inch balls and place on a parchment lined cookie sheet. 
Use the back of a fork to imprint the cookies and sprinkle with sugar crystals before baking. If using powdered sugar, dust cookies after baking. 

Bake for 15 minutes until set but not brown.  Cool on a wire rack and serve! Store in an airtight container.


Other Christmas cookie recipes to try:                             

Red Velvet Brownies
Gingerbread Biscotti
Cinnamon Cheesecake Cookies


Friday, November 25, 2016

Fall Decorating 2016

I love to decorate for the holidays, but decorating can get expensive. I love to get inspired by pins on Pinterest or beautiful photos in magazines and then try to find ways to decorate on a dime. I love to shop at thrift stores, garage sales and dollar stores to hunt for decorating treasures. I don't mind being on a budget because it's so much fun to find items here and there and be able to transform these seemingly unrelated items into something that looks like it was planned out from the beginning.
So much like last year's tablescapes, this year's place settings were purchased at The 99cents Only Store. The total cost of decorating was $22. 

It started with these turquoise soup bowls. The trick to shopping at The 99 is to go there often. They get fun unique items all the time but they sell quickly. By the time I saw these beauties, there were only 6 remaining...so I snatched them up. I wasn't sure what I'd do with them, but I just had to have them. (Cost $6) 

A few months later, they had these gorgeous turquoise plates.(Cost $6) I wasn't even sure the plates would match the soup bowls but when got home and put them together, they were a perfect match! Yay!
I pulled out the dark brown woven chargers, I purchased from The 99 last year and that's when my color scheme took shape.

And then two months ago, I found these super cute resin owls ($6) at The 99 and knew they would be a part of my fall table because they echoed the bronze of the chargers. Super cute!
Add in my existing wine glasses, napkins, silverware, grapevine and ceramic pumpkins, candles, and floral accents...and voila! Fall table on a budget! Only $22.
These two little blue birds ($2) and the oval platter ($2) were also from The 99.  These bronze ceramic pumpkins were from Tuesday Morning from my years of collecting ceramic pumpkins and I purchased the shapely vase 10+ years ago from Southern Living. :)

Below, I added some berries to this rustic blue box for a simple fall floral arrangement. 


Odds and Ends...
I used a bunch of my old silk flowers and pumpkins to make this arrangement for my entryway. And I re-purposed some foam fruit and pumpkins, that used be a part of a cornucopia centerpiece, to make this fall inspired Thanksgiving tree. I think I'll keep it up in my kitchen for Christmas. :)
Happy Thanksgiving everyone!

More Decorating Ideas:

Fall Decorating 2013
Fall Decorating 2014
Fall Decorating 2015

 Southern California fall leaves...

Pumpkin Spice Marshmallows

These little fluffers were so simple to make that I'm wondering why I never tried to make these before. These marshmallows are a lot softer than store brands and have a light airy texture and sweet vanilla flavor. I added orange food coloring and cut them into mini pumpkin shapes, and finished them with some cinnamon sugar as a festive variation for fall. They are amazing in hot chocolate with their hint of cinnamon. Imagine the endless variations, like adding peppermint extract and cutting into to Christmas shapes. Dip them into chocolate for ready made s'more or as an easy chocolate candy. This recipe makes a lot of marshmallows especially if you cut them with scissors into squares as the original recipe instructs. Instead, I made them into festive little pumpkins and still ended up with over three dozen. Enjoy!

My youngest son has quite the sweet tooth and pretty much single-handedly ate all of these over this last week. :)

Pumpkin Spice Marshmallows 

(slightly adapted recipe from My Baking Addiction)
Makes ~3-5 dozen

3/4 c. water, divided
1/8 tsp. orange gel food coloring
3- 0.25oz. powdered gelatin, unflavored
2/3 cup corn syrup
2 cups sugar
1 Tbsp vanilla extract
1/4 cup powdered sugar
1/4 cup corn starch
1/4 tsp. ground cinnamon

Prepare sheet pan with plastic wrap coated with cooking spray. Spray another piece of plastic wrap for the top. Set aside.
In a shallow container, add powdered sugar, corn starch and cinnamon and mix. Set aside. 

Add 1/2 cup water and gel food coloring into stand mixer and mix until food coloring is dissolved. Then add gelatin to bloom.

In a medium saucepan, add 1/4 cup water, corn syrup, and sugar and bring it to a hard boil over medium heat. Let boil for 1 minute. Turn off heat.

Carefully, add hot sugar mixture to stand mixer with gelatin. Beat on medium high for about 12 minutes until stiff peaks are formed.  
Add vanilla extract and beat until just combined. Pour marshmallow batter into prepared sheet pan. Smooth out with a cooking spray coated spatula. Cover top of marshmallows with second sheet of plastic wrap and let set for 4 hours or overnight. 

Peel plastic wrap back and cut marshmallows to desired shape using oiled cutters or scissors. Drop cut marshmallows into powdered sugar mixture to coat. Place in an airtight container.


Other recipes to try:
Pumpkin Spice Latte Ice Cream     Sugar Skulls              Gingerbread Biscotti


Monday, November 14, 2016

Short Rib and Bok Choy Soup


I've seen the words 'lazy day' and 'Cozy Sunday' a lot in blogs and magazine articles lately. It is fall afterall, and I can honestly say I'm in desperate need of a lazy cozy weekend!  I feel like there's always something that has to be done, people to see, events to attend. Since weekends are our only time to spend together as a family, I'm feeling the pinch, along with my family, because I'm taking a 13 week Pro Chef Series which meets every Saturday and Sunday from 8:30am-12:30 but usually I don't get home until after 1pm. I get home and I'm hot, tired, and smelling of each week's culinary ingredient. Last Sunday, was pork class. I got home and my oldest son said, "What sinks like horrible food?" 
Yes...he's been a real shit lately. He not happy that I'm gone every weekend until the afternoon. I get it. And it is true, I do smell like chicken, beef, garlic, onions, grilling, oil, pork...you name it! Just wait until Fish and Shellfish class. But seriously after 4 hours of cooking, my clothes, my hair, skin, and even my bra stinks like food and dare I admit, a hint of sweat. It's a ton of work and A LOT of fun and most importantly, I LOVE IT! I'm learning so much and the food has been out-of-this-world delicious! Don't worry, I'll blog some of Chef Teri's amazing recipes and share some cool techniques I've learned along the way. :)

But that brings me back to Lazy. Cozy. Sunday. I need one and my family needs one. I have no class the weekend after Thanksgiving so I'm scheduling my Lazy Cozy Weekend with my family. Just me, my husband and my boys. Nothing to do. Nowhere to be. 
I'll turn off my phone, wear PJ's all day, make a big pot of soup, watch old movies, nerf guns, and play twister with the kids. Hey...who knows, maybe we'll go for a long walk or a bike ride...or maybe not...we're supposed to be LAZY right? Of course, the cozy part is completely dependent on SoCal weather. :)

Wishing you all a Happy Thanksgiving!

Here's a delicious soup for your next lazy weekend!

Short Rib and Bok Choy Soup

Recipe slightly adapted from Three Beans on a String
Serves 8

2 pound short ribs, with or without bones

6 cloves garlic, sliced
1 inch fresh ginger, peeled and sliced
1 medium yellow onion, sliced
1 Roma tomato, quartered
1 t. Chinese Five Spice
1 Habanero chile, halved and seeded
1/2 cup rice wine or sherry
1/2 cup soy sauce
12 cups chicken broth
1 lb. baby bok choy, sliced in 1-inch strips
10 baby bella mushrooms, sliced
1/2 cup bean sprouts
1/4 cup chopped cilantro
1/4 cup green onions, chopped

In a large stockpot, cover the short ribs with water and bring to a boil. Immediately turn off the heat and remove the beef and set aside. Discard water and wash the stock pot. This helps make a clearer broth. Return the par-boiled short ribs to the clean stockpot and add garlic, ginger, onion, tomato, five spice, Habanero chile, rice wine, soy sauce and chicken broth. Bring the pot to a boil and then reduce the heat to medium and simmer for 3 hours or until meat is tender. Remove from heat and allow the soup to sit for an additional hour. Next, remove the beef from the pot and pour the broth through a sieve to strain out the vegetables while collecting the broth in another clean stock pot. Add beef back to the strained broth.
Skim any fat from the surface of the broth. (I refrigerated the soup overnight and removed the hardened fat from the surface)


Bring the soup back up to a boil and then add the mushrooms and cook for about 2 minutes. Add the Bok Choy and blanch for another 2 minutes.
Ladle into bowls and top soup with bean sprouts, green onions and cilantro.

Other Soup recipes to try:
   Rustic Minestrone                  Chicken Pot Pie Soup              Spicy Beef Stew