Saturday, March 14, 2015

Wilted Brussels Sprout Salad with Warm Bacon Dressing


Some people see salad as a side dish, merely something they grudgingly eat to get to the main course. But this is a salad that you'll be hard pressed to just want to 'get' through. Even those who don't like Brussels Sprouts or vegetables for that matter, will enjoy this salad. It's surprisingly light but packed full of flavor. The sweet, sour and salty bacon dressing goes perfectly with the warm Brussels Sprouts and crispy bacon bits. The slightly wilted Brussels Sprouts are still crunchy and have the taste and texture similar to sauted cabbage. It's like a really good coleslaw, but better because it has bacon in it. 
Now that I think of it, this salad would be amazing on a burger, just like coleslaw. Hmm... I'm going to whip up a batch for our next BBQ and pile it high on a burger with extra pickles. Absolutely delicious! Give this recipe a whirl.

Wilted Brussels Sprout Salad with Warm Bacon Dressing
(recipe from Cuisine at Home, Nov/Dec 2014)
Makes 12 servings

1 1/2 pounds Brussels Sprouts, ends trimmed, shredded
8 oz. thick sliced bacon, diced
1/4 cup shallots, diced
1/4 cup apple cider vinegar
1 T light brown sugar (I added an extra Tbsp of sugar)
1 T stone ground mustard (I used a Country Dijon)
salt and pepper, to taste

Shred Brussels Sprouts in a food processor or using a slicing blade.
Cook bacon in a large nonstick skillet until crisp. Transfer bacon to paper towels to drain. Drain all but 2T of bacon drippings.
Add shallots to the skillet. Cook over medium heat for 2 minutes. Deglaze skillet with vinegar, and whisk in brown sugar and mustard. Add Brussels Sprouts and bacon. Toss to wilt brussels sprouts, 2-3 minutes. Serve warm.
Other salad recipes to try:
Brussels Sprout Salad with Garlic Balsamic Vinaigrette
Green Goddess Primavera Salad
Kale Salad with Strawberry Mango Salsa

Thursday, March 5, 2015

Slice of Life: Chef Tech Cooking School


Recently, I had a chance to step out of the kitchen and away from my computer to take part in a networking event for food bloggers in my area.  Small Chicks Big Eats partnered with Chef Tech Cooking School here in Long Beach and held a Bloggers Networking and Cooking Workshop last month.

I found out about the event by chance after having a glass of wine one night with my friend Gina at the Willmore Wine Bar, which happens to be a few doors down. Chef Tech Cooking School's bright lights flooded the dark sidewalk and the smell of baked bread peaked our curiosity. We peered in through the storefront window and what a sight it was. It was about 8:30 at night and the baking class students were taking their glorious breads, muffins and rolls out of the oven. Perfect timing.
Chef Teri waved us in. She let us try some of the warm potato rolls with butter. Yum! As we talked, Gina mentioned that I had a food blog and Chef Teri asked if I was coming to their food bloggers event that coming Sunday. In short, I rushed home, signed up and cleared my Sunday plans so I could make the event. 

It was an amazing day filled with learning, eating, and meeting some amazing fellow food bloggers. We had bakers, home cooks, teachers, business owners, caterers, food editors and YouTube bloggers each demonstrating our love of food. 
 
Let's take a look at the wonderful food, Chef Teri prepared for us.

MENU
Grilled Chicken Breasts
Shaved Fennel Parmesan Salad
Strawberry Rhubarb Quick Stir Cake
Homemade Vanilla Bean Ice Cream


Here are some the pictures from the event. Beginning with homemade Vanilla Ice Cream. What's the saying? "Life is short. Eat dessert first."
This was unbelievably smooth and decadent.


Next up, the Strawberry Rhubarb Quick Stir Cake. (I would of posted in process pics but the pics were blurry and all around not good...so let's jump to the finished product! Ta Da! Beautiful!)

Now it's time to get those Chicken Breasts in the brine and get them ready for grilling. I've only brined chicken a handful of times and usually it wasn't chicken breasts. It was legs and thighs that kind of thing. Well... I learned that you shouldn't brine legs and thighs of chicken because they have built in fat between the muscle fibers that naturally keep them moist. Brining meat serves to not just flavor the meat but seal in juices. I have yet to do this at home with chicken breasts but believe me, this will be my 'go to' way to prep chicken breasts because they were delicious. 
I didn't get any shots of these lovely ladies soaking in salt water but I did get a post-spa day picture of these hot chicks sunbathing on the grill. :)

AND NOW ON TO MY FAVORITE FOOD...SALAD!

Not only did I get to eat this delicious salad, I learned a few things along the way. I learned the difference between Vinaigrette and Dressing and I learned what that little hole at the bottom of the insert at the top of my Food Processor is used for. It was a full day of salad learning for me! :) 
I'll share what I learned when I blog this recipe in an upcoming blog.
 
Here's a picture of Chef Teri emulsifying by hand with a whisk. Later, she added the vinaigrette to the food processor and emulsified it further. Easy breezy.

Here's Chef Teri demonstrating her knife skills. I plan on taking Chef Tech's Knife Skills class!


(Stay tuned, I will be blogging this salad recipe in the very near future...As you know, I love salad and I love fennel. It's my new favorite ingredient...check out another great recipe with fennel with my Rustic Minestrone Soup with Butternut Squash and Fennel)

At the end of this amazing experience, the one thing I know for certain is that I need to take the Knife skills class. It's a given. I also want to take the Professional Chef 1:Foundation classes at Chef Tech Cooking School in September. Now I just have to save up for it and enroll. :) 

Thank you to Small Chicks Big Eats for organizing this wonderful event and to Chef Teri at Chef Tech Cooking School for opening your doors to this home cook with a blog.  

For more information about classes and workshops at Chef Tech Cooking School visit their website for their calendar of events. 

Check out these amazing ladies:
smallchicksbigeats.com 
figsontop.com
Tanayastable.com
FloriCooks.com
Lacooquette.com
Bakingwithmelissa.com
Instagram@juliegoeshealthy
Instagram@cremedelacroom
Instagram@Kel_Shiroma (thefoodcritique.com)

Sunday, March 1, 2015

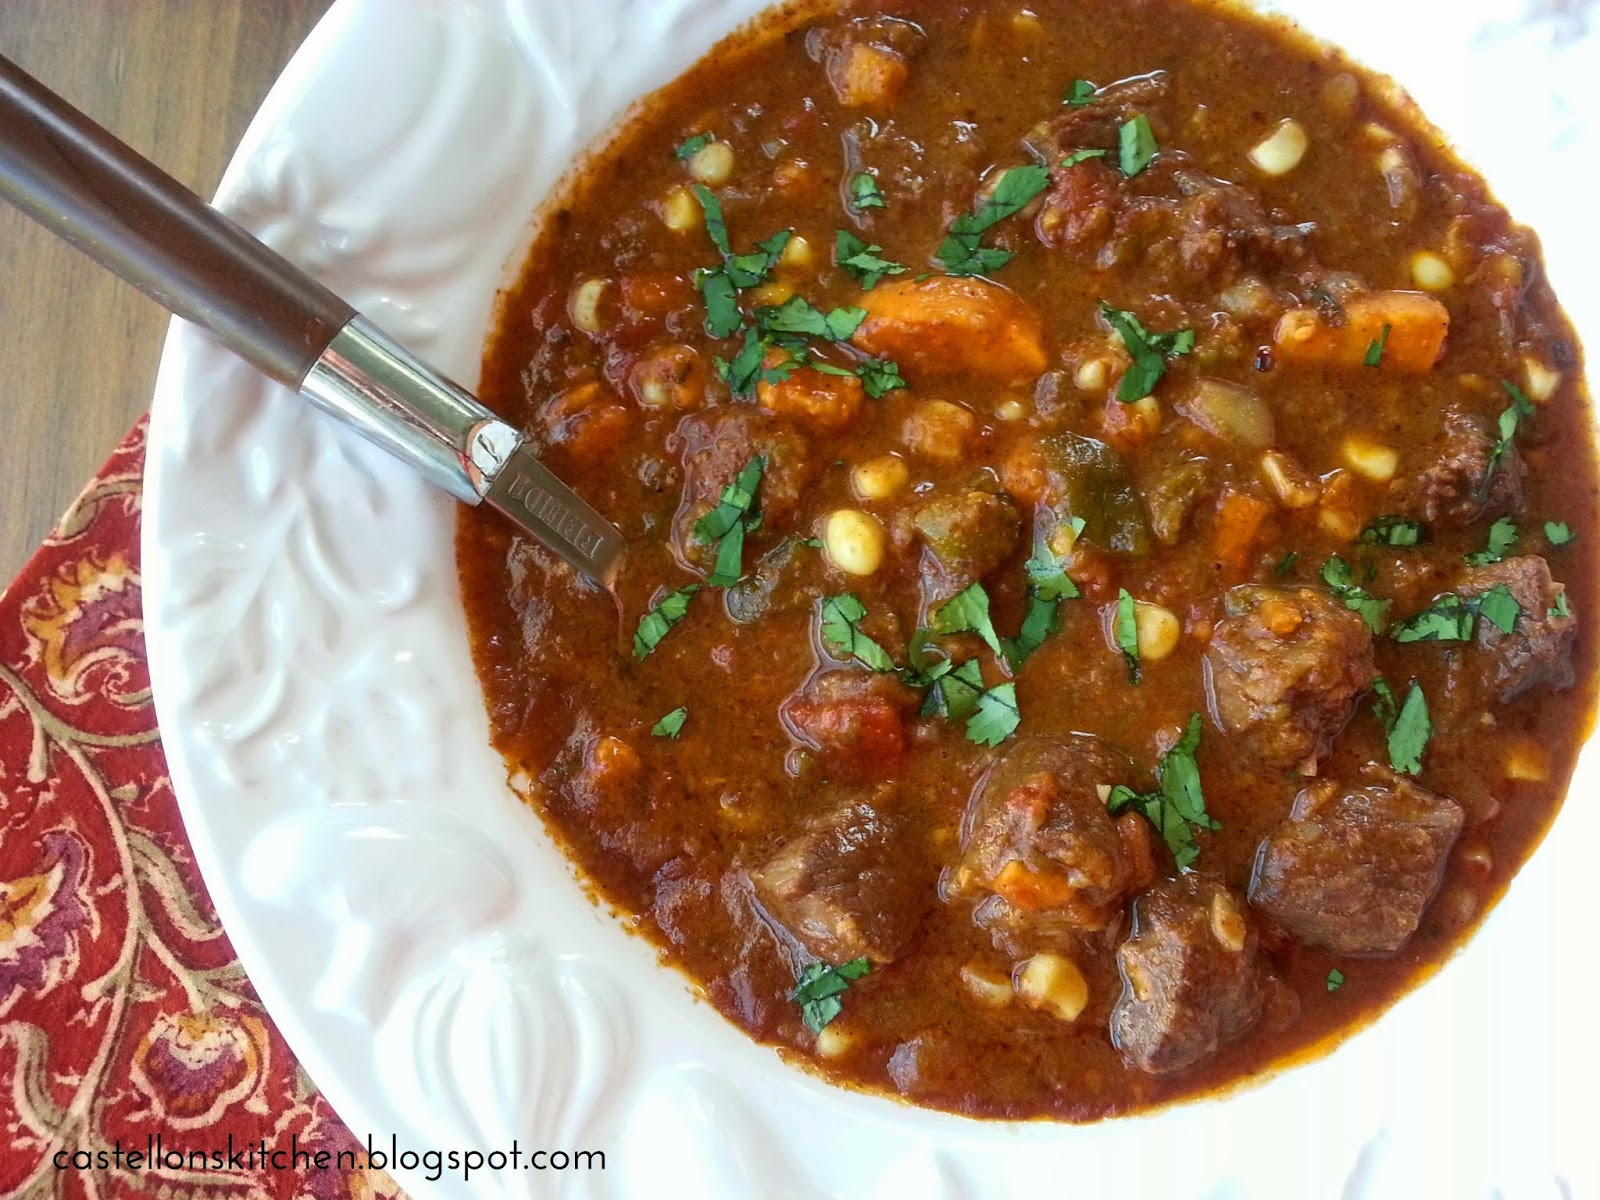
Spicy Slow Cooker Beef and Sweet Potato Stew


This is hands down the best beef stew recipe I've ever had. The Latin spices and the sweet potatoes in this beef stew sets this one apart. Traditional beef stew is kinda bland to me, but this one is pure greatness. Spicy, full of flavor with a bit of heat in the end. And the sweet potatoes are a nice change of taste and texture from traditional starchy potatoes. 
I substituted the poblano chilies in this recipe for some New Mexico chiles that I got from my friend Danielle last year. I still had one bag of them left in the freezer and tossed them in. Maybe that's where all the heat came from in this version. You just never know how hot or mild those New Mexico chilies will be. I don't mind, for me the hotter the better. But not so great for my kiddos. I'll file this recipe under, "Recipes my kids won't eat". Next time, I'll make it milder for them, substituting with roasted mild Anaheim chilies. Whether you like it spicy or mild this recipe is super delicious and easy because the slow cooker does all the work. Enjoy!

Spicy Slow Cooker Beef and Sweet Potato Stew (slightly adapted recipe from Cuisine at Home)
Makes 12 cups

1 boneless beef chuck roast (2.5-3 lb), trimmed, cut into 1-inch cubes
salt and pepper.
3/4 c flour
3-4 T vegetable oil
2 T tomato paste
4 c beef broth
1 can diced tomatoes in juice
1 large onion, diced (2cups)
2 T garlic, minced
1 T each of chili powder, dried Mexican oregano and ground cumin
1 t ground coriander
2 lb sweet potatoes, peeled and cubed
2 poblano chiles, charred, peeled, seeded and diced (I used New Mexico Chilies but you can also substitute with mild Anaheim chilies for less heat.)
1 cup frozen corn, thawed
1/2 cup fresh cilantro
1 T fresh lime juice

Toss beef with flour to coat. Brown beef in 3-4 batches in 1 T oil per batch in a large skillet over medium heat. Transfer beef to a slow cooker and stir in any remaining flour. Add tomato paste to skillet and cook over medium heat, 1- 2 minutes. Deglaze skillet with broth, scraping up any brown bits. Increase heat to high and boil 2 minutes.  Pour broth mixture over beef in slow cooker. Add tomatoes. onion, garlic, chili powder, oregano, cumin and coriander. Cover and cook for 4 hours. Add sweet potatoes and cook an additional hour. Stir in chiles, corn, cilantro and lime juice.  


Other recipes to try:
Corned Beef, Cabbage and Leek Soup
Tomato Garlic Soup with Cheese Tortellini
Minestrone for a Crowd


Saturday, February 14, 2015

Ciabatta Chicken Sandwiches with Peppers and Leeks

After a few months of no blog cooking, I finally made some time to cook. Yay! The weatherman had threatened rain last Saturday, which kept me home and wanting to cook. My inspiration for this recipe came from Crockpot Salsa Chicken. You know the recipe, chicken breasts and a jar of salsa...so simple and so good! It's a staple in my house. My girlfriend, Gina had made it the other night while I was over and it inspired me to try an Italian version of shredded chicken. Even though it never rained last weekend, the weather was cool and cloudy. I threw these amazing sandwiches together with a few items I had on hand; chicken breasts, red and green bell peppers and some leeks were the basic ingredients. I also had some Italian dressing mix and some pepperoncini as well. Throw the whole thing in the Crockpot with some garlic, basil, butter and white wine and you're in business. Toast up these soft Ciabatta rolls with fresh basil butter, melted mozzarella cheese and top with this amazing chicken...yum! Enjoy!


Ciabatta Chicken Sandwiches with Peppers and Leeks
Makes 8-10 sandwiches

3 boneless, skinless chicken breasts
2 small leeks, white and light green parts, sliced and well rinsed (about 1 cup)
1 green bell pepper, diced (1 cup)
1 red bell pepper, diced (1 cup)
3-4 cloves of garlic, sliced
1/4 c sliced pepperoncini
1 packet of dry Italian Dressing mix
1/2 t dried basil
3 T of butter, unsalted, divided
1/4 cup white wine or water

Mozzarella cheese
8 Ciabatta rolls
Basil Butter (1/4 cup butter, softened with 4 leaves fresh basil, finely chopped)

Prepare all vegetables. Add about half of the leeks, peppers and garlic to the bottom of the slow cooker.  Add the chicken and sprinkle with half of the Italian Dressing mix. Top chicken with the remaining vegetables and sprinkle with the rest of the Italian dressing mix. Add pepperocinis, dried basil and place 1 tablespoon of butter on the top of each vegetable covered chicken breast. Add wine and cook on high for 5 hours. Shred chicken. Set aside while you prepare the basil butter and the rolls.

Spread basil butter on both sides of Ciabatta rolls and add mozzarella cheese to the top bun. Place under a broiler to melt the cheese and toast the buttered side for about 3 minutes or until the cheese is melted. 
Remove from the broiler, pile high with shredded chicken and serve hot. Enjoy!

Other recipes to try:
Veggie Sandwiches with Black Bean Hummus and Sunflower Sprouts
Sliders with Pickled Onions and Spicy Mayo
Chicken Panini with Swiss Chard and Leeks

Sunday, January 25, 2015

Blueberry White Chocolate Chip Cookies


This is the time of each year when I usually get sick and this year didn't disappoint. I'm moving into my second week of this flu and I'm still weak with body aches;even my teeth hurt. I'm not much of a sleeper normally, my usual night is 5-6 hours, tops. But with this bug, it's like I can't get enough sleep. I'm exhausted and spend every minute I'm not working, napping or laying down on the couch recovering from having to be awake all day. It's crazy.
The plus side, if there is one to being sick, is that all this lounging around and feeling crappy, has actually allowed me to get organized and plan some blog ideas for this year. While I wasn't unconscious, Pinterest was there inspiring and motivating me to get well. My list of things to do getting ever longer as I flipped through beautiful pictures and pinned my heart out. :)
Since I didn't have the energy to cook, I figured I could at least organize my old blog photos and that's when I stumbled on these pictures of my Blueberry White Chocolate Chip Cookies I made this last summer. I know you're probably asking...How did you forget to blog cookies? Honestly...I'm not quite sure how these fell through the cracks. But I'll take it as a good sign that in the heart of winter, I'm able to bring you a little taste of summer with these delicious cookies. I'm starting to feel better already! 
Enjoy!

White Chocolate Chip Blueberry Cookies (adapted recipe from Twice Remembered)
Makes 4-5 dozen

1 c. unsalted butter, softened to room temp
1 c. brown sugar, packed
1 c. granulated sugar
2 large egg, room temperature
2 t. vanilla extract
3 c. all purpose flour
1 t. baking soda
2 t. hot water
1/2  t. salt
1 1/2 c. white chocolate chips
1 1/2 c. dried blueberries (see below for a how to)

Preheat oven to 350 degrees.
Cream together the butter and sugars until smooth. Beat in eggs one at a time, then stir in the vanilla. Dissolve the baking soda in hot water. Add to batter along with the salt. Stir in flour until incorporated and then add the chocolate chips and blueberries. Use a small cookie scoop to drop cookie dough on a parchment lined cookie sheet.
Bake about 10 minutes.   

Drying Blueberries 
Preheat oven to 250 degrees. 
Rinse and sort 2 pints of blueberries removing any over-ripe fruit. 
Bring pot of water to a boil. I used my pasta pot that had the strainer insert so that I could easily lift the blueberries out of the water all at once. If you don't have a pasta pot, then have a strainer handy. 
Once the water is boiling, add the blueberries into the boiling water. Immerse the blueberries for about 30 seconds. This will crack the outer skin and allow for water to escape when drying. Promptly remove blueberries from the water. Spread blueberries out in a single layer on parchment lined cookie sheet. Bake blueberries for 1-3 hours* until desired dryness. 
* I dried my blueberries for three hours and they were very dry. Good for long term storage but a bit too dry for cookies. To soften them up a bit,  I soaked the blueberries in hot water for about 30 minutes and drained them prior to adding them to the cookie dough. Next time I'll cut down on the drying time to about 2 hours so I don't have to rehydrate them. Enjoy! 

See photo below: If you don't want to bake all the cookies at once, these are easy to freeze. Spread them out on a cookie sheet so that they are not touching each other and place in the freezer for about an hour. Once the cookie dough is mostly frozen, transfer the cookie dough into a freezer bag and place in the freezer. Write baking instructions on the outside of the bag. Pull out as little or as much as you want to bake.  
Other cookie recipes:
Chocolate Cake Mix Cookies
Cinnamon Cheesecake Cookies
Heath Bar Cookies 
 

Monday, January 12, 2015

Cranberry Orange Buttermilk Cake

It has been a few weeks since I last blogged. The holidays were crazy busy and left me feeling a bit blue. Usually each New Year inspires me to plan my "To Do List" for the coming year. Not resolutions, but "To Do's". But that didn't happen this year...at least not yet. 
My holiday blues made it really hard for me to blog, let alone think about what I wanted to accomplish in 2015. Writing on the blog was hard especially since I'd done very little blog cooking since Thanksgiving. The few dishes I'd cooked, needed more work. They were not quite good enough. This recipe for Cranberry Orange Buttermilk Cake was one of the successful recipes throughout this time but I just couldn't put any words down. 

Today, I decided that I needed a better attitude. I needed to tackle the things I could change...like I used to do, before I started feeling bad. 
I got up today determined to get my head back in gear by carving out some time to do the things I like to do. 

First things, first. Take care of my physical self. 
I love to exercise and I love to read but hadn't done much of either since last summer. So this morning, I worked out and I resumed reading a book I started reading over 6 months ago. Yay for me!  
Next up...Cooking. I love to cook. It grounds me. So after my workout and shower, I worked on a new recipe. It's not quite there. The flavor is all there but I have to work on the presentation a bit...but at least I know how I'm going to change it up and make it blog worthy. :) 
And now, I'm tackling this blog...this deliciously moist cake that left me unable to write all these weeks. Not only is this cake super easy to make but it's versatile. The basic buttermilk cake recipe can be used with just about any other ingredients. Swap out the cranberries and orange and add lemon zest and blueberries, or add nuts or a cinnamon struesel topping! It's delicious and a snap to make. Enjoy!

Looks like I'm on my way to start my "To Do List" after all. Happy New Year!

Cranberry Orange Buttermilk Cake

Makes 1 loaf

1 1/2 cup all purpose flour
1/2 t salt
1 t baking powder
1 cup sugar
2 T orange zest
3/4 cup buttermilk
1/2 cup oil
2 large eggs
1 t vanilla extract
1/3 cup cranberries
1/2 cup powdered sugar

Preheat oven to 350 degrees. Spray loaf pan with cooking spray.

Mix flour, salt, baking powder and sugar in a large mixing bowl and set aside. In a medium bowl, add buttermilk, orange zest, oil, eggs and vanilla extract and mix well. Add this to the flour mixture and whisk until incorporated. Add cranberries and mix until just combined. Pour into the prepared loaf pan and bake in a 350 degree oven for 35 minutes or until a toothpick comes out clean. Note: The cranberries will float to the top. 
Sprinkle with powdered sugar and Enjoy!  

Saturday, December 27, 2014

Rustic Minestrone with Butternut Squash and Fennel


Today is my best friend Julie's birthday. Most years, I feel terrible because I always forget her birthday given it's two days after Christmas. With all the hustle and bustle going on before Christmas, once Christmas is over, regrettably I go into shut down mode and forget her birthday. Sorry Juls. :( Well not this year, I've been thinking about her a lot these last few months, especially the last few days since I made this amazing soup and decided to blog this recipe for her. 
She has graciously allowed me to tell her story in hope that it will help others. Julie had a pretty tough year health-wise. Early this summer she told me that she had been experiencing some weakness and numbness on one side that was noticeably disruptive and limited her being able to do normal everyday things. She knew there was something wrong because it did not go away after a few days, as you would expect with muscle fatigue. She went to the doctor and after many visits, tests and an MRI she was diagnosed with Multiple Sclerosis (MS). My typical Julie, with her unshakable positive attitude and empowering outlook on life, took it in stride. At least that's the side she showed me. I know she was worried, as I was, but we hugged and talked about what it meant for her. Where she approaches life positively in the face of adversity, I approach troubling news clinically, hiding my fears by going right into trouble shooting and knowledge seeking modes ...What's the treatment plan? What's the prognosis? What's next? ...Are you okay?

Julie bravely gave herself injections as she struggled through treatment of her first episode of MS. Her doctor gave her information about keeping cool and limiting overly exerting exercises and then put her on a diet that helps to lessen symptoms and shorten MS episodes. The diet is vegetable heavy with animal protein sources recommended, limiting soy and dairy, and gluten. Last month, Julie asked me if I could help come up with some recipes for her since filling up half your diet with primarily vegetables is a challenge on a good day. I gladly accepted and I've been thinking about vegetables ever since. How do I incorporate them in dishes so that they are filling and satisfying? 
Last week, I experimented with an amazing vegetable sauce that I used to top some mushroom ravioli and it was amazing. But, since ravioli has gluten, I'm having to retool the dish omitting the pasta. I already know this sauce will be amazing on marinated grilled chicken. Once it's perfected you'll see it on the blog as well. I also made some delicious Roasted Sweet Potatoes over Thanksgiving that I plan to blog for her as well. They were to die for. 

All this experimentation with veggies, brings me to this Rustic Minestrone Soup. It is gluten and dairy free with heavy vegetables and a little bit of leftover Christmas ham, which can be swapped with other meats or omitted if you want a meatless meal. I actually found this recipe in an old magazine (circa 2003) as an advertisement for Turning Leaf Wine. Strangely enough what caught my eye in this recipe was the use of butternut squash and fennel. I remember Julie told me that root vegetables and other vegetables like butternut squash were good things for her to eat. So I gave it a go on Christmas Day and it was phenomenal! That's a Julie word. Julie is always complimentary and uses great words, like phenomenal to let you know she likes something. :) I adapted the recipe just slightly by roasting the fennel and butternut squash first to sweeten the vegetables up a bit. Plus roasting the fennel transformed the Anise taste into something buttery and absolutely phenomenal.  It was even better the next day as all those flavors blended together beautifully.
Happy Birthday Julie! I love you! 

Stay tuned for more Julie recipes to come. 

Rustic Minestrone (adapted recipe from Turning Leaf Wine)
Serves 4-6

2 T olive oil
1 lb (~2 cups) butternut squash, peeled, seeded and chopped into even chunks
1 small fennel bulb, quartered with fiberous core removed
salt and pepper, to taste 2 t olive oil
1 1/2 cups ham, chopped 
1 small onion, chopped
1 large carrot, chopped
5 cloves of garlic, minced (about 2T)
2 t fresh thyme, finely minced
2 t fresh rosemary, finely minced
1 can (14.5oz) diced tomatoes in Italian herbs
6 cups chicken stock
2 bay leaves
2 cups Swiss Chard,chopped (or Spinach)
1 can (15 oz) cannellini beans, drained and rinsed
salt and pepper, to taste

Heat oven to 400 degrees. Toss butternut squash and fennel with 2 T olive oil and transfer to parchment lined cookie sheet. (I used a pie plate) Salt and pepper to taste and roast for 30-35 minutes. Allow fennel to cool and then chop. Set the butternut squash aside to add to the soup later. 


Add 2 t olive oil, ham, carrots, onions, garlic, roasted fennel and herbs to a large Dutch oven and saute until onions are translucent and the carrots are tender crisp, about 10 minutes. Add chicken stock, tomatoes with juice, and bay leaves and simmer for 20 minutes. Add Swiss chard, roasted butternut squash and cannellini beans and simmer for another 15 minutes or longer. Salt and pepper to taste and enjoy! (For gluten free: omit the rolls.)


For more information about Multiple Sclerosis, contact the National MS Society at this link.