

Magical Mystery Maze(June 2018)
This was my third year of converting the cafeteria at my son's elementary school into a fun maze for their annual carnival. My first year, I designed a Zombie maze for the Halloween Carnival and it was a huge hit! It was a classic scary maze with typical Halloween themes like, zombies, cemeteries, laboratories, witches, werewolves, that kind of thing. It was so much fun and the parent outreach was amazing. The parents were lining up to scare these kids and I must admit, it was hilarious to see the kids get so frightened. It was awesome! This year, the theme of the Carnival was Magic...specifically, Madison's Magical Carnival! I designed the theme of Magic throughout each turn of the maze, which included the magic of an enchanted forest, voodoo magic in the Bayou, a magician's magic, the magic under the sea, the magic of dreams, and the magic of the full moon! Take a look around and let me know what you think. Enjoy!
Enchanted Forest Magic
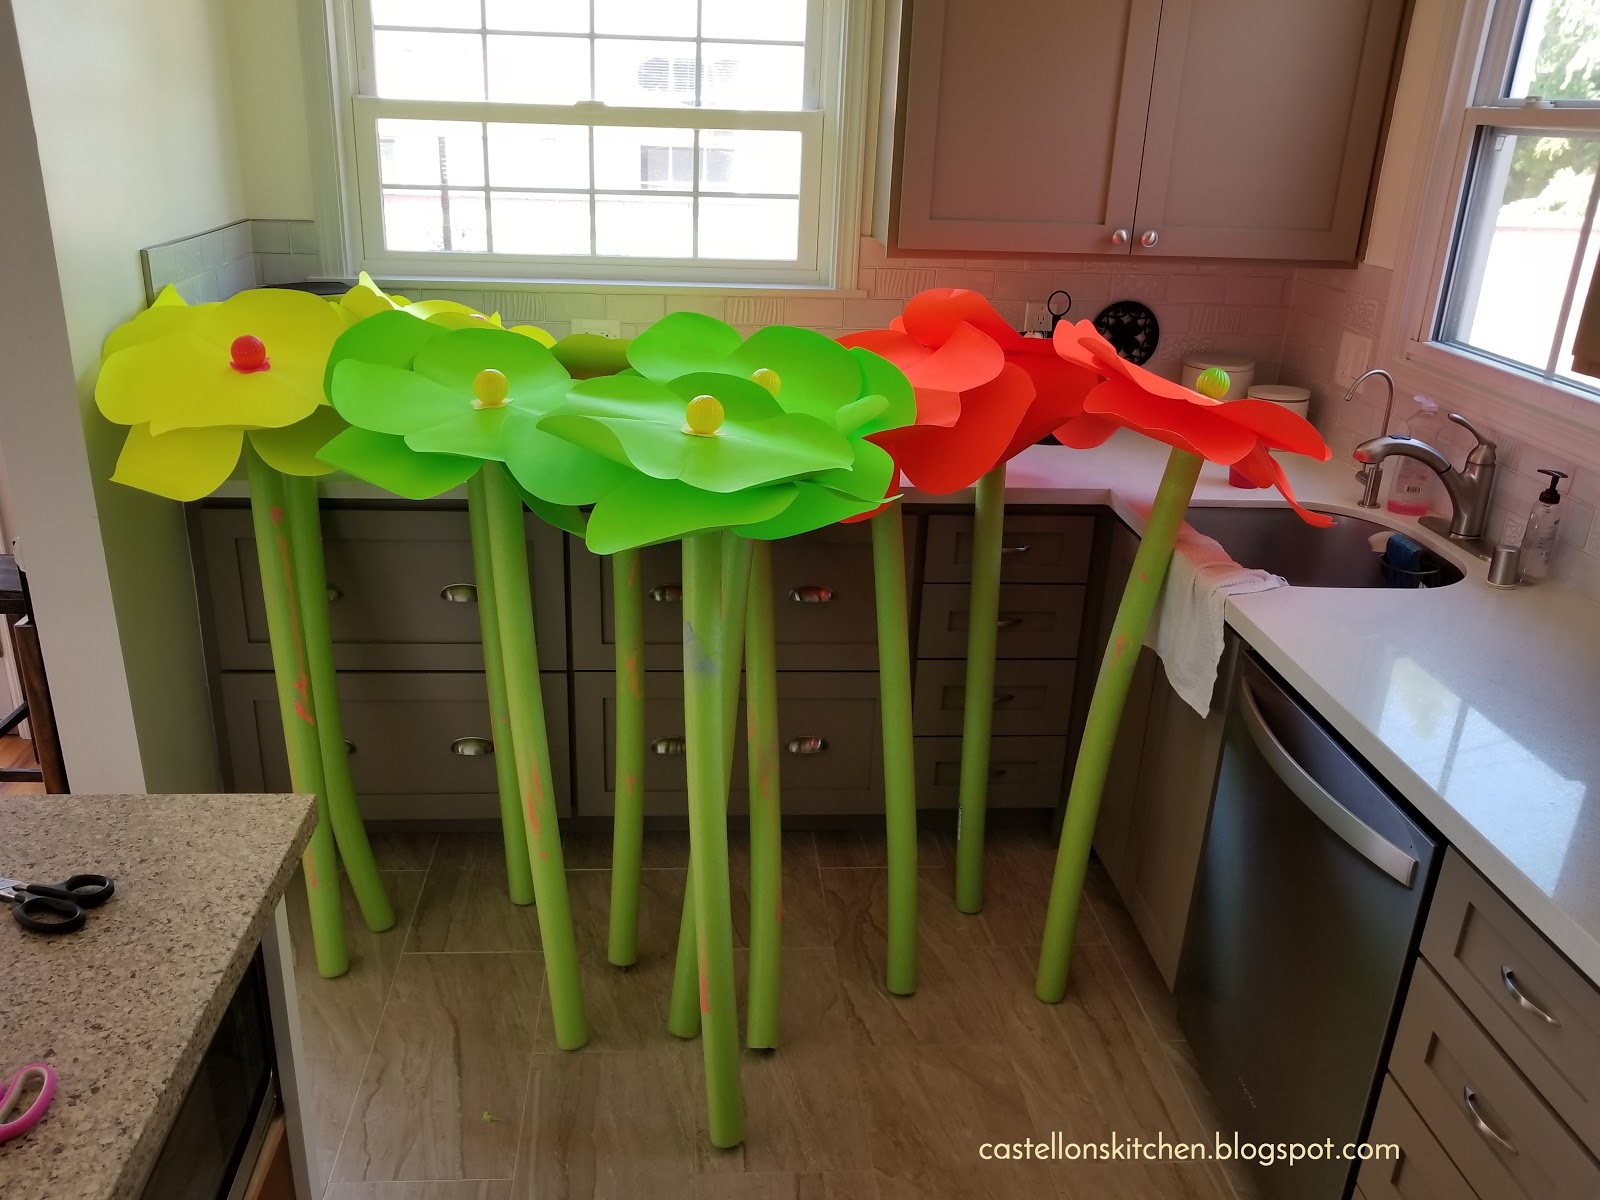
For the enchanted forest, I was inspired by Alice in Wonderland and I wanted to make a neon forest of large flowers and mushrooms. I made the large flowers out of neon poster board, plastic neon Christmas bulbs (I found these at a thrift store for 25 cents/dozen), neon flower-shaped Post-it® notes, and pool noodles left over from last year's Fun House maze. I cut out the poster board pedals, curled the ends and glued them together and attached them to the pool noodles! Easy Breezy.


Umbrella Mushrooms- How to
For the large mushrooms, I bought cheap umbrellas from the 99 Cents Only Store, color changing tea lights, a roll of plastic tablecloth (left over from the last carnival), and cardboard mailing tubes painted white. I cut and hot glued one edge of the plastic table cloth to the edge of the umbrella, I twisted it once and glued it to the other side to mimic the gills of mushrooms. I repeated this with another piece of tablecloth which covered the bottom of the mushroom. Then, I cut the Velcro® strap off the umbrella and hot glued a color changing tealight to the middle of the Velcro® strap, taking care not to cover up the on/off switch. Now the tealights can be suspended from one of the umbrella supports inside the mushroom to add extra light and color changing action to your Enchanted Forest Mushrooms. I also painted spots on the tops of the mushrooms with black-light paint. I placed each umbrella mushroom inside a cardboard mailer tube of varying heights and viola! Neon light-up Mushrooms! Super cool effect!


The shrubbery and leaves of the forest were made with cardboard, paint and detailed with black-light paint. The small mushrooms were Dollar Tree plastic bowls with hot glued neon poster board circles, that were turned upside down onto mailer cardboard tubes that were painted white and glued to cardboard squares for stability.

Voodoo Magic Bayou
For the Voodoo Bayou, I reused the house facade I made for the Crazy Clown House from last year and made the cardboard porch supports that were attached to PVC supports. I made skull stakes with Dollar Tree plastic skulls, grass skirting, and tea lights and bamboo sticks. I also hung lots of creepy cloth from the ceiling to mimic a mossy bayou canopy. It's not too noticeable in the pictures though, but the effect was cool. I also added bullfrogs in the small patch of swamp water and alligator skulls hanging from the porch and blue swirl lights to set the mood.


Magic Under the Sea
Ok...I admit that I made this turn of the maze ONLY because I wanted to make these gorgeous Paper Lantern Jellyfish. I saw many iterations of this idea on Pinterest and literally designed the whole scene around them. Aren't they absolutely Magical!! I know right...now, you know why I included these beauties. The jellyfish are made from paper lanterns, bath scrubbies, color changing tealights, and tissue paper. I got everything from the Dollar Tree so each Jelly only cost about $2.00 to make. The Dollar Tree had two paper lanterns (two different sizes) for a dollar and the color changing tealights were also two for a dollar. Each Jelly used one whole bath scrubby $1 and I already had the tissue paper at home (free).
Paper Lantern Jellyfish- How to
Assemble the paper lantern.
Cut a 1.5-2" wide strip of tissue paper big enough to circle the bottom few inches of the paper lantern. Cut fringe into the tissue paper strip and hot glue to the bottom quarter of the lantern.
Take the bath scrubby and undo the rope that holds the bath scrubby together and set the rope aside. The rope will be used later to suspend your tealight in the jellyfish.
Separate the mesh. Cut the mesh to varying lengths and tie to the bottom wire of the paper lantern where the tissue paper was attached.
Tie a knot into the scrubby rope and hot glue the knot to the bottom of the tealight, making sure not to cover the on/off switch.
Now you can tie the tealight to the top wire of the paper lantern, letting the tealight dangle inside the lantern. When you are ready to light it up, gently pull the rope to access the switch and turn it on or off.

The coral reef prop was made from cardboard boxes covered with brown craft paper and covered with paper party decorations, pool noodles, coffee filters, pre-made bows and mesh ribbon, pompoms. plastic clam shells and of course some of the left over paper lanterns, which I also added color changing tea lights in them to light them up and give movement to the prop. I got everything from the Dollar Tree for this as well. Here is a shot of the finished coral reef on my dining room table so you can see some of the detail. Once it's inside the maze with the blue lights on, it looks much more realistic.
I also made a treasure chest from an old foam cooler that I spray painted silver and filled it with crumpled paper and hot glued tiaras, gold coins, pearls and necklaces and then placed a few color changing tea lights inside to light it up.


Here's a small video clip of Undersea Magic in all it's glory! The parent actor playing the sea creature was my husband!
Magic Show
The Magic Show turn of the maze allowed me to reuse the Woman Sawed in Half prop I made for the Carnival Fun House Maze from the prior year. You can read how I made this here. The other piece I made for this turn of the maze was a giant Top Hat. The idea being that a volunteer wearing a evil rabbit mask could jump out or peek over the hat while the kids walked by. It was a really subtle but super scary thing to see it pop up in the dark as you walked by. Again the success of this scene is that the actor volunteers could act within the props. Also the Top Hat was used as a prop to sell pre-sale carnival tickets!


Dreams Made Real
This turn of the maze allowed for more black lights to be used so it really popped as you turned the corner. The idea was the magic of dreams, specifically nightmares and all the things that scared me as a child. I was afraid of someone looking through the window at night. Things hiding under the bed or the dark corners of the bed. That kind of thing. So in this vignette, the volunteer actors had a lot to use to help scare the kids. They could hide under the bed or in a corner or behind the curtains. They could walk around holding the doll, sit quietly on the bed and stare at them as they walked by. The bed was a small kindergarten table made into a bed. The window panes were made out of cardboard that was painted white, with shear curtains taped to the top. A glow in the dark scary face was taped into one of the window panes. The dresser was made with 6 small boxes taped together, cardboard drawers glued to the front, cardboard top attached to the top, and it was all painted white and then detailed with black-light paint. The large blocks were reused from the prior year.
Full Moon Mystery
So the final turn of the maze, harnesses the Magic of the Full moon and not just werewolves, but a Cerberus, the three headed dog. Finding a large moon cutout on the internet was not difficult but was very expensive and would have cost too much. So instead of buying one, I painted this large moon instead. I taped it to the plastic tarp wall, lit it with a small spot light and a orange and purple swirl light so that the moon was really noticeable as you rounded the corner. We had Christmas trees placed around to mimic a forest and had the volunteers wear a werewolf mask hiding behind the trees. They would jump out and scare the kids as they scrambled to the exit.

Here's a walk through of the Magical Mystery Maze without sound or actors.
Other Haunting/Maze Ideas:
 |
| Carnival Fun House Maze (Part 1 of 3) |
No comments:
Post a Comment