Tuesday, April 7, 2020

Tapeworm Soup (French Onion Soup)

Halloween Food

Fun plating and a little creative preparation goes a long way in transforming regular recipes into fun festive dishes for Halloween. Think of it like everyday recipes in costume. This Tapeworm Soup for instance, is your classic French Onion Soup and instead of putting them in crocks smothered in Gruyere cheese melted toasts, I served it in these fun food-safe beakers which I ordered from restaurantsupply.com. The beakers expose the rich caramel color of the soup with worms of onions stringing throughout the murky rich broth. Instant yuck factor! As if that wasn't enough, I added to the tapeworm affect by topping each soup with lightly sauteed leeks, letting them them droop over the rim of the beakers. The flat segmented rings mimic those disgusting parasites perfectly. A deliciously gross idea for HalloweenServe it with a few bubbly crisps of Parmesan cheese and dig in. Enjoy!


Tapeworm Soup (French Onion Soup)

(slightly adapted recipe from Chef Teri Appleton)

Serves 8

4 lbs. yellow onions, cut into 1/4 inch slices
3 T butter
1 cups water, divided for rounds of deglazing
1/2 cup dry sherry
4 cups chicken broth
2 cups beef broth
6 sprigs of Thyme
1 bay leaf
salt and pepper, to taste

Combine onions and 2 cups water in a large dutch oven over high heat. Cover and cook for 25 minutes until onions are soft and wilted. Drain onions and wash and dry Dutch oven. 
Over medium heat, melt butter in Dutch oven and then add the wilted onions.  Cook onions, stirring frequently with a wooden spoon. Scraping the bottom and sides of the pot until liquid evaporates and the onions brown, ~15-20 minutes, reducing heat to medium if onions are browning too quickly. 
 Continue to cook, stirring frequently until bottom of the pot is coated with a dark crust(fond), adjusting heat as necessary to avoid burning the fond. 

Stir in 1/4 cup water, scraping bottom of the pot to loosen the crust and cook until water evaporates and pot bottom has formed another dark crust. Repeat process of deglazing 2-3 times, until onions are very dark brown. 

Stir in sherry and cook until sherry evaporates, ~5 minutes.
Stir in stocks, thyme, bay leaf and 1/2 tsp salt, scraping up any bits of browned crust on the bottom and sides of the pot. 

Increase heat to high and bring to a simmer. Reduce heat to low, cover and simmer 30 minutes. Remove and discard herbs, then season with salt and pepper.

Tapeworm Garnish
3 leeks, white part only, sliced into 1/4 inch rounds 
3 T butter

Cut leeks into 1/4 inch rounds. Laying each round flat on the cutting board cut a quarter of the way through the rings of the leek creating long open rings. 


In a medium skillet, saute in butter for a about 5-8 minutes until leeks are softened but not browned. Top soup with leeks and serve with a Parmesan crisp.

Parmesan Crisps
1 cup parmesan cheese, finely grated

Preheat oven to 350 degrees. Place small mounds of grated Parmesan on a parchment lined cookie sheet. 


Bake for 9-10 minutes until cheese is melted a light golden brown. Serve with soup. Bone Appetit!


More Halloween Food Ideas:
Vampire Slayer Soup (Roasted Garlic and Sweet Potato Soup)
Decomposed Deviled Eggs
Roasted Roaches(Bacon Wrapped Cheese Stuffed Dates)

Saturday, April 4, 2020

The 'Green' Reaper Platter (Green & Black Fruit and Cheese Tray)

Halloween Cheese Platter


The last few years, I've used color as inspiration to guide my Halloween recipes and decorating ideas. Last year, was traditional Black and Orange. The year before, a sultry and elegant Violet. And the year before that, I went for sophisticated neutrals with black accents.  This Halloween season is all about the color Green!  I've already got started and blogged a few of my green ideas like these fun 'Let Nature Run its Corpse' Cakes and this dramatic Slithering Salad.


So this brings us to The 'Green' Reaper Platter!  My purple Abracadabra platter from two years ago (pictured below) continues to be very popular on Pinterest, so I decided to make another platter featuring the color green and black.
First, I needed to find some showstopping cheeses to anchor my cheese board. And thankfully with all this 'Stay at Home' going on here in California, I've been doing a lot of on-line shopping and discovered this Green Pesto Gouda and  Sage Derby Cheese from igourmet.com. I ordered these two cheeses and the Spooky (Looking) Cheese Tray because the Spooky platter also came with these cool black charcoal crackers. It also came with a beautiful purple swirled cheese that would've been perfect for my Abracadabra platter and a layered orange cheese that would've been great last year, if I had done a cheese platter last year, maybe I still will? Anyway, I got my order 3 days later and got straight to work throwing together this gorgeous green and black themed platter. 


As for the name... the green being an obvious pun, but there's a cute back story why I named it 'The Green Reaper Platter'. When my oldest son, Jackson was around 5 or 6 years old, he loved to play with a hanging grim reaper Halloween decoration. He loved to go by it and clap his hands and it would shake and make eerie sounds. He loved it but didn't know what it was called so I told him that it's a grim reaper. He seemed to take the name in stride and didn't ask any questions about it. A few days later he kept talking about the green whopper this and the green whopper that. My husband and I were so confused we couldn't figure out what he was talking about. We asked, "What's the green whopper, Jackson?" He went over to the hanging decoration and pointed to it, "The Green Whopper". We laughed so hard and even to this day, the Grim Reaper will always be the Green Whopper.  💗


The 'Green' Reaper Platter (Green & Black Fruit and Cheese Tray)

Cheeses
Green Pesto Gouda  (link)
Sage Derby Cheese by Thistle Hill (link)

     Fruit                                 Veggies
Blackberries                           Broccoli
Black grapes                         Cucumbers
Green grapes                    Green cauliflower
Green apples                           Celery
Dried Mission Figs

     Nuts                    Assorted Crackers
Pistachios               Charcoal Crackers (link)
Pumpkin seeds          Spinach Kale Thins
Wasabi peas            or Multigrain crackers
         

         Sauces

Fig Balsamic Dressing (bottled)

Guacamole Hummus (homemade)
Makes ~1 1/2 cups

1 cup white beans
1 avocado
juice of one lime
1/4 cup cilantro leaves
1 T jalapeno
1- 1 1/2 t onion powder
2-3 T canola oil
salt and pepper (to taste)

Blend all ingredients together. until smooth. Salt and pepper to taste.


More Halloween recipes to try:


Abracadabra Platter
Antipasto De Los Muertos
Amputated Appetizer
Spider Caviar

Tuesday, March 24, 2020

Slithering Salad (Spicy Cucumber Salad)

Spicy Cucumber Salad for Halloween

One of the bright sides to all this 'Stay at Home' time here in California, besides helping curb the infection rate of the COVID-19 virus, is that being at home with nowhere to go has got me tinkering in the kitchen again. No more obligations to distract me from playing around with my Halloween ideas. Last year, I missed blogging my Summer of Halloween recipes so this year, I'm determined to get an early start. Armed with lots of time on my hands and lots of ideas, here's a super simple idea that comes together quick and easy. 

An idea inspired by the cucumber salads served at Japanese restaurants and Sushi places. Cool, crisp cucumbers drizzled in a light soy sesame dressing...it's one of my favorite sides to have with sushi. I spiralized the cucumbers, kicked up the dressing with garlic chili sauce for heat, and added fun plating that turned a simple salad of cucumbers into a dramatic, delicious and festive Halloween recipe.  Stay safe my friends. 

(🎃221 days until Halloween...in case you're wondering🎃)


Halloween Food

Slithering Salad (Spicy Cucumber Salad)

Serves 4-6

Spicy Dressing

2 1/2 T rice wine vinegar
1-2 T garlic chili sauce (to taste)
1 T soy sauce
1 T sesame oil
1 T honey
1 t. fresh ginger, finely grated

3 English cucumbers

2 juniper berries or whole allspice berries (snake eyes)
Black sesame seeds (garnish)

Prepare dressing. Mix all ingredients in a small bowl and set aside. 


Spiralize the cucumbers:

Use straight cucumbers to get the best results.  

Select the head and tail cucumbers for your snake. Choose a cucumber that has a tapered narrow end to be the tail of your snake, and choose a cucumber that has a long piece of vine attached to it to make the best snake head with his tongue hanging out. The third cucumber will be to lengthen your snake and bridge between the head and tail sections. 

Head cucumber: On the non-vine end of the cucumber, thread a bamboo skewer through the center of the cucumber lengthwise leaving enough of the skewer exposed so you can pull it out later. I left about an inch and a half. This photo below shows a much longer section of the skewer as it was an in progress pic, but the amount of skewer exposed will depend on how big your cucumbers are to begin with.  

Place your threaded cucumber down on the cutting board, and with your knife at about a 45 degree angle, slowly rotate the cucumber as you cut down to the skewer, creating a continuous spiral around the skewer that holds everything in place. 

Adjust as you go. Your cuts will not be even all the way around due to the variation of the cucumbers and how centered your skewer is inside, but don't worry too much about it. Once the cuts are done, the variations of the spirals will hardly be noticeable. 

Continue cutting the spirals until you are about 4 inches from the tip of your snakes tongue. You don't want to cut spirals all the way into his head. Remove the bamboo skewer to release your snake coils. 


Snake eyes: Use the end of a skewer to poke eye holes in the cucumber on opposite sides of the head and then press juniper berries into the eye holes.  If you can't find juniper berries, substitute with whole allspice berries. Trim the tongue if needed.


Once you finish with your "snake head", repeat the spiraling with the tail cucumber. For the tail portion, thread the skewer starting at the tapered narrow end and begin spiraling at the narrow tail end until you reach the the end of the threaded bamboo skewer and trim off any excess unspiraled cucumber. Remove the skewer carefully releasing the coils and set aside. Repeat spiraling with the third cucumber and trim both round ends off the cucumber.  The picture below shows the untrimmed ends of the head and tail sections of spiralized cucumbers.

Arrange snake sections on a serving platter and drizzle with spicy dressing, garnish with black sesame seeds. Slice and serve immediately. 

More Halloween recipes to try:
Witchy Finger Food (Blistered Shishito Peppers)

Easy Halloween Kabobs 

Roasted Zombie Brain

Wednesday, March 18, 2020

'Let Nature Run Its Corpse' Cakes

Halloween Cupcakes

After missing all of last year's "Summer of Halloween" because of a health issue, I'm starting extra early this year on my Halloween recipes and decorating ideas.  I realize it's only March, but some of my Halloween ideas have been inspired by other holidays. For instance, my Haunted Hamlet was inspired by Mini Christmas Villages, my Halloween Topiaries were created by transforming Christmas Angels, and My Bloody Valentine Cake inspired by... of course Valentine's day.  These festive cupcakes that I like to call, Let Nature Run Its Corpse Cakes were inspired by all the mossy Spring/Easter pins all over Pinterest right now. Seeing all the bunnies and eggs cushioned in baskets of moss, I took it another direction all together...instead I went with aged skull and crossbones put to rest in shallow mossy graves. ☠ I think they're absolutely perfect for Halloween, don't you? 
Halloween cupcakes

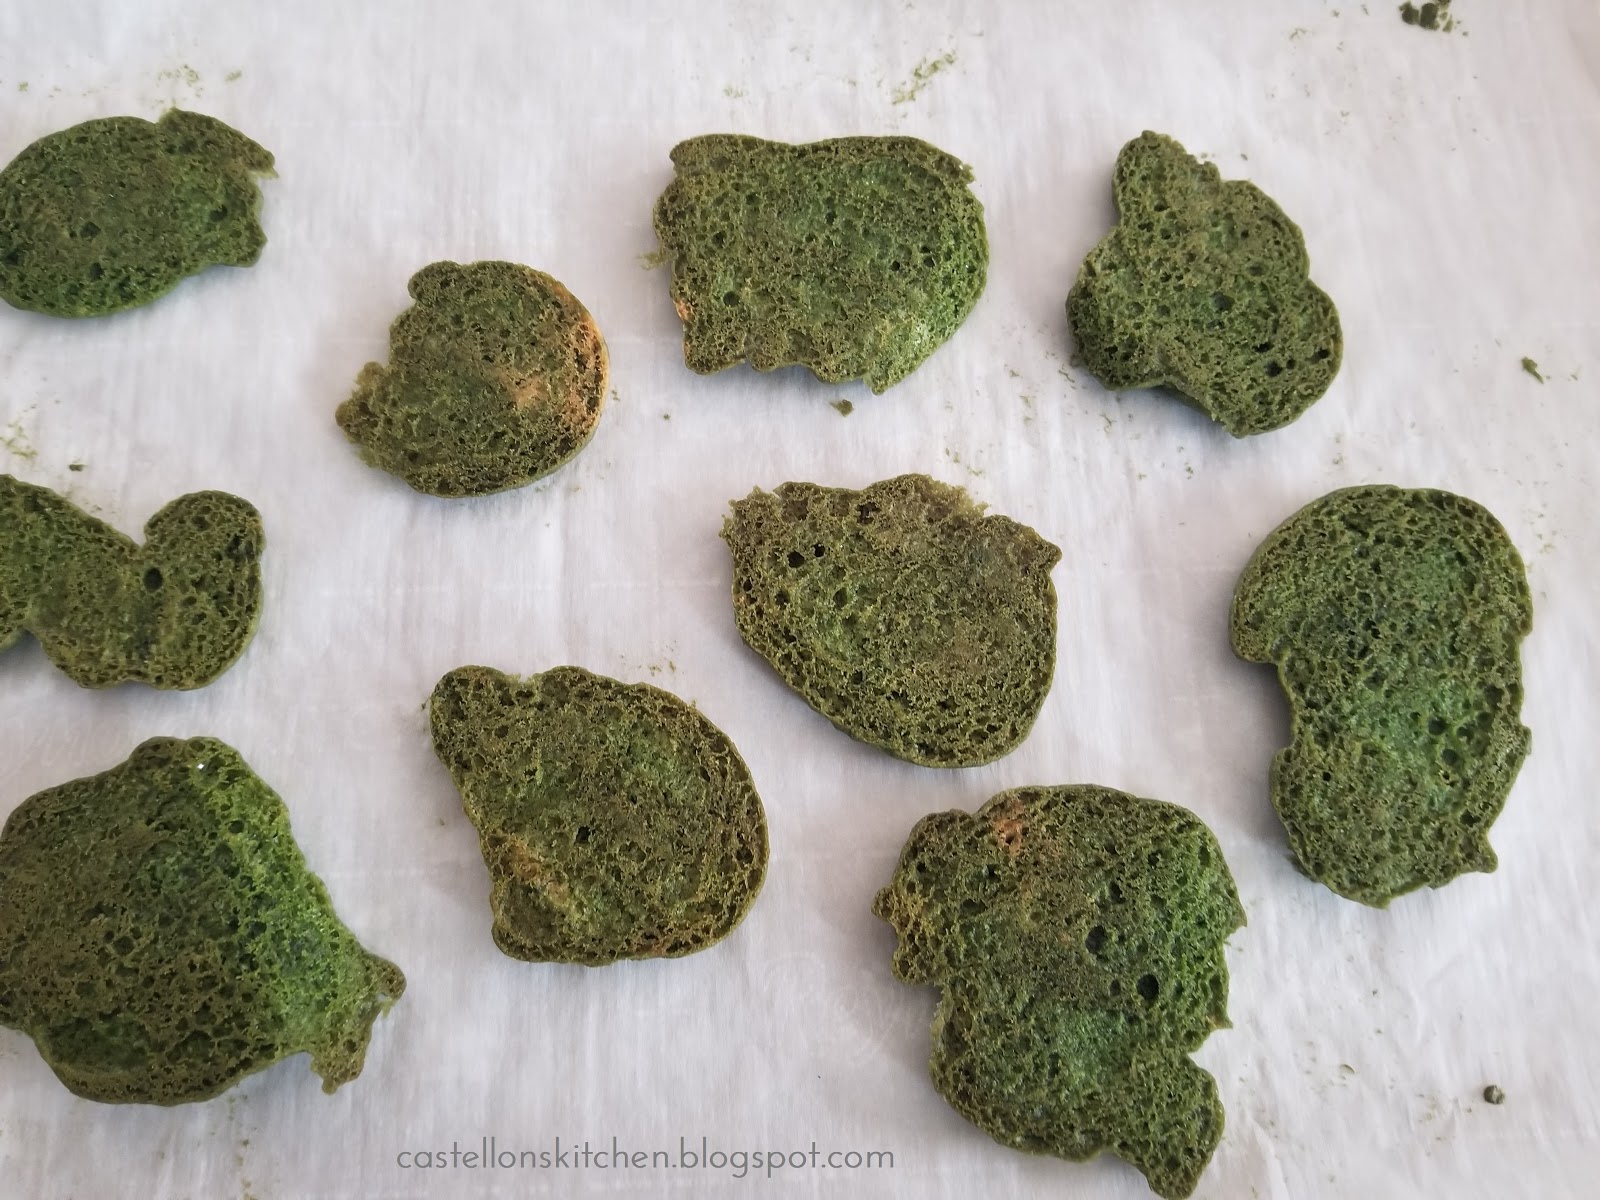
The faux moss looks so realistic that it's hard to believe that these cupcakes are edible. Creating the faux moss-look was super simple. I added a few drops of moss colored food coloring to ready made sugar cookie dough and baked as usual. Crumble half of the cookies and sprinkle the underside of the whole cookies with the cookie crumbs to give you faux moss covered cookies. I topped them with aged white chocolate skulls and crossbones that I made with mini molds purchased from Etsy. I've included the links below.  

These little gems are the perfect recipe to kick off my Organic Halloween theme this year. All my Halloween food and decorating ideas will center around all things green, black with natural organic elements like moss and ferns, twigs and wood. It's going to be so much fun...Stay tuned for more Halloween ideas coming all spring and summer long. 

Let Nature Run Its Corpse Cakes 

Makes 24 cupcakes

Make ahead:
Chocolate Skull and Bones
1 package melting white chocolate 
1/2 t. cocoa powder 
1 T vodka
Mini Skull mold by StaceyDecor 
Mini Bone mold by Moldcreationsnmore 

Melt chocolate according to package directions and transfer into a piping bag or a plastic ziplock bag with the corner cut off.  Pipe melted chocolate into molds and tap the bottom of the molds on counter to settle chocolate and remove air bubbles and empty space.  Place filled molds in the refrigerator and let set for 15 minutes or longer as needed. Remove skull and bones from the molds and set aside. Don't worry if the small crossbones break, they can still be used with the skulls. Repeat until you have 24 skulls and 48 bones.
Aging bonesIn a small bowl, add 1 tsp. cocoa and 1T vodka and mix until combined. Use a paint brush to paint the chocolate skulls and bones with the cocoa vodka mixture to age the bones. The vodka will evaporate and leave the cocoa behind creating an aged look of the bones. Set aside until ready to use. 


Mossy Cupcakes 
1 box chocolate cake mix
1 can prepared vanilla frosting
1 tube prepared sugar cookie dough, room temperature
moss green gel food coloring
black cupcake liners

Cupcakes: Prepare cupcakes according to package directions. Cool completely.
Frosting: Combine ~1/4 tsp. of moss green gel food coloring to vanilla frosting and mix well. Set aside.
Cookies: Place prepared cookie dough in a medium bowl and add about 1/2 tsp. moss green gel food coloring and mix until well combined. 


Scoop about 1 tsp of cookie dough onto a parchment lined cookie sheet. Use a fork or a butter knife to press dough flat into irregular shapes. 


Bake for 10 minutes at 350 degrees. Cookies will have slightly brown bottom which is what you want to add depth of color to your mossy cookies.  Cool cookies and set aside 30 small cookies to top your cupcakes with. Crumble the remaining cookies or the larger cookies into a medium bowl and set aside. This will be used to top your cupcake frosting and to add mossy texture to the sugar cookie topper. 

Assemble: Frost cupcakes and dip frosting side down into crumbled cookies to create the mossy top of the cupcake. Next, lightly frost the bottom side of a sugar cookie. Now place a small dollop of frosting on the other side of the cookie to act as a glue to hold the cookie to the top of the cupcake. Now sprinkle crumbs over the slightly frosted cookie bottom to complete the mossy look. 


Garnish: Top with skull and crossbones secure with a small dab of frosting. 

More Halloween Dessert Ideas:

Jack-o-lantern Cupcakes
Bad Moon Rising Cheesecake
My Bloody Valentine
Haunted House Cake Topper