Showing posts with label Thanksgiving. Show all posts

Thursday, November 21, 2019

Lemon Ginger Sweet Potatoes

Full disclosure... I am not a fan of Thanksgiving yams/sweet potatoes or any of the marshmallow coated casseroles that are so popular this time of year. But last year, I had a sweet potato dish made by my friend, Carina. They were sweet but not overly sweet. They had a hint of citrus, which I thought was orange, but she used lemon, not orange. They were so subtle and sweet and just down right delicious and a nice complement to all the creamy gravy laden dishes of Thanksgiving yummy-ness.  I've been wanting to make a version of her sweet potatoes since last year and that time is finally here. I used her basic recipe of sweet potatoes baked in a brown sugar syrup with lemon slices topping them. I added some ginger, garlic and herbs to complement the lemon and the sweetness of the potatoes and it turned out amazing. Thank you Carina for the inspiration with your delicious recipe. 
                                         ðŸ¦ƒHappy Thanksgiving!🦃

Lemon Ginger Sweet Potatoes

Serves 6-8

1.5-2 lbs. sweet potatoes or yams with similar diameter(about 2 lbs)
2-3 lemons, sliced into 1/4" slices
salt, pepper and cayenne pepper (to taste)
Simple brown sugar syrup(see recipe below)
Compound butter(see recipe below)

Prepare Simple Syrup
2/3 cup brown sugar
1/2 cup water
2-3 slices of fresh peeled ginger
lemon peel of one lemon

Add sugar, water, ginger and lemon peel into a small saucepan. Heat over medium heat, until sugar is completely dissolved. Turn heat down and let simmer for 10 minutes. Do not strain lemon or ginger from the syrup, leaving it in intensifies the flavors. Let syrup cool and place an air tight container . Refrigerate until ready to use. Can be made up to 3-5 days in advance.  

Prepare Compound Butter
1/2 cup salted butter, softened
3-4 cloves garlic, finely minced
1 T fresh oregano, finely chopped
3 T fresh Italian parsley, finely chopped

Combine all ingredients and refrigerate until ready to use. Can be made up to 3-5 days in advance.

Prepare Potatoes

Preheat oven to 350 degrees.

Slice fresh lemon into 1/4" slices, removing seeds from slices and set aside. Peel sweet potatoes and slice into 1/4" rounds and add to a large mixing bowl. Generously salt and pepper sweet potatoes. Add cayenne pepper to taste. Note: A quick sprinkle of cayenne elevates the lemon and ginger without much heat. 
Add simple syrup to the sliced sweet potatoes and mix until well coated. 

Spray 9"x 13" casserole dish with cooking spray. Begin stacking sliced potatoes like poker chips into casserole dish, alternating with an occasional fresh lemon slice. 
Remove lemon and ginger slices from the remaining simple syrup in the mixing bowl. Pour 1/2 cup of simple syrup over sweet potatoes.

Top with the compound butter, cover with foil and bake at 350 degrees for 1 hour. At 30 minutes, remove foil and bake an another 30-40 minutes. Check, adding more time if needed. Let cool for about 10-15 minutes and serve. 

More Thanksgiving Side dishes:
Parmesan Creamed Onions
Corn and Squash Casserole
Chilaquiles Corn Bread Stuffing

Wednesday, November 20, 2019

Blood Orange Upside-Down Cake


Is it too early for citrus season? I know apples, root vegetables, and squash are front and center all fall long, but I just couldn't wait any longer to share this delicious Blood Orange Upside-Down Cake. All the bright citrus sweetness of oranges, hints of cinnamon and a sweet dense orange cake soaked with a blood orange simple syrup and the juice from the baked fruit. Utterly delicious and oh so comforting to get you through the cold winter...fall months. It's perfect right out of the oven with a scoop of vanilla ice cream or all by itself with a cup of coffee.  
Note: Blood orange season is pretty short and not every grocery store will carry them. Not to worry if you can't find blood oranges, you can substitute with regular or Mardarin oranges. But, if you are lucky enough to find blood oranges in the market, grab a few bags. Use the first bag to make this cake and the second bag to freeze the zest and juice so you can use the zest and juice well beyond the cold winter months. Enjoy!

Blood Orange Upside Down Cake

Simple Syrup
1 cup blood orange juice
2-3 cinnamon sticks
1 cup sugar

Place blood orange juice and cinnamon sticks in a small saucepan and heat until reduced by half. Add sugar  and heat on low until sugar is completely dissolved and thickened about 4-5 minutes. Let cool and reserve cinnamon sticks. Strain syrup in a fine mesh strainer to remove fruit pulp. Return cinnamon sticks to strained syrup and set aside. (Photo note: I added star anise the first time I made this, but preferred not to include it in the next few attempts, unfortunately I did not take new pics without the star anise)

Cake Batter
3/4 cup butter
1 cup sugar
3 eggs
1 t. vanilla extract
3 t milk
zest of 3 oranges
1 1/4 cup all purpose flour
1 1/2 t. baking powder
1/2 t. salt
6-8 small blood oranges, peeled and sliced into 1/4 inch slices

Preheat oven to 350 degrees.


Prepare simple syrup as directed above. 

Cream butter and sugar until fluffy. Add eggs one at a time. Add vanilla extract and milk and beat until incorporated.  Add orange zest. Add flour, baking powder and salt and set aside.

Spray a 8" cake pan with cooking spray and then line the bottom of the pan with an 8" parchment paper circle, taking care to smooth out the parchment to remove all bubbles underneath the parchment. 

Add blood orange syrup and cinnamon sticks to the parchment lined cake pan. Next, layer blood orange slices over the syrup and cinnamon sticks. 

Then, pour cake batter over the orange slices and smooth over the top with a rubber spatula to level the batter. The batter will be thick.

Bake at 350 degrees for 40 minutes. At 20 minutes, place a piece of foil sprayed with cooking spray over the top of the cake, to prevent over browning. Let bake the remaining 20 minutes. Remove from oven and let cool for about 10-15 minutes. 
Run a knife around the edge of the pan and then place a serving plate over the cake pan. Flip the pan and plate over together to remove the upside down cake from the cake pan.  Serve warm with a side of ice cream or all by itself. Enjoy!

Other dessert recipes to try:

Orange Cornmeal Cake

Pumpkin Pie Cupcakes
Rustic Apple Torta
Gingerbread Petits Fours with Cinnamon Buttercream

Sunday, December 30, 2018

Pumpkin Challah Bread

I used to be able to pick up some Challah bread from my local farmers market every few weeks from one of my favorite bakers, Rob at Arising Dough. Unfortunately, he moved to another Farmers Market over a year ago and I regrettably I haven't made it over to visit his new market. (sigh.) In addition to his delicious sourdough bread, Rob makes Challah bread in all sorts of flavors and one of my favorite's is his Fall Spices Challah. It is absolutely divine. I came across this Pumpkin Challah bread recipe and it reminded me of his amazing bread and I decided to give it a try. The added pumpkin puree makes this already soft bread extra moist and soft but still dense enough to hold up to butter and jam or even soaking overnight in eggs and cream to make the most amazing French Toast. I personally like it with butter and a sprinkle of cinnamon sugar and a cup of coffee, but I also made some curried croutons with it to top salads and soups! Absolutely perfect, but next time, I'll forgo bread making and go get the original from Arising Dough. Happy Holidays!

Pumpkin Challah Bread

Recipe from Taste of Home Pumpkin Cookbook

1 pkg (1/4oz.) active dry yeast
3 T warm water (110-115 degrees)
1/2 cup canned pumpkin
1 large egg
2 T brown sugar
2 T softened butter
1 t. pumpkin pie spice
1/2 t. salt
2-2 1/2 cups bread flour

Egg wash
1 egg + 1 T water

In a small bowl, dissolve yeast in warm water. In a large bowl, combine pumpkin. egg. brown sugar, pie spice, salt, yeast mixture and 1 cup flour. Beat on medium speed until smooth. Stir in enough remaining flour to form a soft dough. It will be a bit sticky.
Turn dough on a floured surface and knead dough until smooth and elastic, about 6-8 minutes. 
Place in a greased bowl, turning once to grease the top. Cover with plastic wrap and let rise in a warm place until doubled. About an hour. 


Punch down dough. Turn onto a lightly floured surface, divide into thirds. Roll each into a 16-inch rope.  PLace ropes on a parchment-lined cookie sheet and braid. 


Pinch ends to seal and tuck under. Cover with a kitchen towel;let rise in a warm place until almost doubled, about 45 minutes. 

Preheat oven to 350 degrees.
Prepare egg wash by mixing water and egg in a small bowl. Brush over loaf. Bake 20-25 minutes or until golden brown. Remove from pan to a wire rack to cool.

Other recipes to try:
Garlic Cheese Bread
French Bread
Pumpkin Crumb Muffins

Tuesday, November 13, 2018

Chilaquiles Corn Bread Stuffing

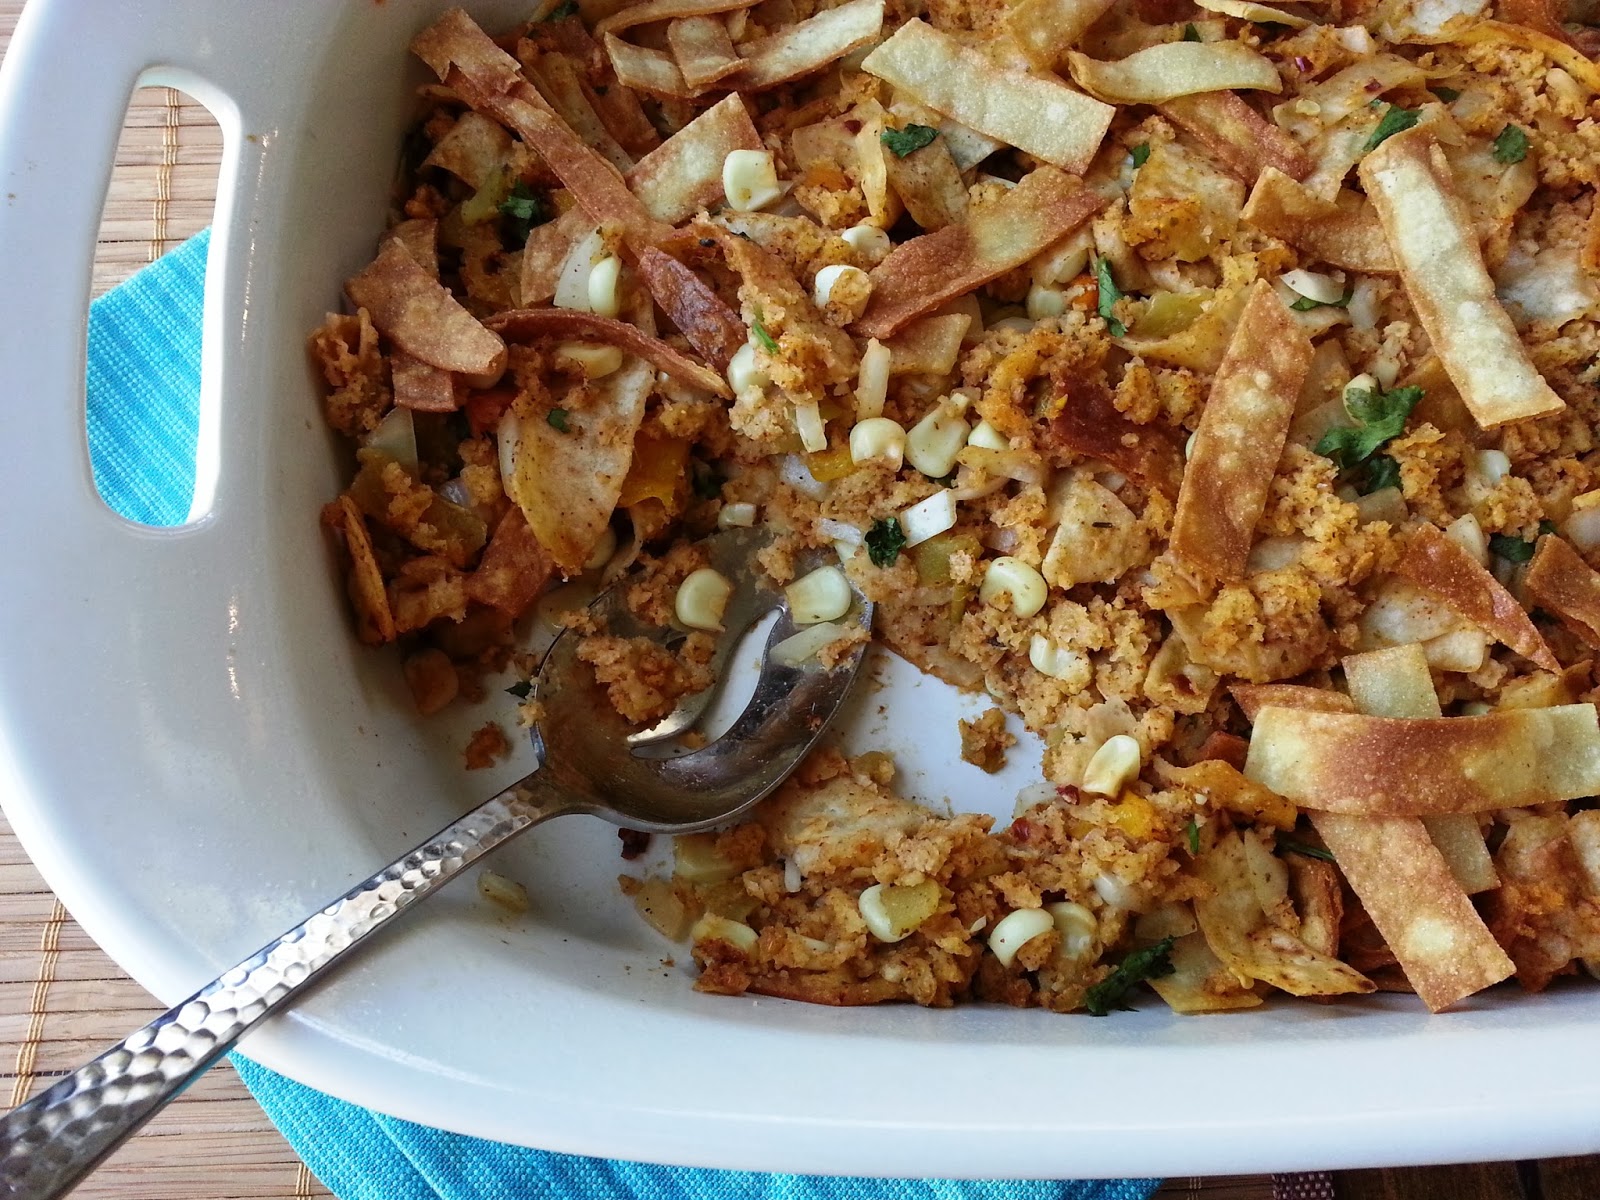
The turkey may get center stage every Thanksgiving, but for me the side dishes are the stars of the show and this Chilaquiles Corn Bread Stuffing is sure to steal the show on Turkey day. A Latin-inspired stuffing that blends traditional corn bread stuffing ingredients like corn bread, celery, carrots and onions with chorizo, fresh corn, green chiles, salsa and fried corn tortillas. Then instead of slathering the whole thing with gravy like traditional stuffing, I topped mine with crunchy corn tortilla strips, crumbled cotija cheese, cilantro and salsa! Flavor packed comfort food, that's not just for Thanksgiving. Make this casserole for a holiday brunch with a crisp green salad or fruit, or throw a few over-easy eggs on top just like you'd find on traditional Chilaquiles and have it for breakfast on Christmas Morning. Happy Holidays.


Chilaquiles Corn Bread Stuffing


Serves 8-10

11 oz. Beef, Pork, or Soy Chorizo 
1 large yellow onion, diced
1/2 cup carrots, diced
1/2 cup celery, diced
1 - 4 oz. can diced green chiles
1 cup corn
6 yellow corn tortillas, cut into strips
oil for frying tortillas
6 cups corn bread stuffing mix (I used Mrs. Cubbison's®)
1 can chicken broth
1 1/2 cups prepared salsa or tomato sauce
1/4 cup cilantro, finely chopped

Top with:
Fried tortilla chips
Cotija cheese, crumbled
cilantro, finely chopped
green onions
Salsa

Preheat oven to 350 degrees.

In a large skillet, add chorizo, onions, carrots, and celery and heat over medium heat until vegetables are tender, about 8 minutes. Add green chiles and corn and mix and set aside while you fry the tortillas.

In a separate frying pan, add enough oil to fry tortilla strips until light brown working in small batches. Remove tortillas from pan with a slotted spoon and drain on a paper towel.
Add corn bread stuffing mix to a large bowl. Add the meat mixture to the corn bread stuffing mix and stir well to incorporate. Add enough chicken stock to moisten the corn bread meat mixture.

IN a small bowl, add salsa and about half of the fried tortillas and mix to coat the chips in salsa. Make sure to reserve the rest of fried tortillas for garnish. Add the salsa coated chips and cilantro to the corn bread mixture. Pour into a buttered casserole dish, cover with foil and bake for about 30 minutes. 

Top with lots of crunchy fried tortillas, cotija cheese crumbles, cilantro, and green onions. Serve with salsa. Enjoy!
Other recipes to try:

Creamed Corn Casserole
Autumn Slaw with Candied Pumpkin Seeds
Tortilla Dressing

Saturday, December 30, 2017

Holiday Decorating 2017


I love the holidays but what I love more is when the holidays are over. I put away the decorations and get back to eating normal meals and not spending so much money. Don't get me wrong, I love spending time with friends and family and enjoying all the wonderfulness the holidays bring, but I really look forward to a fresh start. A new year to make my to do list and tackle each day of the new year. I have a lot of plans for this new year and as the holidays end I'm already planning for Halloween and lots and lots of recipes in between. But before I move on to New Year or Halloween, here's a quick look at my Thanksgiving and Christmas decorations this year. Happy New Year!

Thanksgiving Decorating

I went with neutrals again, but this time with white and green pumpkins with rustic and floral accents. I didn't buy anything new for my table scape this year, rather I re-purposed items from previous years. So if you look closely, you'll recognize some things from the past. The chargers, dinner plates and pumpkin plates were all purchased from The 99cent Only Store. 

The only thing I did buy were more pumpkins. I waited until they were on clearance 75% off at Michael's. Some weren't even white, they were orange and neon green. I spray painted them cream and aged them a bit with diluted brown paint. I bought the green ones, but some had dings in them.  I concealed the imperfections by turning them around or placing pumpkins or floral accents around them.

Christmas Decorating

I usually don't blog my Christmas decorating because generally I just plain run out of time. By the time I look at the pictures and start going through them, it's already end of January. So sadly I have a few years of pictures that I've never posted. But this year, I decided to just post a few of the dining room and the tree. Two years ago, I purchased both the red oval platters and the green square appetizer plates from The 99 as well as the Christmas goblets from the Dollar Tree for a total of $18. I bought the Cowboy plaid napkins at Tuesday Morning on clearance for $8. The runner, I bought on sale from Hobby Lobby for $10. Total cost for my Christmas tablescape was $36. 

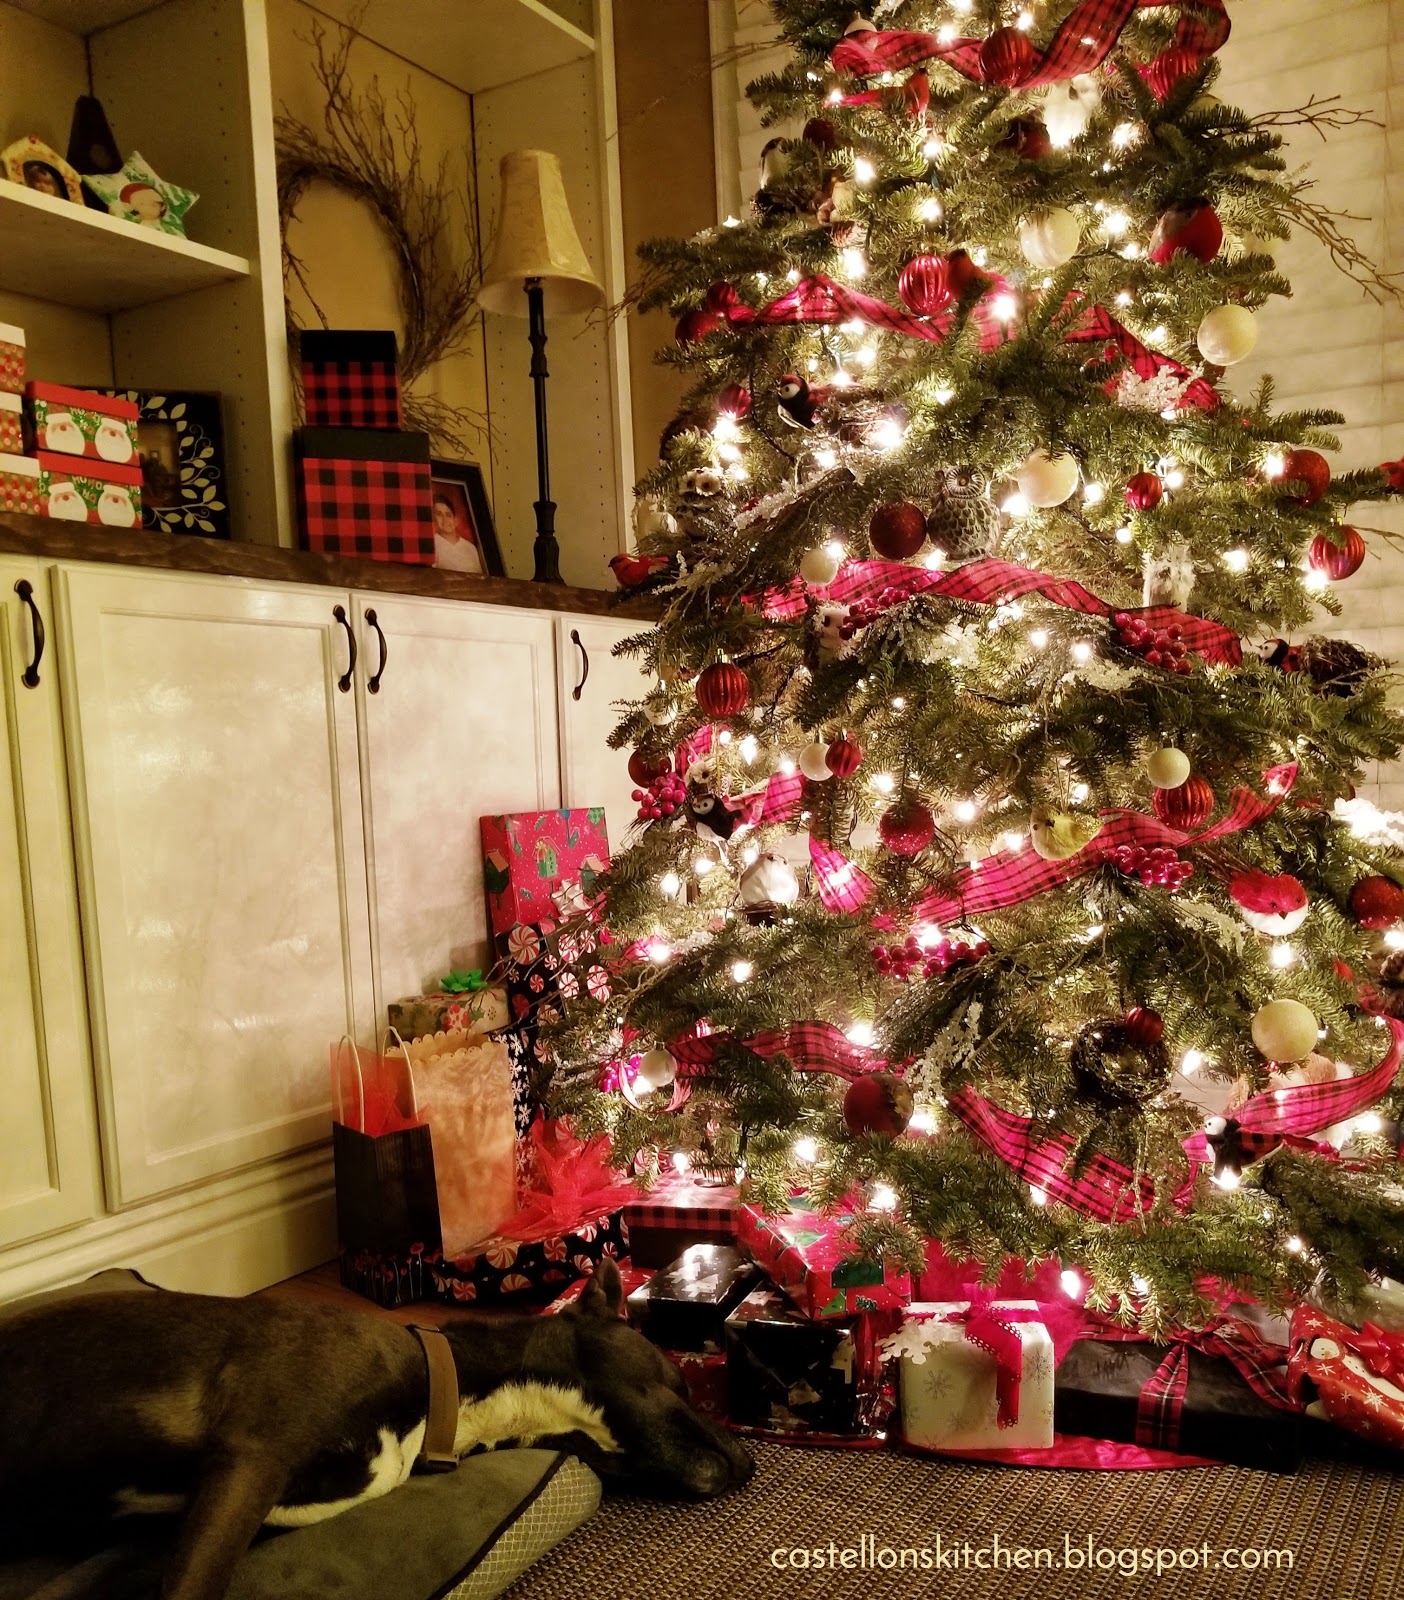
This year we bought a tree that had no top stem for an angel or star to crown the tree. Instead it had a flat expanse at the top. So instead of  looking for another tree with a stem, I used the flat top to place a nest and a snowy owl. I nestled in berries and branches to radiate out of the top of the tree and I think it turned out great. My son said that there weren't enough lights at the top to light the owl up and I have to agree with him. He's kinda hard to see at night,  so I took a picture of him in the daylight. Isn't he cute?
 
Here's a picture of my dog, Socks crashed out next to the tree. This is how I felt every night after shopping, wrapping, and baking, all on top of my normal workload of school, homework, basketball practice, school concerts, PTA meetings and activities, cleaning, cooking, laundry... phew!

Christmas Cookies and Treats

I couldn't let all this Christmas cheer go without some Christmas Cookies. I made these for my son's teachers, PTA parents and friends and thought I'd share them here. Surprisingly, making 8 different types of cookies is easier than it sounds with the help of two really easy stand in recipes using cake mixes. The lemon Snowflake Cookies and the Spice Cake Cookies were easy to throw together because they only have three ingredients. Cake mix, 1 egg and cool whip. I dropped the lemon cookie dough in powdered sugar and the Spice Cookie dough I didn't and instead drizzled with a Maple Syrup Icing. Both turn out soft and super moist and delicious. Enjoy!


Here are the links to some of the cookies I've blogged before. The last two, I pulled from my Betty Crocker Cookbook. Enjoy!
Mini Shortbread Bites
Lemon Snowball Cookies and Spice Cake Cookies with Maple Icing
Cinnamon Cheesecake Cookies
Red Velvet Brownies with Cookie Crumble Frosting
Blackberry Oatmeal Bars 
Spritz Cookies
Russian Teacakes

Here's one more recipe...
Gingerbread Petits Fours

More Holiday decorating ideas:
Christmas 2014
Fall Decorating 2014
Fall Decorating 2015
Fall Decorating 2016