Saturday, December 30, 2017

Holiday Decorating 2017


I love the holidays but what I love more is when the holidays are over. I put away the decorations and get back to eating normal meals and not spending so much money. Don't get me wrong, I love spending time with friends and family and enjoying all the wonderfulness the holidays bring, but I really look forward to a fresh start. A new year to make my to do list and tackle each day of the new year. I have a lot of plans for this new year and as the holidays end I'm already planning for Halloween and lots and lots of recipes in between. But before I move on to New Year or Halloween, here's a quick look at my Thanksgiving and Christmas decorations this year. Happy New Year!

Thanksgiving Decorating

I went with neutrals again, but this time with white and green pumpkins with rustic and floral accents. I didn't buy anything new for my table scape this year, rather I re-purposed items from previous years. So if you look closely, you'll recognize some things from the past. The chargers, dinner plates and pumpkin plates were all purchased from The 99cent Only Store. 

The only thing I did buy were more pumpkins. I waited until they were on clearance 75% off at Michael's. Some weren't even white, they were orange and neon green. I spray painted them cream and aged them a bit with diluted brown paint. I bought the green ones, but some had dings in them.  I concealed the imperfections by turning them around or placing pumpkins or floral accents around them.

Christmas Decorating

I usually don't blog my Christmas decorating because generally I just plain run out of time. By the time I look at the pictures and start going through them, it's already end of January. So sadly I have a few years of pictures that I've never posted. But this year, I decided to just post a few of the dining room and the tree. Two years ago, I purchased both the red oval platters and the green square appetizer plates from The 99 as well as the Christmas goblets from the Dollar Tree for a total of $18. I bought the Cowboy plaid napkins at Tuesday Morning on clearance for $8. The runner, I bought on sale from Hobby Lobby for $10. Total cost for my Christmas tablescape was $36. 

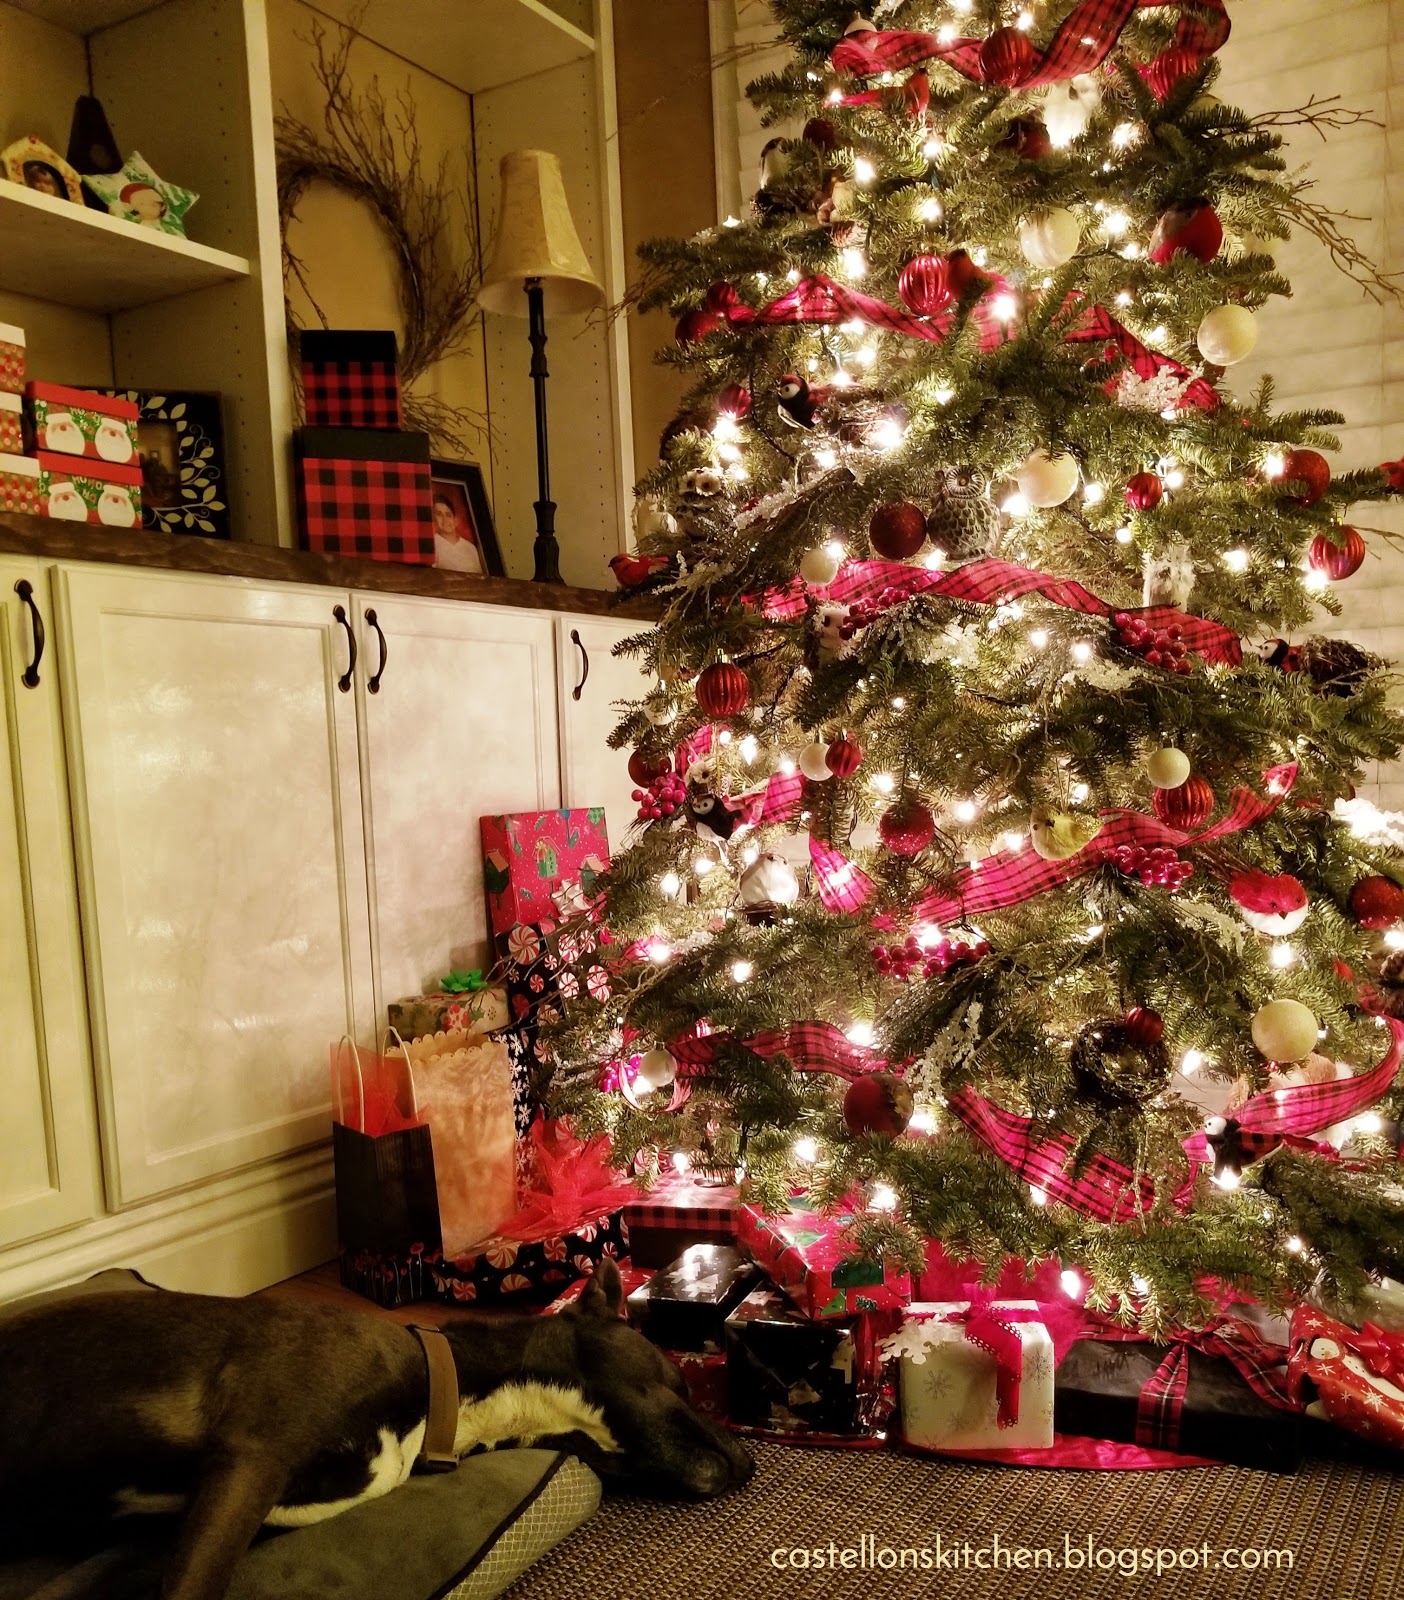
This year we bought a tree that had no top stem for an angel or star to crown the tree. Instead it had a flat expanse at the top. So instead of  looking for another tree with a stem, I used the flat top to place a nest and a snowy owl. I nestled in berries and branches to radiate out of the top of the tree and I think it turned out great. My son said that there weren't enough lights at the top to light the owl up and I have to agree with him. He's kinda hard to see at night,  so I took a picture of him in the daylight. Isn't he cute?
 
Here's a picture of my dog, Socks crashed out next to the tree. This is how I felt every night after shopping, wrapping, and baking, all on top of my normal workload of school, homework, basketball practice, school concerts, PTA meetings and activities, cleaning, cooking, laundry... phew!

Christmas Cookies and Treats

I couldn't let all this Christmas cheer go without some Christmas Cookies. I made these for my son's teachers, PTA parents and friends and thought I'd share them here. Surprisingly, making 8 different types of cookies is easier than it sounds with the help of two really easy stand in recipes using cake mixes. The lemon Snowflake Cookies and the Spice Cake Cookies were easy to throw together because they only have three ingredients. Cake mix, 1 egg and cool whip. I dropped the lemon cookie dough in powdered sugar and the Spice Cookie dough I didn't and instead drizzled with a Maple Syrup Icing. Both turn out soft and super moist and delicious. Enjoy!


Here are the links to some of the cookies I've blogged before. The last two, I pulled from my Betty Crocker Cookbook. Enjoy!
Mini Shortbread Bites
Lemon Snowball Cookies and Spice Cake Cookies with Maple Icing
Cinnamon Cheesecake Cookies
Red Velvet Brownies with Cookie Crumble Frosting
Blackberry Oatmeal Bars 
Spritz Cookies
Russian Teacakes

Here's one more recipe...
Gingerbread Petits Fours

More Holiday decorating ideas:
Christmas 2014
Fall Decorating 2014
Fall Decorating 2015
Fall Decorating 2016

Meyer Lemon Jam

It's Meyer lemon season! Meyer lemon is a hybrid of a regular lemon that's crossed with Mandarin oranges. Small and round with thin skins, they are perfect for cooking because they are not as sour and they have a ton of juice compared to regular lemons. Here in California, I can find them in the grocery stores six months out of the year but Meyer Lemons are at their peak in the winter. I'm also fortunate that my mom has a Meyer lemon tree in her backyard so I get these little lovelies every year and lots of them beginning in late summer. How do I take advantage of these jewels before they go bad? I make jam. Don't worry, there's no canning or sterilizing needed. This is an easy freezer jam.  You may be asking yourself, so what if it's easy... What can I make with Lemon Jam? 

This jam is terrific on fish, seafood, chicken and vegetables, or simply dilute some with ice water to make a sweet lemonade or add to iced tea. Add to vodka for a refreshing lemon drop martini or tequila for a lemon Margarita. Add to a scoop of vanilla ice cream for a luscious lemon sauce. Add to cakes, scones or frostings to add a punch of lemony goodness to baked goods. Seep for a week in the fridge with vodka for a cool Limoncello for your next diner party. The possibilities are endless. In particular, I'll share my recipe for Scallops with Lemon Jam next, so keep an eye out for it. 
 
Next time you see some at the store, pick up a bag of Meyer lemons and make this freezer jam to use throughout the year. 
Note: If you can't find Meyer lemons, don't sweat it, substitute with regular lemons, but cut some of the pith out of the lemons so it doesn't get too bitter. Enjoy!

Meyer Lemon Jam

(slightly adapted recipe from Mario Batali)

4-5 Meyer lemons, seeded
1 1/2 cups of sugar
1/2 tsp salt

Cut Meyer lemons into quarters and remove seeds. Not to worry if you don't get all of the seeds because Meyer lemons have a ton of seeds (10+ per lemon), but try to get most of them. Place lemon quarters, rind and all, into a food processor and puree. Add sugar and salt and blend until smooth. Place in pint size freezer bags and freeze. Or store in a clean mason jar up to 1 week in the refrigerator. Enjoy!


Other recipes to try:
Sweet Pepper Jam
Quick Pickled Onions

Nana's Salsa

Saturday, December 16, 2017

Roasted Fennel and Broccoli

Let's be honest, vegetable side dishes are a hard sell during the holidays. There are just too many other savory, cheesy, yummy choices to convince family members to squeeze some broccoli into that last space between the mashed potatoes and corn casserole, when a second dinner roll would fit just as nicely. Thank you very much. 
To compete with all this yumminess, most holiday vegetables are turned into casseroles loaded with cream and cheese...Mmm...I love creamy, cheesy vegetables casseroles. LOVE them! But this year, I was determined to make a delicious vegetable side dish for Thanksgiving that was still yummy without all the casserole-ish-ness. For me, the next best thing is roasted vegetables. I made this Roasted Fennel and Broccoli and it was incredible! Roasting them in a mustard shallot dressing and topping with Parmesan cheese makes a super savory side dish. My biggest fan and my biggest critic is my husband. So when he has two servings, of a vegetable no less, I'll take that as high praise. 😋
Happy Holidays!

Roasted Fennel and Broccoli

Serves 6

1 1/2-2 lbs. broccoli florets
1 fennel bulb, core removed and sliced to 1/4" slices
Mustard Shallot Marinade
2 small shallots, finely minced
1 clove garlic, finely minced
2 T Dijon mustard
1/2 cup canola oil
salt and pepper

Preheat oven 400 degrees

In a large mixing bowl, add shallot, garlic and mustard and whisk together. Next add the canola oil in a steady stream while whisking to emulsify the marinade. Add salt and pepper to taste and set aside.

Prepare veggies. Cut off top of fennel bulb and reserve the leaves for garnish. Slice fennel bulb in quarters and remove hard core from bottom and slice into 1/4" slices. Place fennel slices in the dressing and stir until coated. Cut fennel will brown if left in the air.  


Add broccoli florets and toss to coat. Spread veggies out in a single layer on a parchment lined cookie sheet and roast at 400 degrees for 30-40 minutes or until fennel is soft. Sprinkle generously with fresh Parmesan cheese and chopped fennel leaves. Enjoy!

Other easy side dishes to try:

Sauteed Collard Greens
Parmesan Creamed Onions
Roasted Potatoes with Bacon and Parmesan

Friday, December 15, 2017

Mulligatawny Soup

I'm afraid to say that it is still very warm here in Southern California.  It's been in the 80's and very dry with Santa Ana winds. But as hot as it gets during the day, once night falls, so does the temperature. My go-to easy meal for a cool night is always soup. If you've never had Mulligatawny soup, don't let the complicated name scare you. Mulligatawny is an Anglo-Indian soup that means, "Pepper Water". There are many versions of this soup, some highly spiced and contain meat and other versions omit meat and have lentils. This recipe is a warm and comforting curry soup with a little heat from the added cayenne pepper that cools to a mellow spiciness with a dollop of yogurt. I used leftover grilled chicken thighs but you can always use chicken breasts if preferred. Adding the tart apples also adds a exciting texture and complements the Indian spices beautifully. My husband was very skeptical of the apples and the almonds at first impression, but really liked what they added to the soup. I also added a little bit of rice as well to sop up all that wonderful curry. Enjoy! 

Mulligatawny Soup

Serves 8

1 T vegetable oil
1 leek, white and light green parts only
2 cups onions, chopped
2 carrots, chopped (first addition)
2 celery stalks, chopped
1 Pasilla pepper, chopped
4 cloves garlic, halved
7 cups chicken broth, divided 2cups/5cups
2" fresh ginger, chopped (~2 T)
3 chicken thighs, cooked and chopped
1 small carrot, finely diced (second addition)
2 T Penzeys® Sweet Curry (plus more to taste)
1 T ground cumin
1/2 t cayenne pepper
1 T tomato paste
salt and pepper to taste
1 can full fat coconut milk
1/2 cup chopped cilantro
1 tart apple, chopped 
1/2 cup toasted sliced almonds
Strained Greek yogurt or coconut cream (optional)

In a large dutch oven, add oil, leeks, onions, carrots (1st addition), celery, Pasilla pepper and garlic and saute until tender crisp. 

Add two cups chicken broth and continue cooking until vegetables are tender, about ~8-10 minutes. Place the ginger in a blender and coarsely chop. Once the vegetables are tender, Add the vegetables along with all the liquid to the blender with chopped ginger and puree. (Note: when blending hot liquids, remove the lid insert and cover with a towel while blending) Transfer blender contents back into the dutch oven. 
Add remaining 5 cups of chicken broth, chopped chicken thighs, finely diced carrot(2nd addition), curry powder, cumin, cayenne pepper and tomato paste and salt and pepper to the dutch oven. Heat to a simmer, taste and adjust seasonings. Add coconut milk and cilantro and simmer for 5 minutes. 
Add chopped apples and toasted almonds and top with a dollop of Yogurt or coconut cream and more cilantro.  Enjoy!

Other recipes to try:

Potato Gnocchi and Spinach Curry

Spiced Couscous and Carrot Salad
Indian Spiced Lentils

Sunday, December 10, 2017

Gingerbread Petits Fours with Cinnamon Buttercream

Christmas cookies, Christmas carols, Christmas trees and lights. I love everything about the Christmas season. Don't get me wrong, Halloween is my still my favorite holiday, but Christmas has a special place too. What better way to start the Christmas season than with these adorable Gingerbread Petits Fours. A dense, moist cake with warm spices of ginger, cinnamon, allspice and molasses layered with a buttery cinnamon buttercream frosting with cute gingerbread man sprinkles. The perfect bite of Christmas cheer! Enjoy!

Gingerbread Petits Fours with Cinnamon Buttercream

Makes 24

1 1/2 cups all purpose flour
1/2 tsp baking soda
1 1/2 tsp ground ginger
1/2 tsp ground cinnamon
1/2 tsp ground allspice
1/2 cup butter, unsalted softened
1/2 cup firmly packed dark brown sugar
1 large egg
1/3 cup light molasses
1 T fresh grated ginger
1/2 cup buttermilk

Cinnamon Buttercream Frosting
1 cup salted butter
3-4 cups powdered sugar, sifted
1 tsp ground cinnamon
2 T heavy cream

Preheat oven to 350 degrees
Combine flour, baking soda, ginger, cinnamon and allspice in a medium bowl and set aside.
Beat butter and brown sugar in a stand mixer until creamy. Add egg and beat until blended. Add molasses and grated ginger, and beat until blended. Add about half the flour and the all of buttermilk and continue to blend. Add the remaining flour and mix until smooth. 

Grease and flour an 8" square pan and pour batter into the prepared pan. Bake at 350 for 40-42 minutes or until a toothpick comes out clean when inserted in the middle. 
Cool pan on a wire rack about 10 minutes and then flip cake out onto a parchment lined cooling rack to cool completely. Once cooled, wrap cake in plastic wrap and refrigerate 8 hours or overnight. (I refrigerated mine overnight) Your gingerbread is now a moist and firm gingerbread cake that will be easy to cut with little crumbs and little breakage. 

Prepare buttercream frosting by beating the butter and powdered sugar and cinnamon until smooth and fluffy. Add heavy cream and continue to beat until well combined. Fill a pastry bag with a decorative tip with about a half a cup of the buttercream frosting and set aside. 


Cut cake in half horizontally making two layers. 

Spread a thick even layer of butter cream frosting on one of the layers. 

Next place the other cake layer on top and wrap back in the plastic wrap and refrigerate for one hour to firm up the frosting for cutting. You want firm clean cuts so that the frosting isn't squeezed out when you begin slicing your petits fours.

Once chilled and frosting is firm, trim edges of cake to create a clean outside edge. Cut cake into ~24 even bites, wiping off your knife between each cut. If you notice the frosting getting soft pop it into the fridge for another 30 minutes to an hour to firm up. 
Once all your cakes are cut, place them on a serving platter and pipe a decorative dollop of buttercream frosting on each and sprinkle with holiday sprinkles. I got these gingerbread sprinkles at Calico Cake Shop in Buena Park, CA. 
I also sprinkled half of these with powdered sugar and topped them with sugar gingerbread men just for fun.
These are best served at room temperature so the buttercream frosting is nice and pillowy soft and delicious! Merry Christmas! 
 Other recipes to try:

Easy Fudge
Orange Cornmeal Cake
Gingerbread Biscotti

Saturday, December 9, 2017

Homemade Chicken Broth


The best thing I've ever done to improve my cooking has been to make my own chicken broth. Making homemade chicken broth may sound intimidating, but it is probably the easiest thing in the world to make, it just takes a little block of time. This small investment each month has transformed my cooking from good to amazing. I get to pick all my fresh ingredients and I especially like that I can control the amount of salt added, which in this case, I add no salt to the broth. Opting to salt only after I use it in a dish. Not adding salt lends flexibility so I can reduce my broth to a demi-glace for that pop of intense flavor without it getting overly salty as it concentrates. If you were to do this with canned chicken broth, it would get too salty as it reduces. 

So next time you see whole chickens on sale, buy them and make your own chicken broth. When I'm ready to make broth, I buy two whole chickens and cut them up. I cut off the chicken legs, thighs and breasts and vacuum seal the meat and stick it in the freezer. What's left over...the rib cage, chicken necks and chicken wings gets tossed into the stock pot. This time, I also included a whole chicken leg and de-boned my thighs and put the thigh bones into the pot as well. Now we are ready to get started.

Homemade Chicken Broth

Makes about 16 cups

2 chicken carcasses, skin removed
filtered water
2 onions, chopped
2-3 carrots, chopped
2 celery stalks, chopped
2-3 bay leaves
1/2 bunch parsley stems
2 tsp. whole black peppercorns
8 sprigs of fresh thyme

Prepare your vegetables and set aside.
Remove the meat from your whole chicken and freeze for use later. Next remove the skin from the remaining carcass. It's ok to leave the skin on the wings. Fill up your stock pot with cold water so that it covers the chicken bones and bring it to a boil over high heat. Once it reaches a boil, immediately, turn the heat down to a very low simmer.
Once the water comes to a boil, the impurities will float to the top. Turn down the heat to low and skim with a spoon to remove the floating proteins and foam.
Add the onions, carrots and celery and heat at a very low simmer for 3-4 hours. Resist the urge to stir your stock. The key to clear chicken broth is that you don't stir or disturb the pot. Very low and very slow and no stirring. The water should never be boiling from this point on. The first boil was to remove impurities but now it sits and simmers for the next 3-4 hours.
After 3-4 hours of simmering, add your bouquet garni, which is parsley stems, thyme, bay leaves and black peppercorns and continue to simmer for one more hour. Make sure you only use the stems of parsley, if you use the leaves, the broth will take on a green color.
Turn off the heat and prepare to strain and freeze your homemade chicken broth. Get a clean stock pot and a chinois and place two layers of cheesecloth in it. If you don't have a strainer like this, use a collander layered with cheesecloth. Begin ladling hot broth into the strainer, allowing the clear broth to collect in the clean stock pot. Continue straining until all broth is collected and only bones and vegetables remain in your original stock pot.

To prevent spoilage, you'll need to cool your stock down quickly in order to place it in the freezer. I set up an ice bath with pre-labeled freezer bags, like this. (Normally I use a bigger ice bath but my other container was holding baked goods so I had to improvise, so give your self some room and use a bigger ice bath than this one. ;) 

Ladle 2 cups of hot broth into a measuring cup and then transfer broth into labeled freezer bags sitting in an ice bath. Zip up bag, taking care to remove as much air as possible. Let it sit in the ice bath until cooled a bit. Place sealed bag flat on a cookie sheet. Continue to cool and place bags of broth on cookie sheet making sure there are no leaks. I place a piece of parchment between the layers of bags so when they freeze they don't stick to each other. Place cookie sheet of bagged broth into the freezer until frozen. Once frozen, you can stack them in the freezer without the parchment paper or the cookie sheet. You're done. Now you have homemade chicken broth at the ready.
Other recipes to try:
How to make Dill Pickles


How to Roasted Peppers in the Oven